Set up billing with pods in the Workbench UI
Purpose: This document describes how Verily Workbench admins can create and manage pods for Workbench billing purposes.
Note: This guide includes steps for setting up and managing billing via the Workbench UI. For CLI instructions, please see Set up billing with pods with the Workbench CLI.
Introduction
Verily Workbench enables users to take advantage of public cloud platforms for storage, compute, and other services. An important step in user setup is to enable Workbench to create resources and perform cloud operations that have cloud costs associated with them, with flexibility on who is billed. This document describes the steps to enable and manage the association between user profiles and how cloud services are paid for.
For more information about what Workbench operations lead to cloud charges and how to manage cloud costs, see Cloud cost management.
What is a pod?
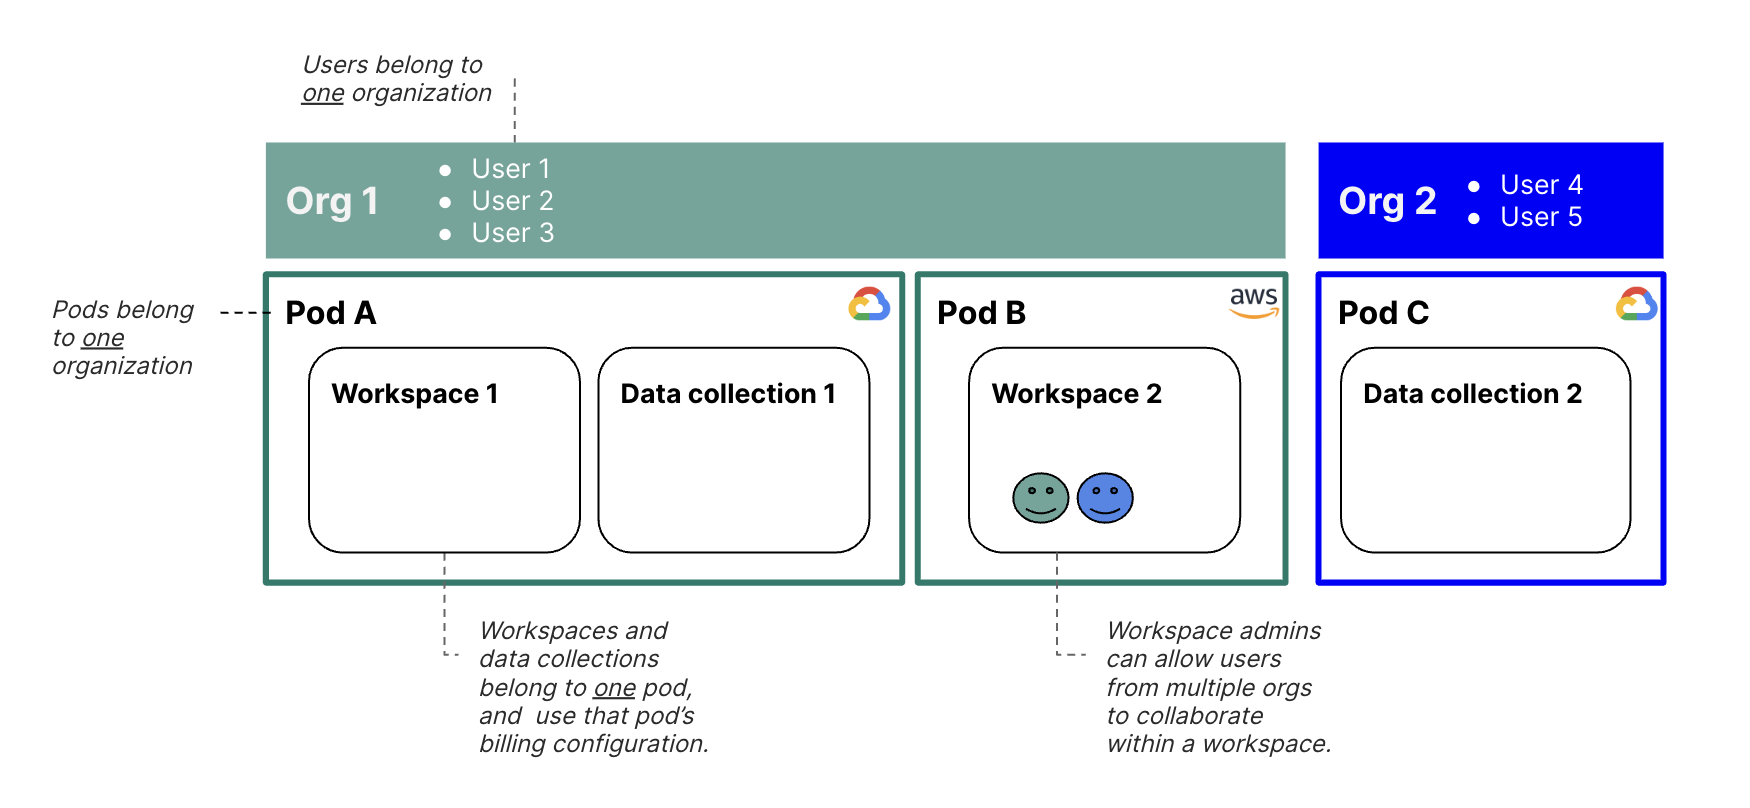
Institutions can use pods to connect people and workspaces to cloud infrastructure and billing.
A pod organizes resources within an organization so that they share the same cloud platform and billing. With billing controls at a pod level, users within one organization can choose to use multiple billing accounts, and users across organizations can be allowed to collaborate in a given pod.
How pods work
Each pod is linked to a cloud account, which is used for billing. One pod can be used for many workspaces. Since pods are linked to cloud accounts, the pod specified upon workspace or data collection creation determines which cloud platform the workspace or data collection belongs to.
Pods are administered by organizations (“orgs”).
In order to create a pod a user must have the Organization Admin or Pod Manager role. For more information on organization level roles and permissions, see Organization roles and permissions.
When a Pod Manager creates a pod they are then able to administer it by automatically being granted the Pod Admin role on that pod. Pod Admins can grant permission to other users or groups to use the pod. Users can be granted permission to access as many pods as needed.
When a user creates a workspace or data collection, they pick the pod in which to allocate the workspace or data collection, chosen from the pods they have permission to access. (As with pods, workspaces can be shared with users from other organizations.)
Be aware
Pods are tied to either Google Cloud Platform (GCP) or Amazon Web Services (AWS). Once a pod is selected for your workspace or data collection, you'll be required to use that cloud provider's resources. Note that the pod cannot be changed once linked to your workspace or data collection.Using Workbench without belonging to a pod
You don’t need to be a pod member to use some Workbench features. For example, you can:
- Browse read-only any workspaces to which you have been granted Reader
- Work read-write in any workspace to which you have been granted Owner or Writer
For more information about workspace permissions, see Access control and sharing.
Pod roles and permissions
The set of roles and permissions at the pod level is as follows in the table below. Note that Pod Manager is not on this list because it is an organization-level role.
| Role | Description | Permissions |
| Pod Admin | An end user of Workbench who is an administrator of a given pod. When a user creates a pod they are automatically granted this role. |
|
| Pod User | An end user of Workbench who can create workspaces and resources in a given pod. |
|
| Workbench Support | A Workbench-wide role. Generally assumed by the Workbench Support and Operations teams. | Pod Admin privileges as well as permission to create pods. |
How to create a pod
Video tutorial
Learn how to set up billing with pods by watching the video below.
Step 1: Create a Cloud Billing account
Note
The information in this section is specific to Google Cloud.
You may first want to talk to your institutional IT department or administration to determine if your organization has an existing account or a preferred account setup method with Google.
If you want to use an existing Cloud Billing account, your Google Cloud account will need to have access to the Billing account that you use, as the setup process will check that you have access permissions.
Otherwise, to set up billing for yourself, follow Google's instructions to create a new self-serve Cloud Billing account. Note that while you'll need to set up some billing method, you may also be eligible for $300 in free credits from Google. Information and instructions for usage can be found at Free cloud features and trial offer.
Step 2: Grant permission to Workbench to use the Billing account
Sign in to the Billing account management page in the Google Cloud console. Check the box for the relevant account. An Account Profile panel will open. Click the Add principal button.
Note
If you see the message "You don't have permission to edit the permissions of the selected resource" when you select a billing account, you should contact the billing account owner so they can grant you the necessary permissions.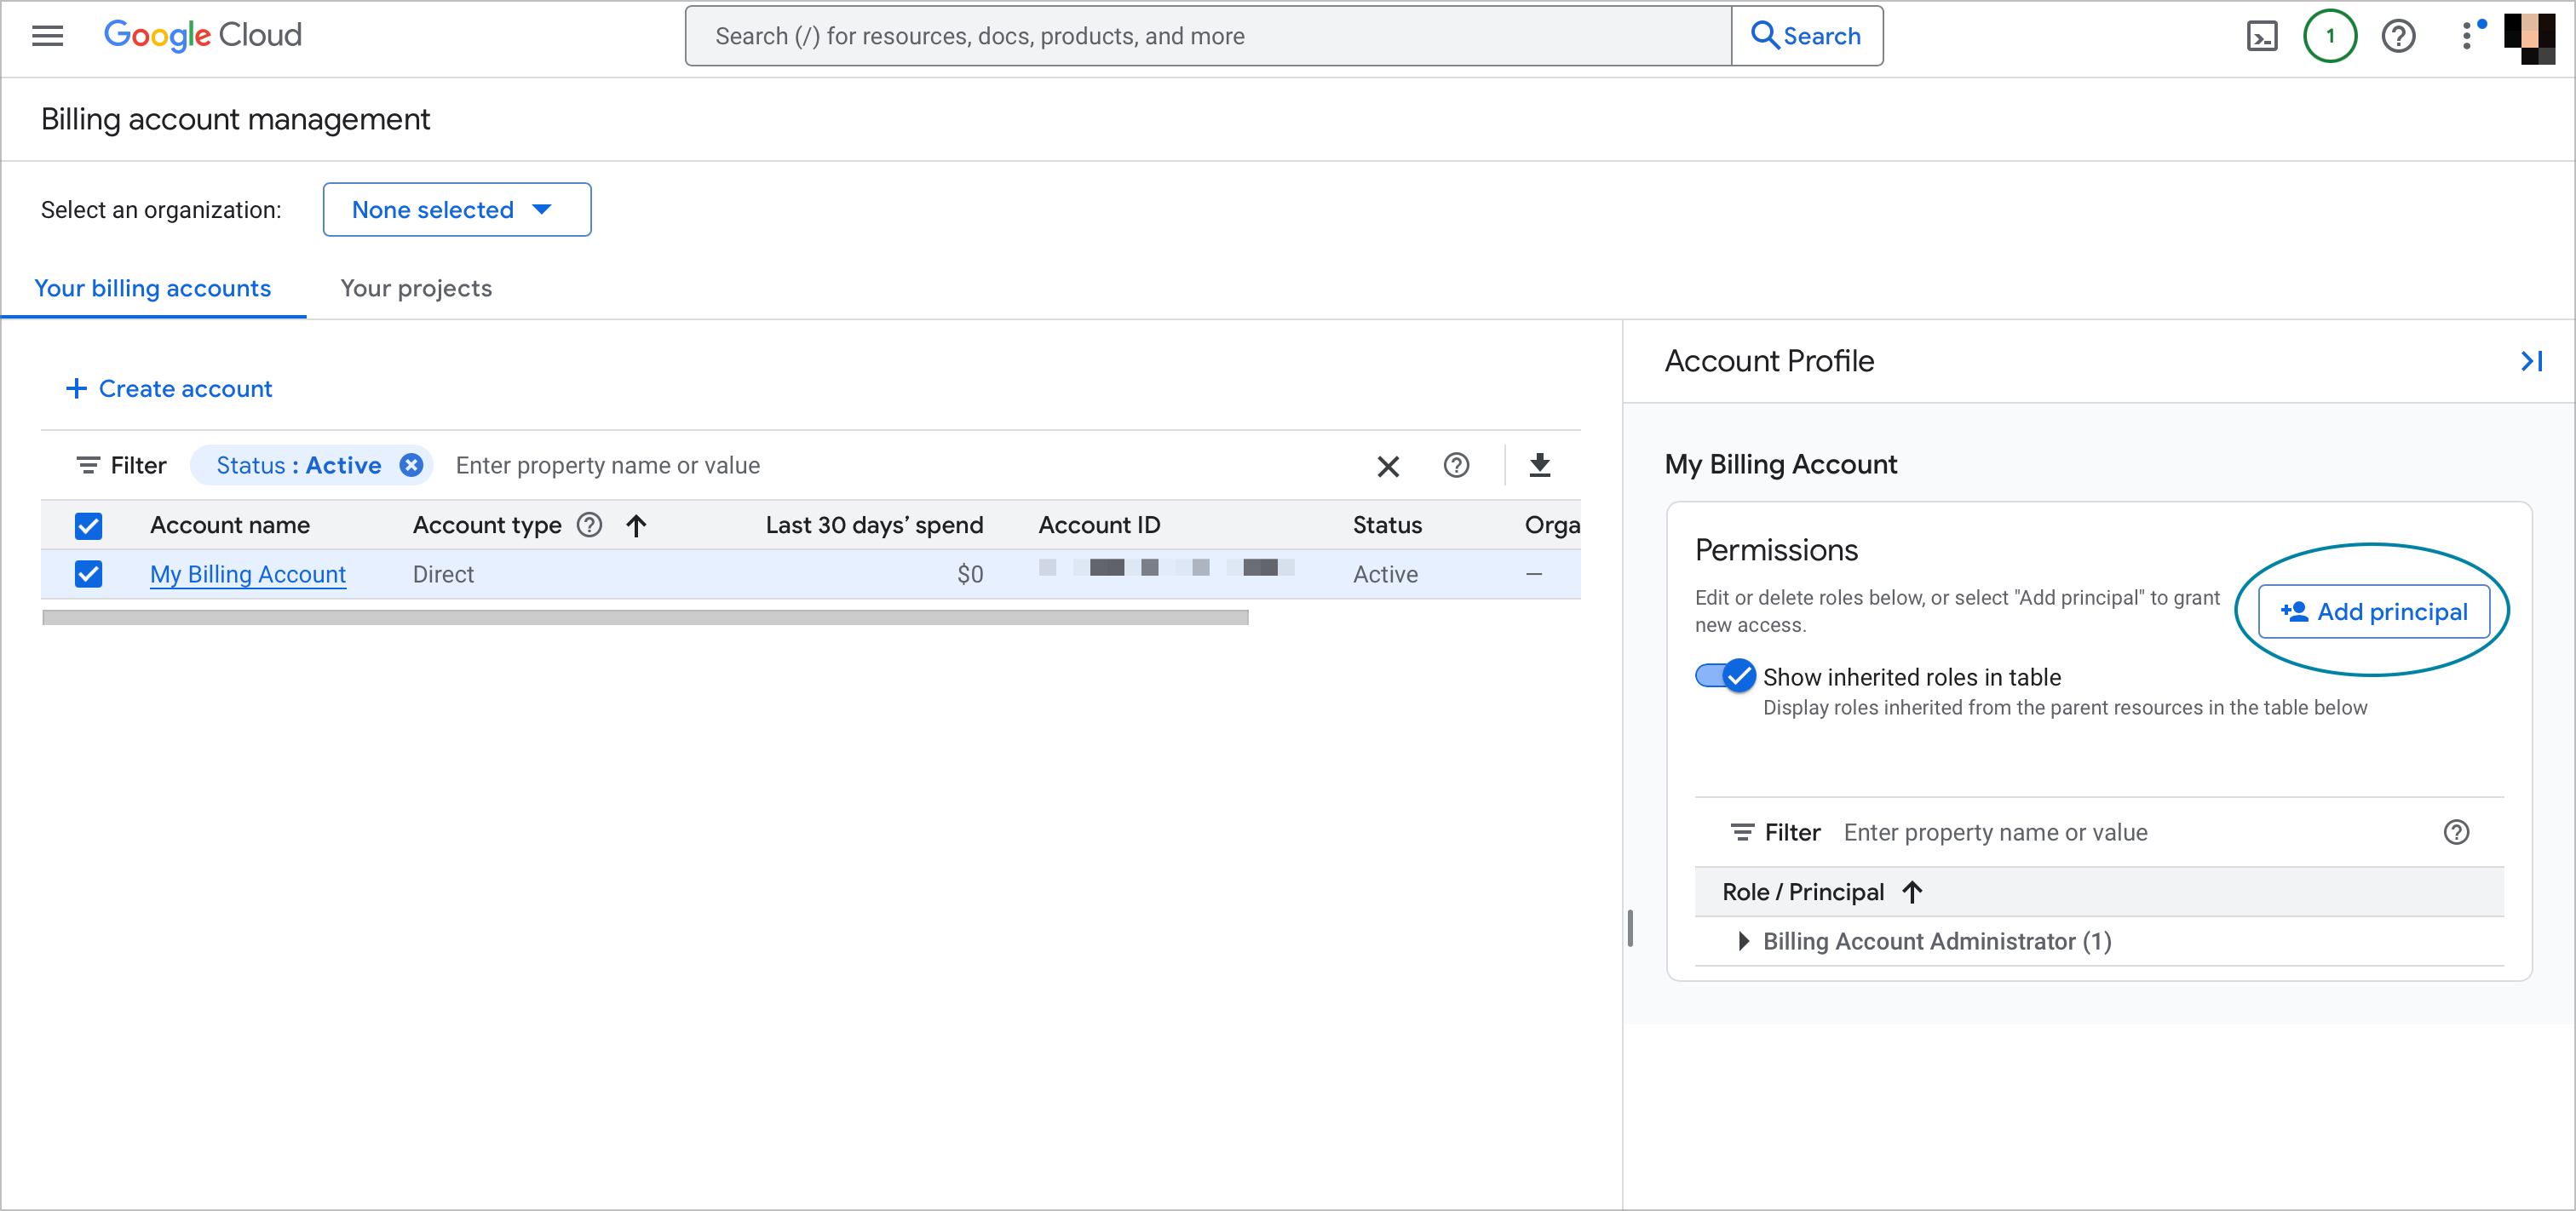
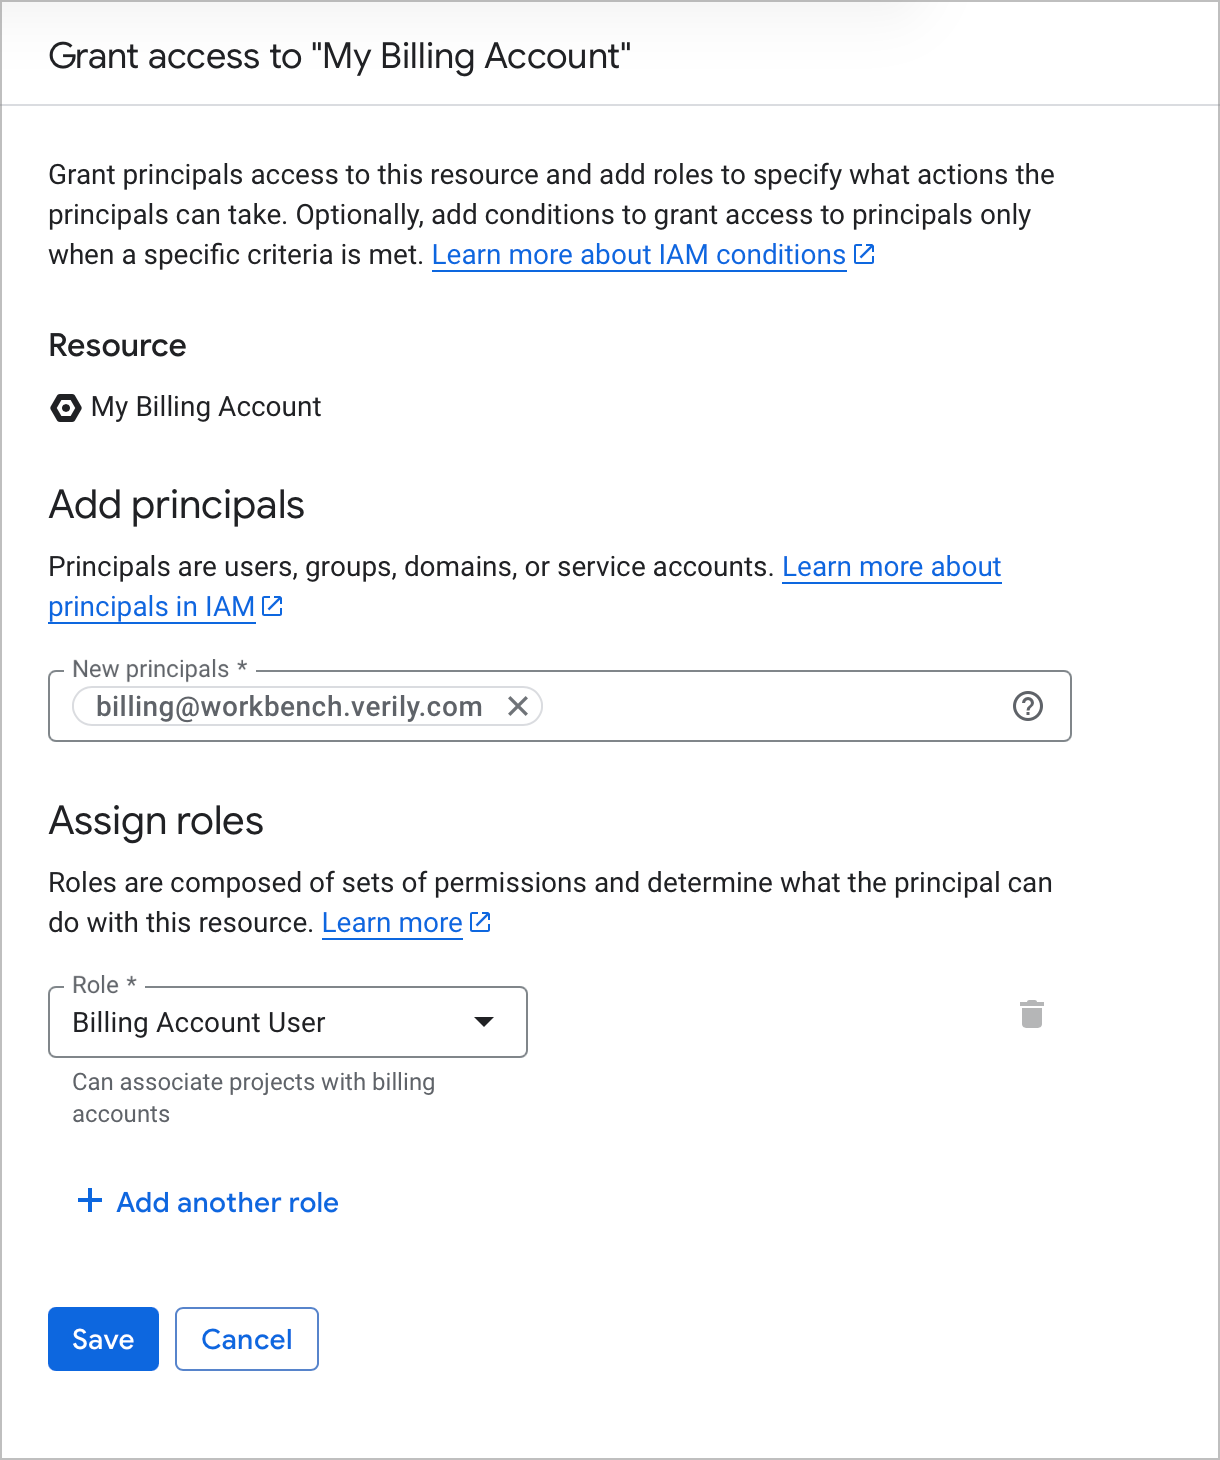
Enter billing@workbench.verily.com in New principals and assign the role to Billing Account User. Click Save.
Step 3: Allow Workbench to confirm your access to the Billing account
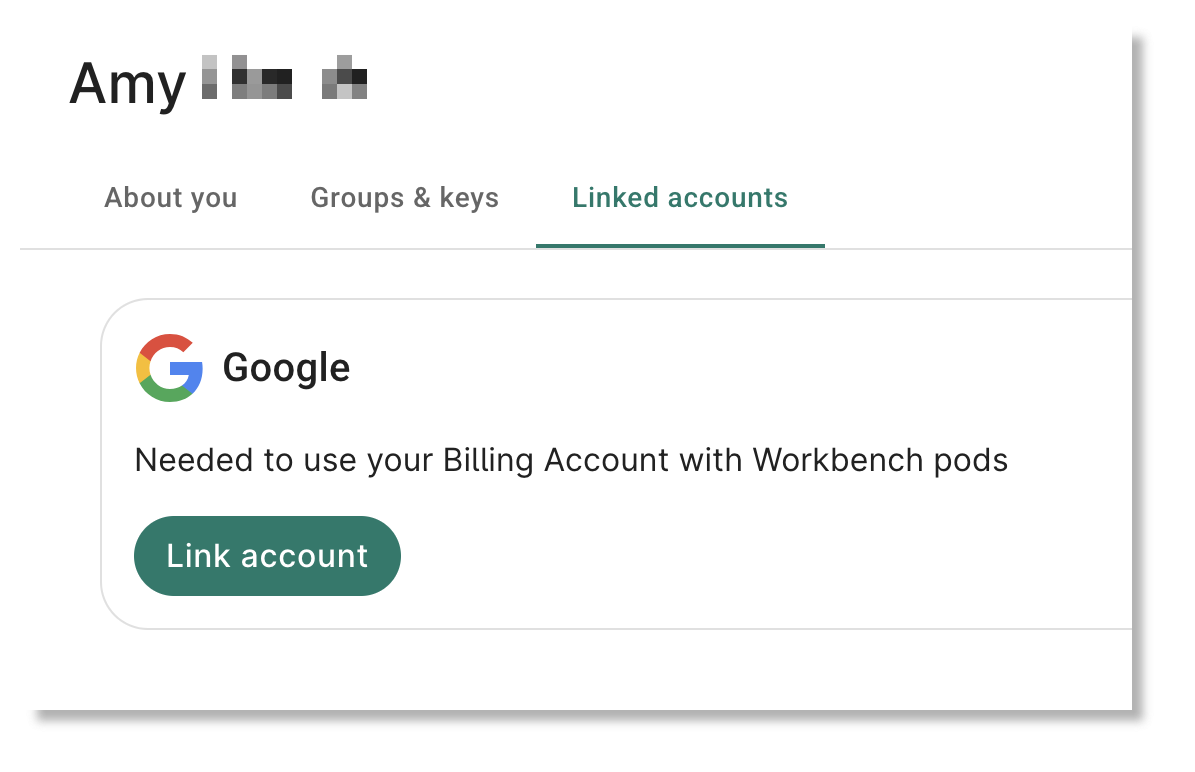
You must also allow Workbench to confirm your account's access to a given Google Cloud Billing account. This allows Workbench to check that you have authority to use a billing account ID for a pod.
In the Workbench UI, go to the Linked accounts section in your profile. Click the Link account button in the Google tile.
A Sign in with Google dialog will open. You may first be asked to sign in to Verily Workbench. If so, click Continue.
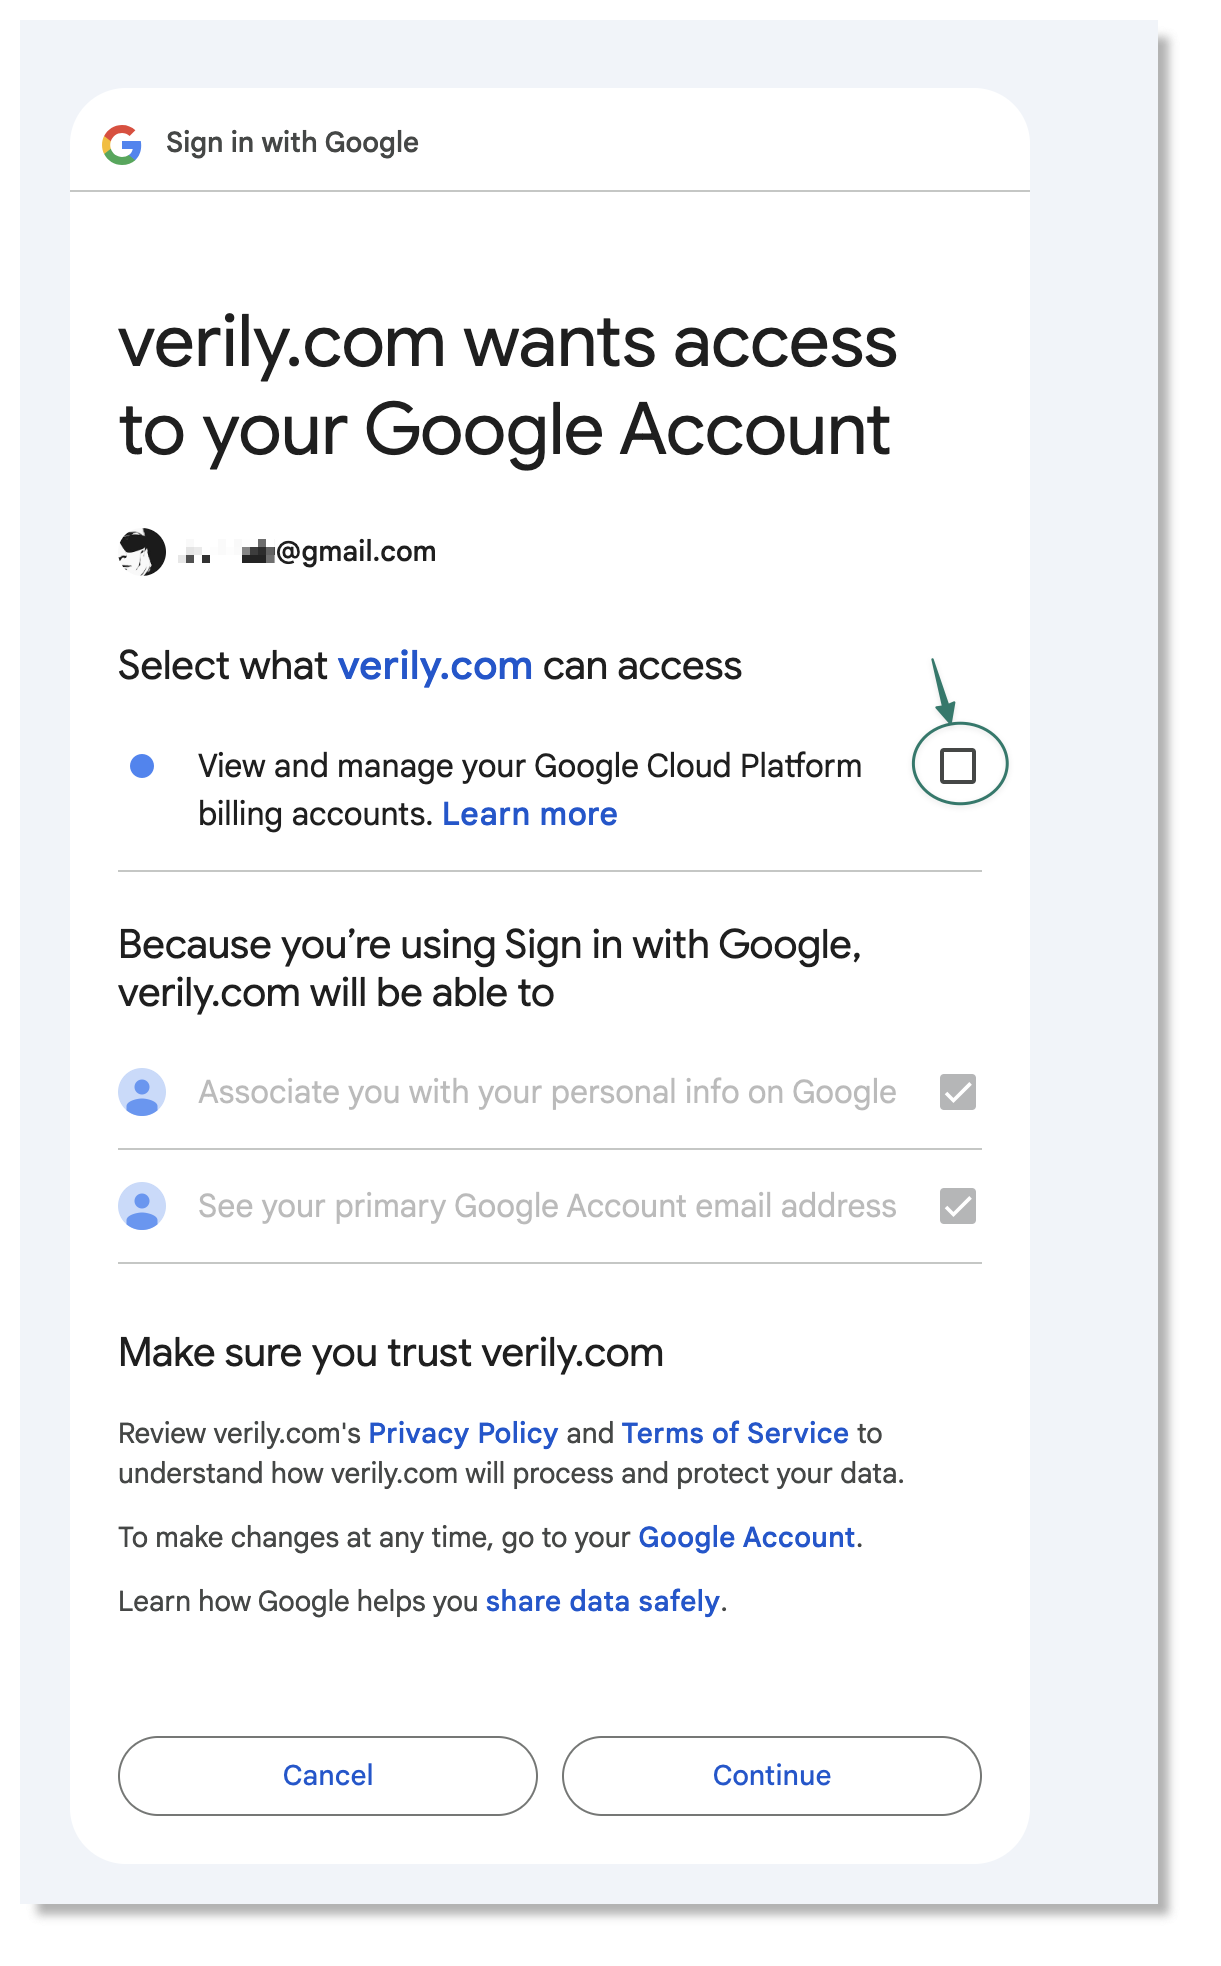
Next, you'll see a screen indicating that Workbench wants access to your Google Account. Check the box next to View and manage your Google Cloud Platform billing accounts and then click Continue.
Step 4: Create a pod
Be aware
Note that if you're an Enterprise Tier user, only Org Admins and Pod Managers can create pods. See Manage organizations for more details about these roles.
Standard Tier users have the ability to create pods.
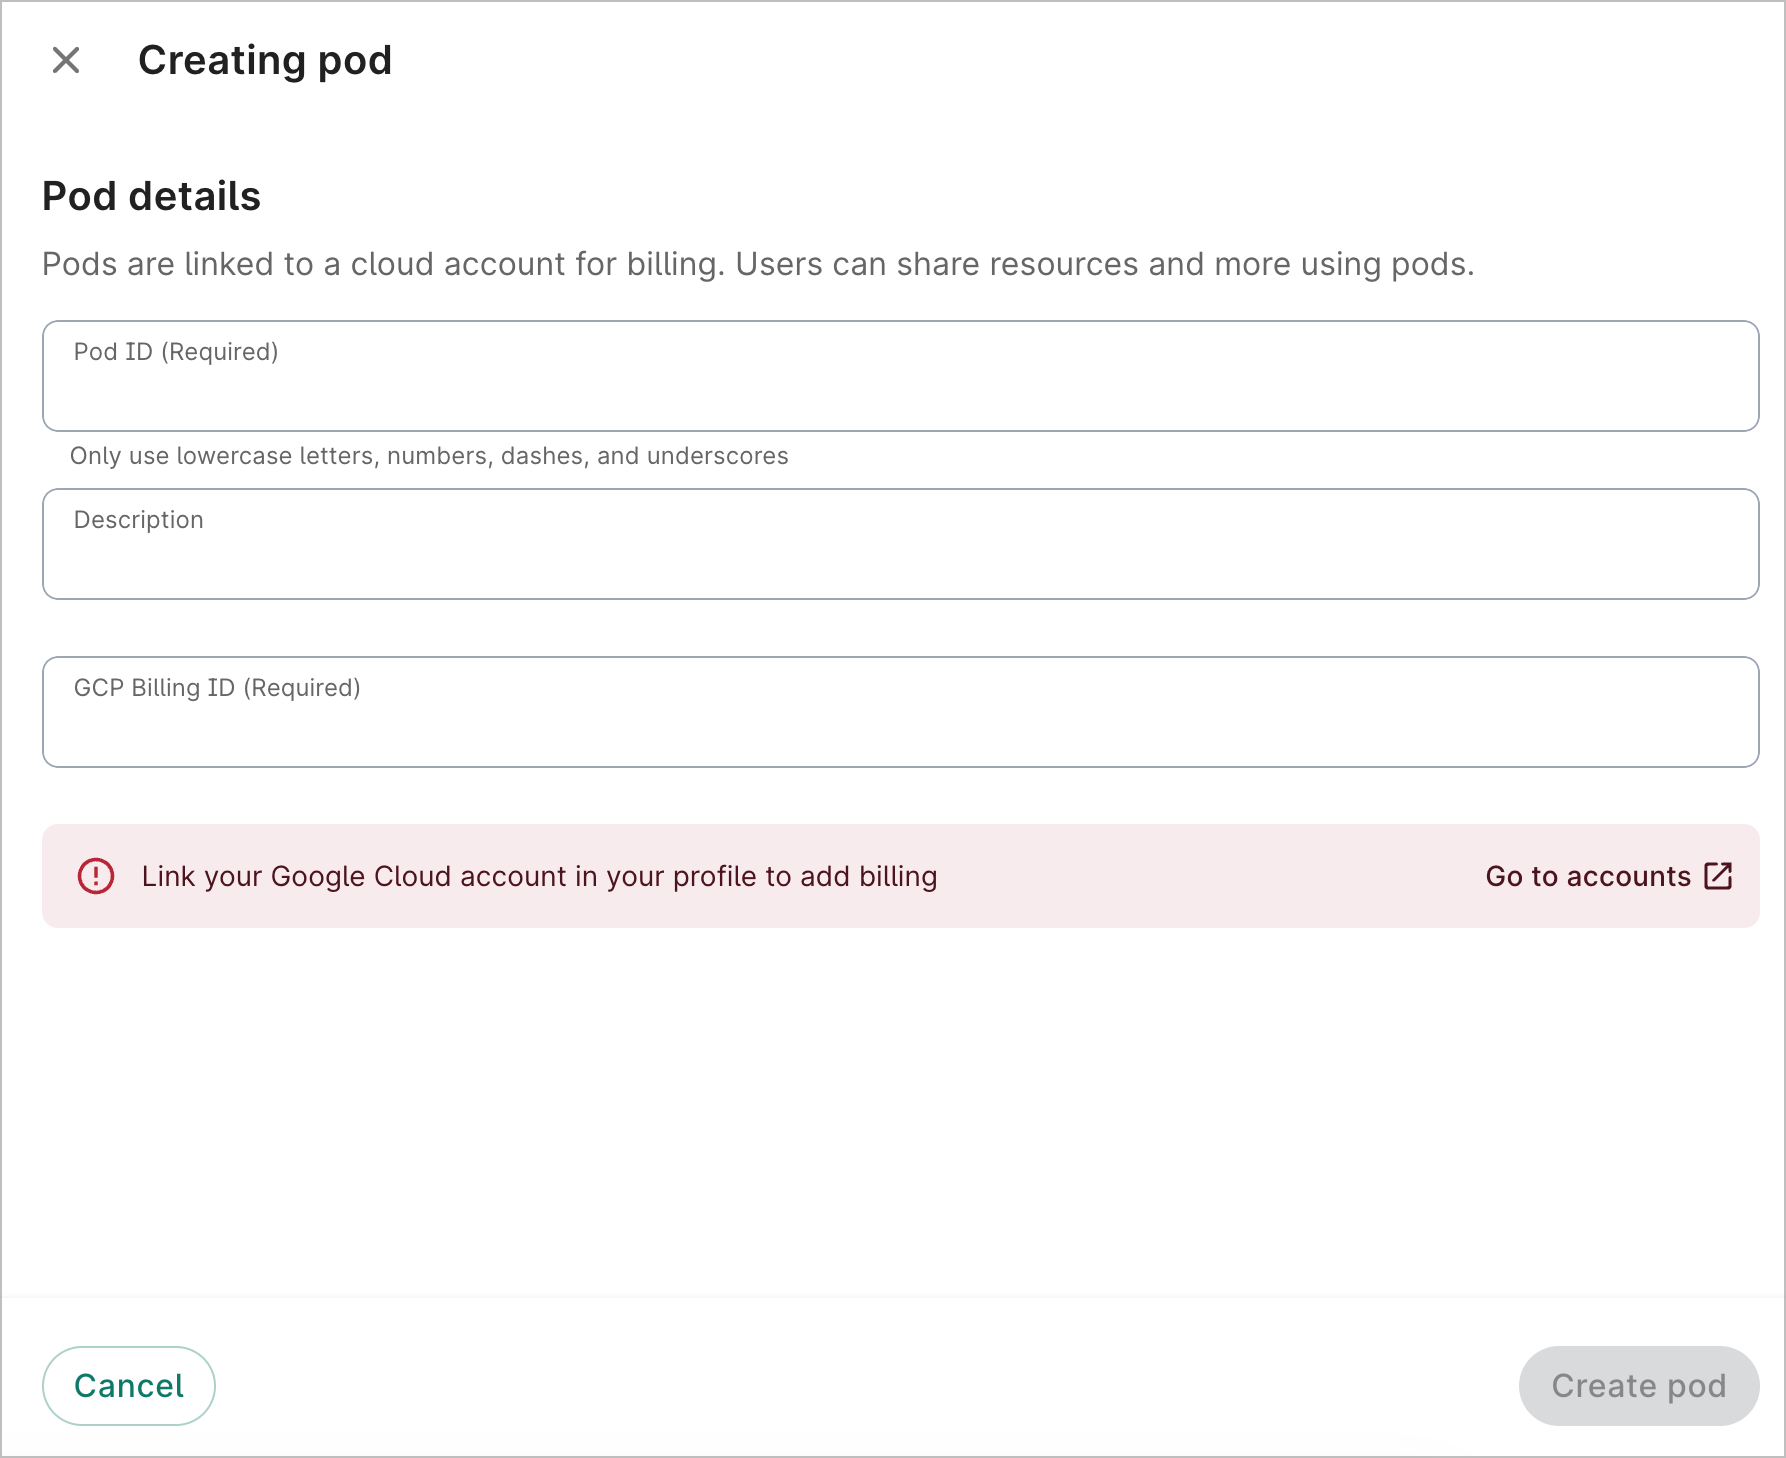
Click the + New Pod button on the Pods page of the Workbench UI. If you see an alert prompting you to link your Google Cloud account, click Go to accounts to complete this step first.
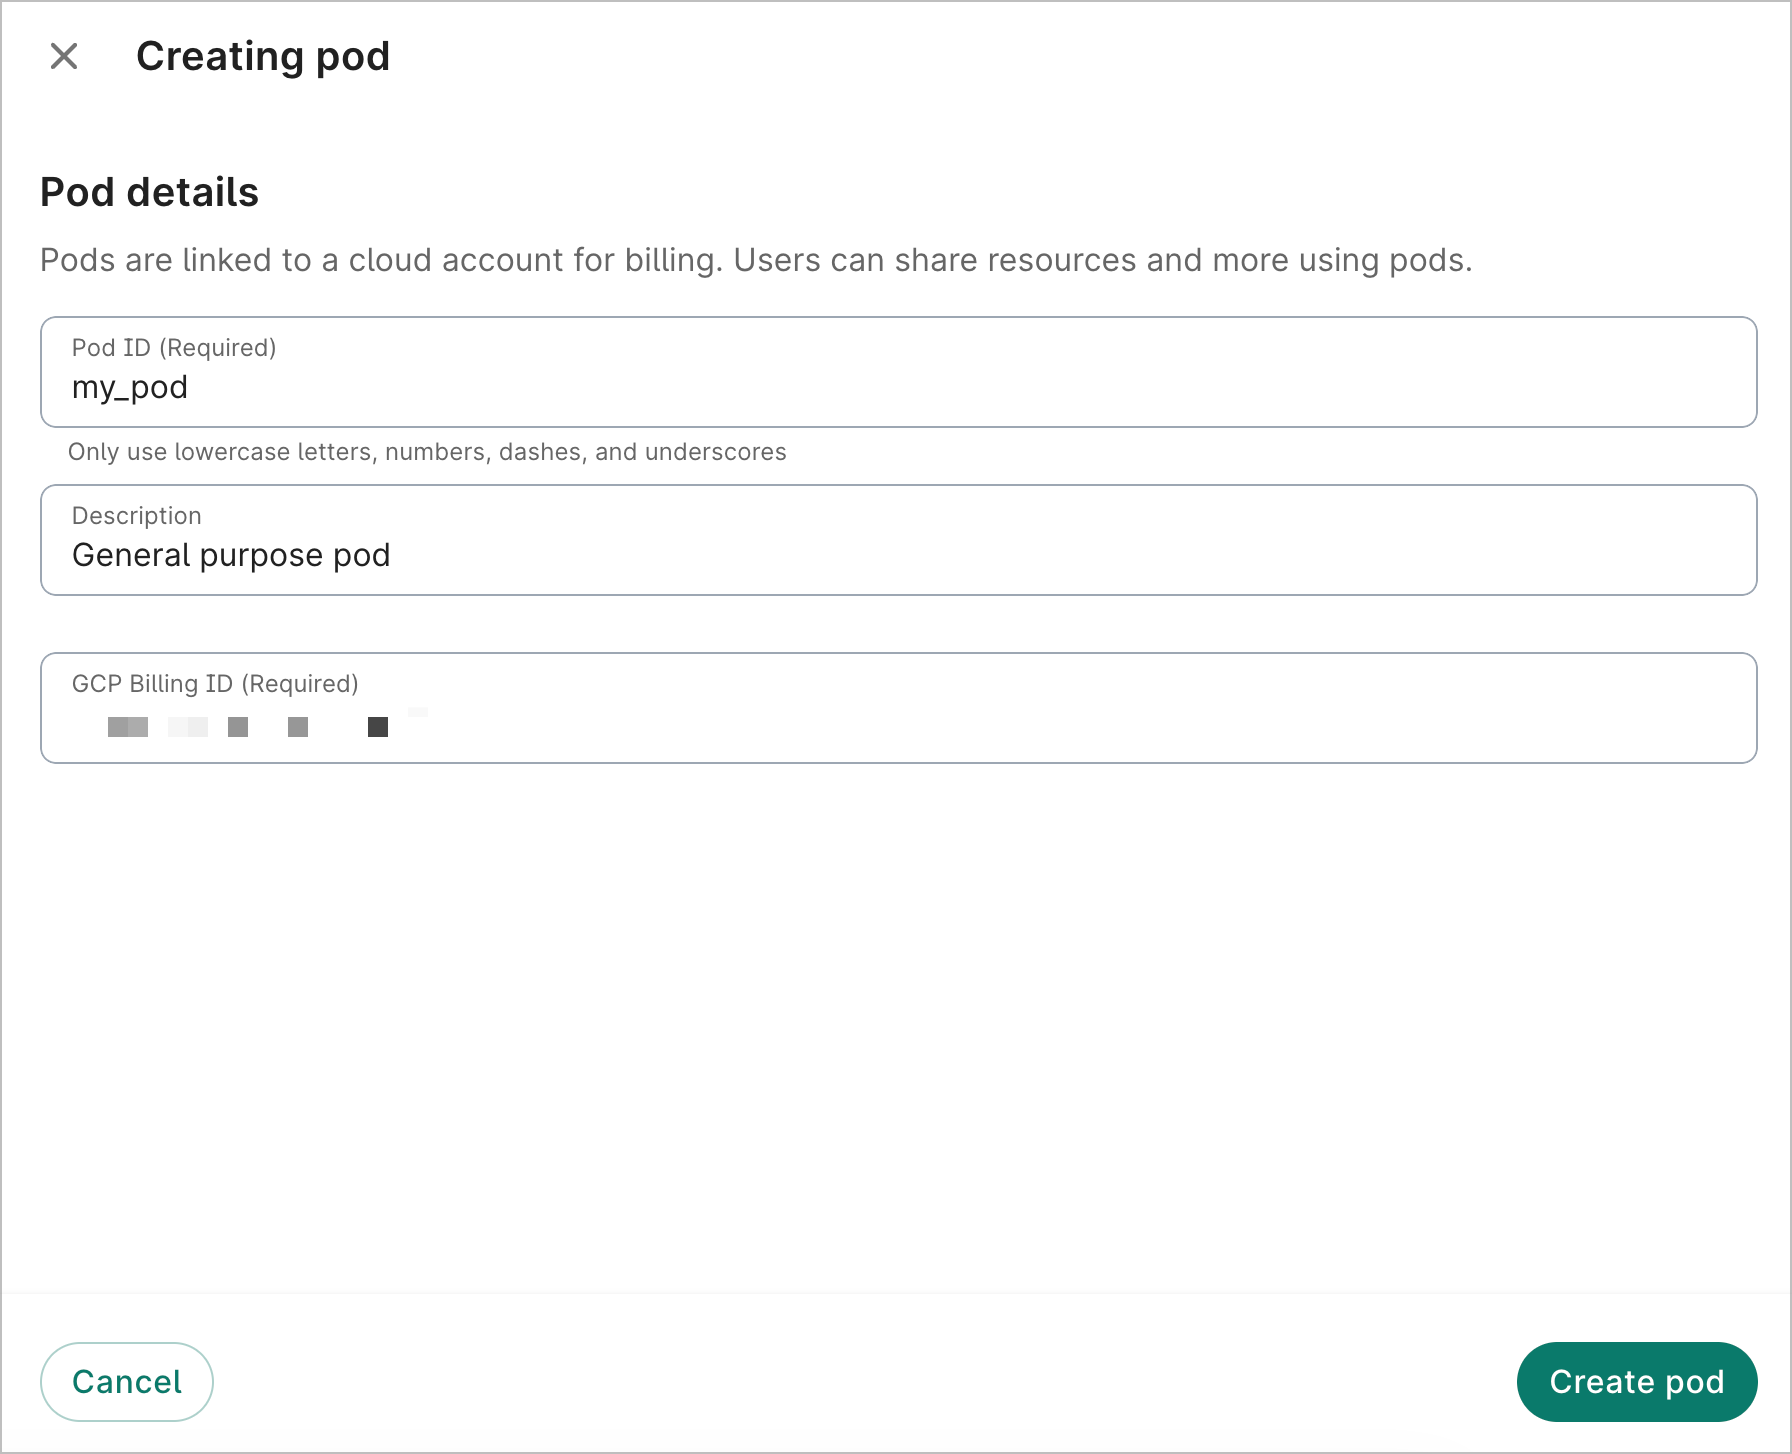
After you've linked your account, complete the fields to create a new pod. You'll need to know the 18-character Google Billing account ID of the GCP account that you want to use. You can find this on your billing account management page. Click Create pod.
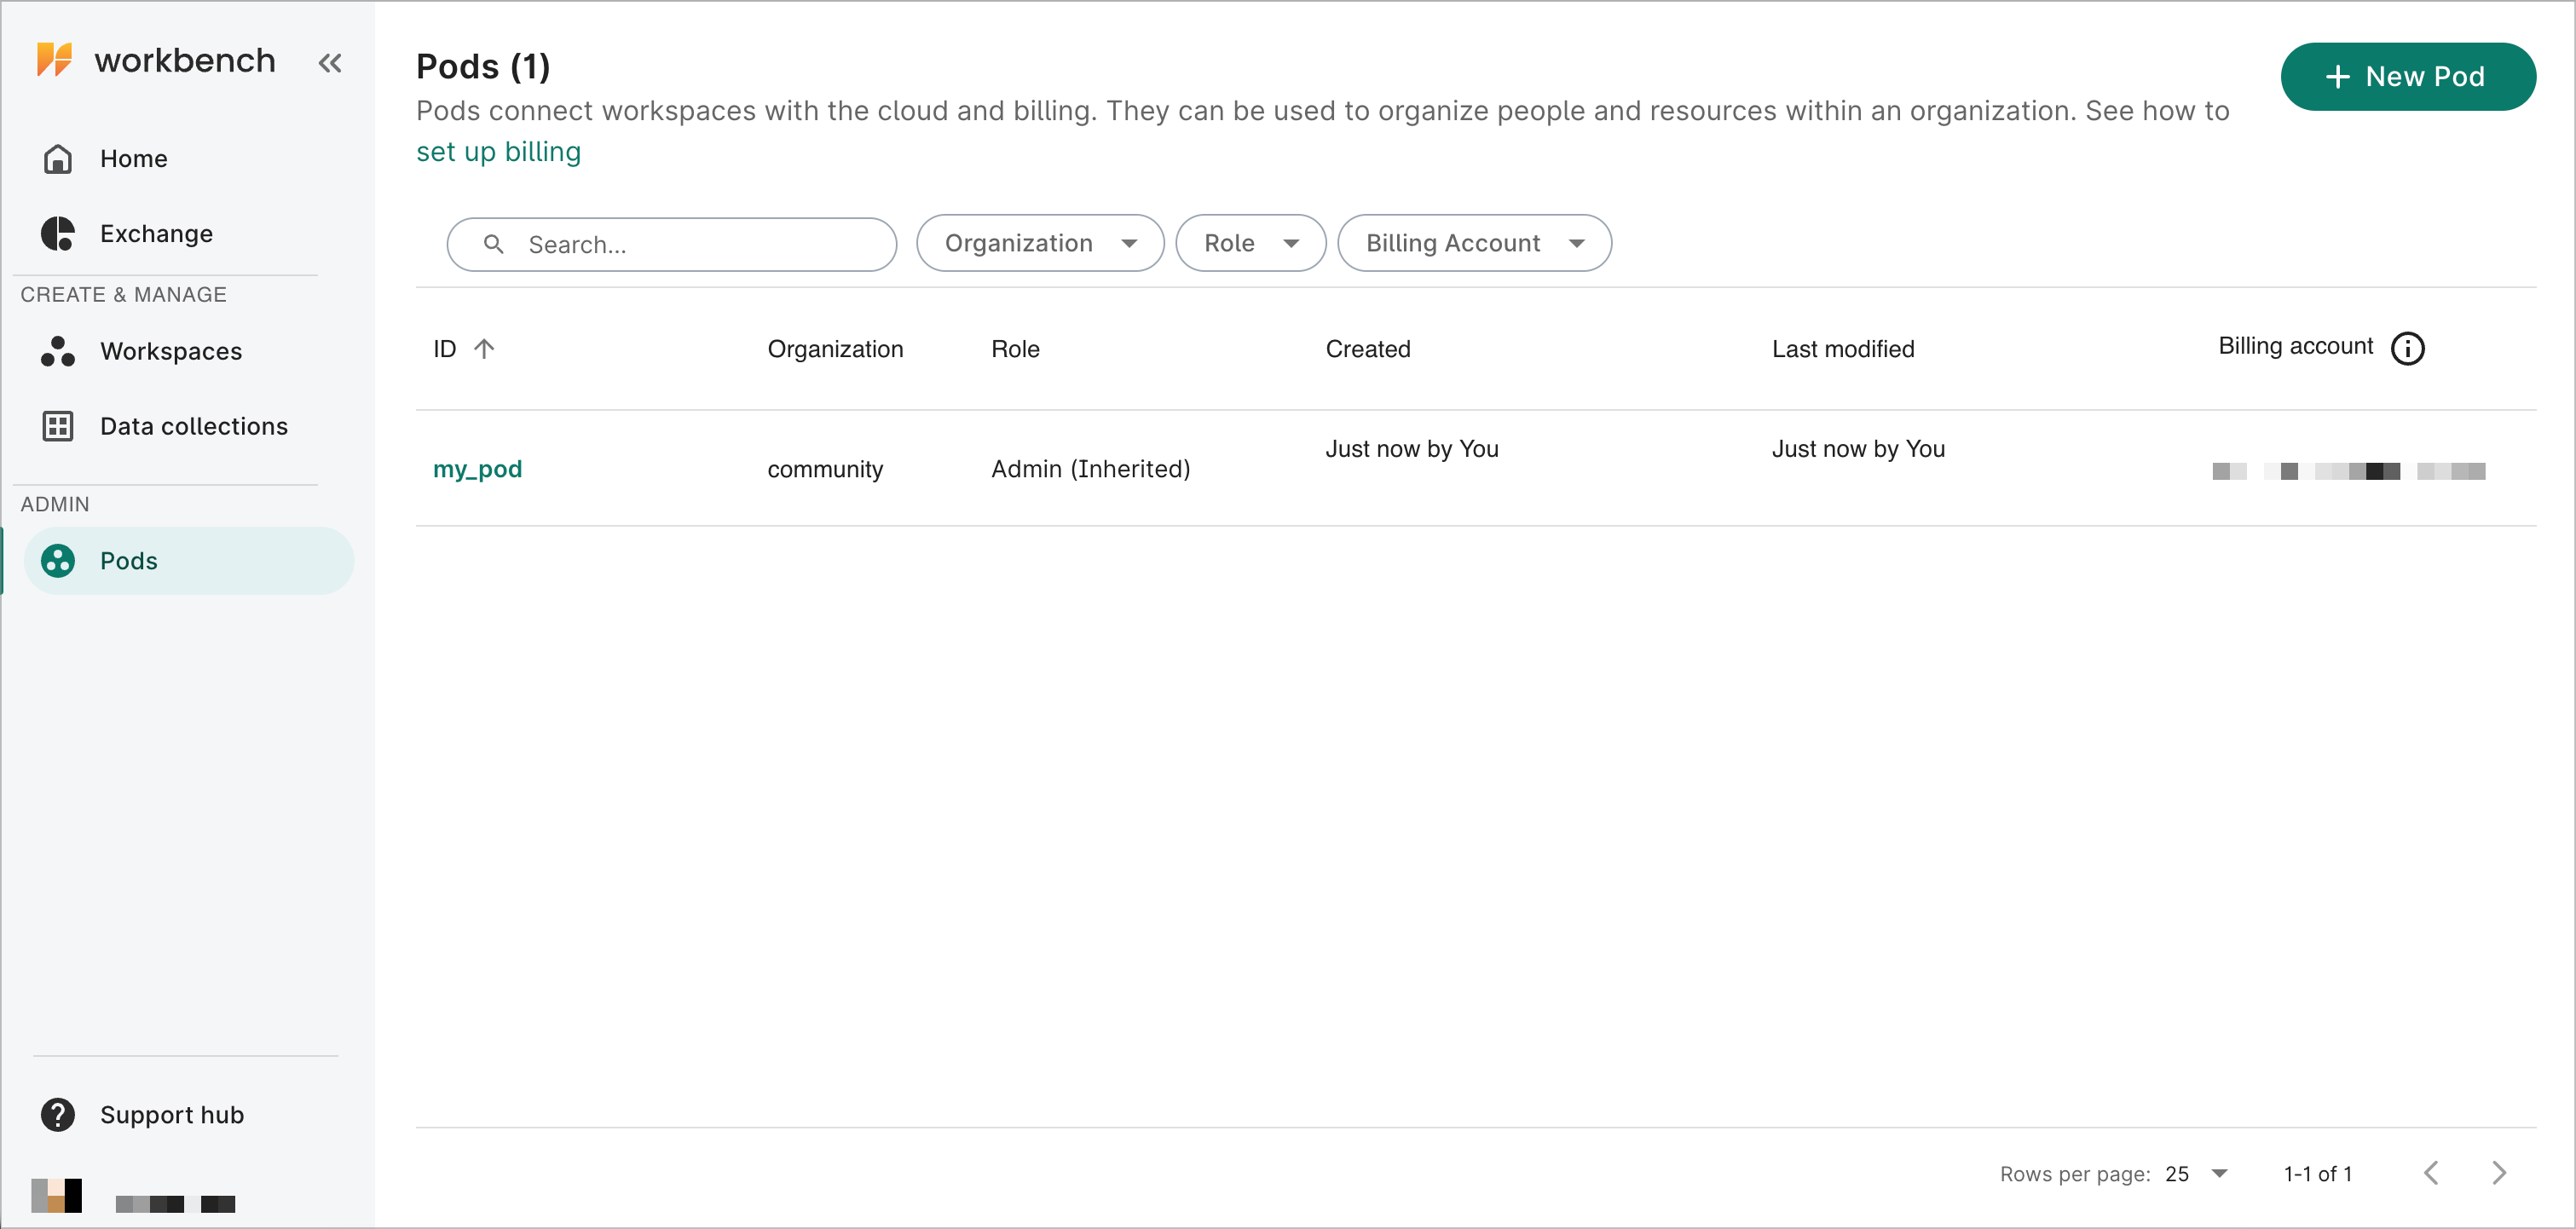
You'll see your new pod listed on the main Pods page. You can now use this pod when creating new workspaces. Enterprise users can also use the pod for creating new data collections. See below for more details.
How to update a pod (for pod admins)
Grant permission or revoke users’ access
A pod admin may grant use of the pod to other Workbench users, or revoke that access.
Note
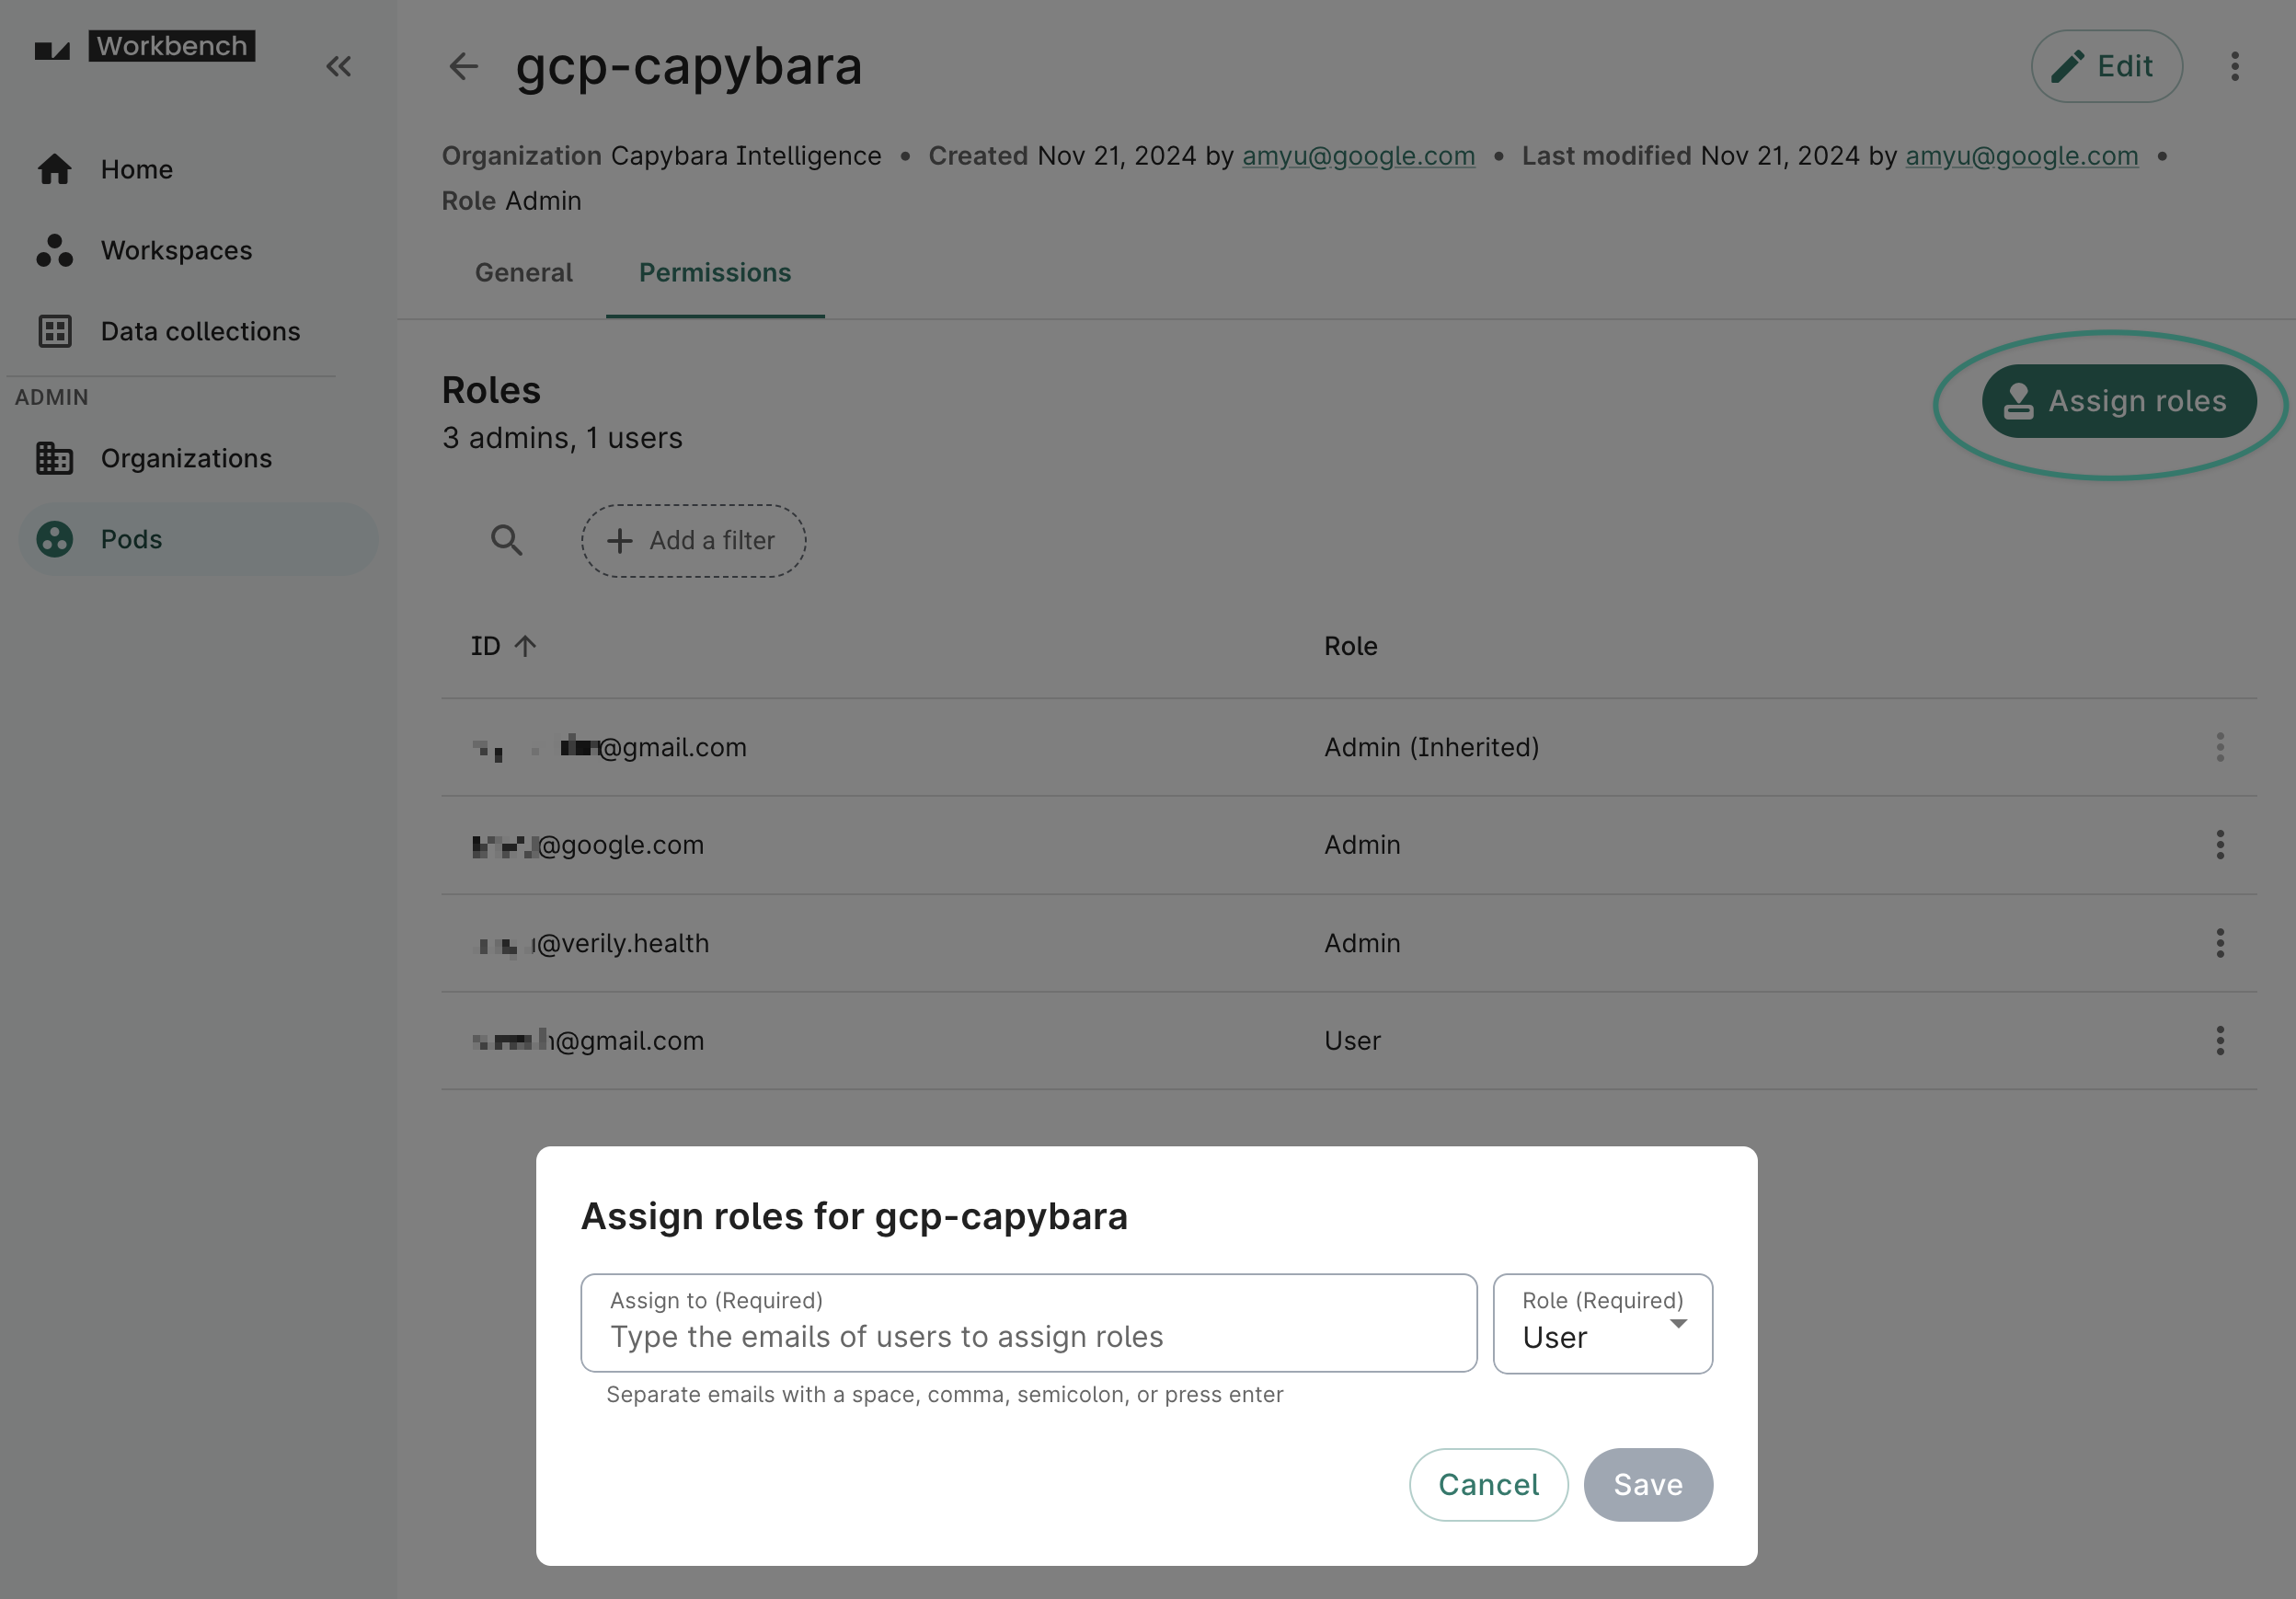
The user you add must be already onboarded to Workbench. They can also be from another Workbench org — that is, they don't need to be members of the pod’s parent org.From the Pods page, click the name of the pod you want to update. Select the Permissions tab and click the Assign roles button to grant User or Admin roles to other Workbench users.
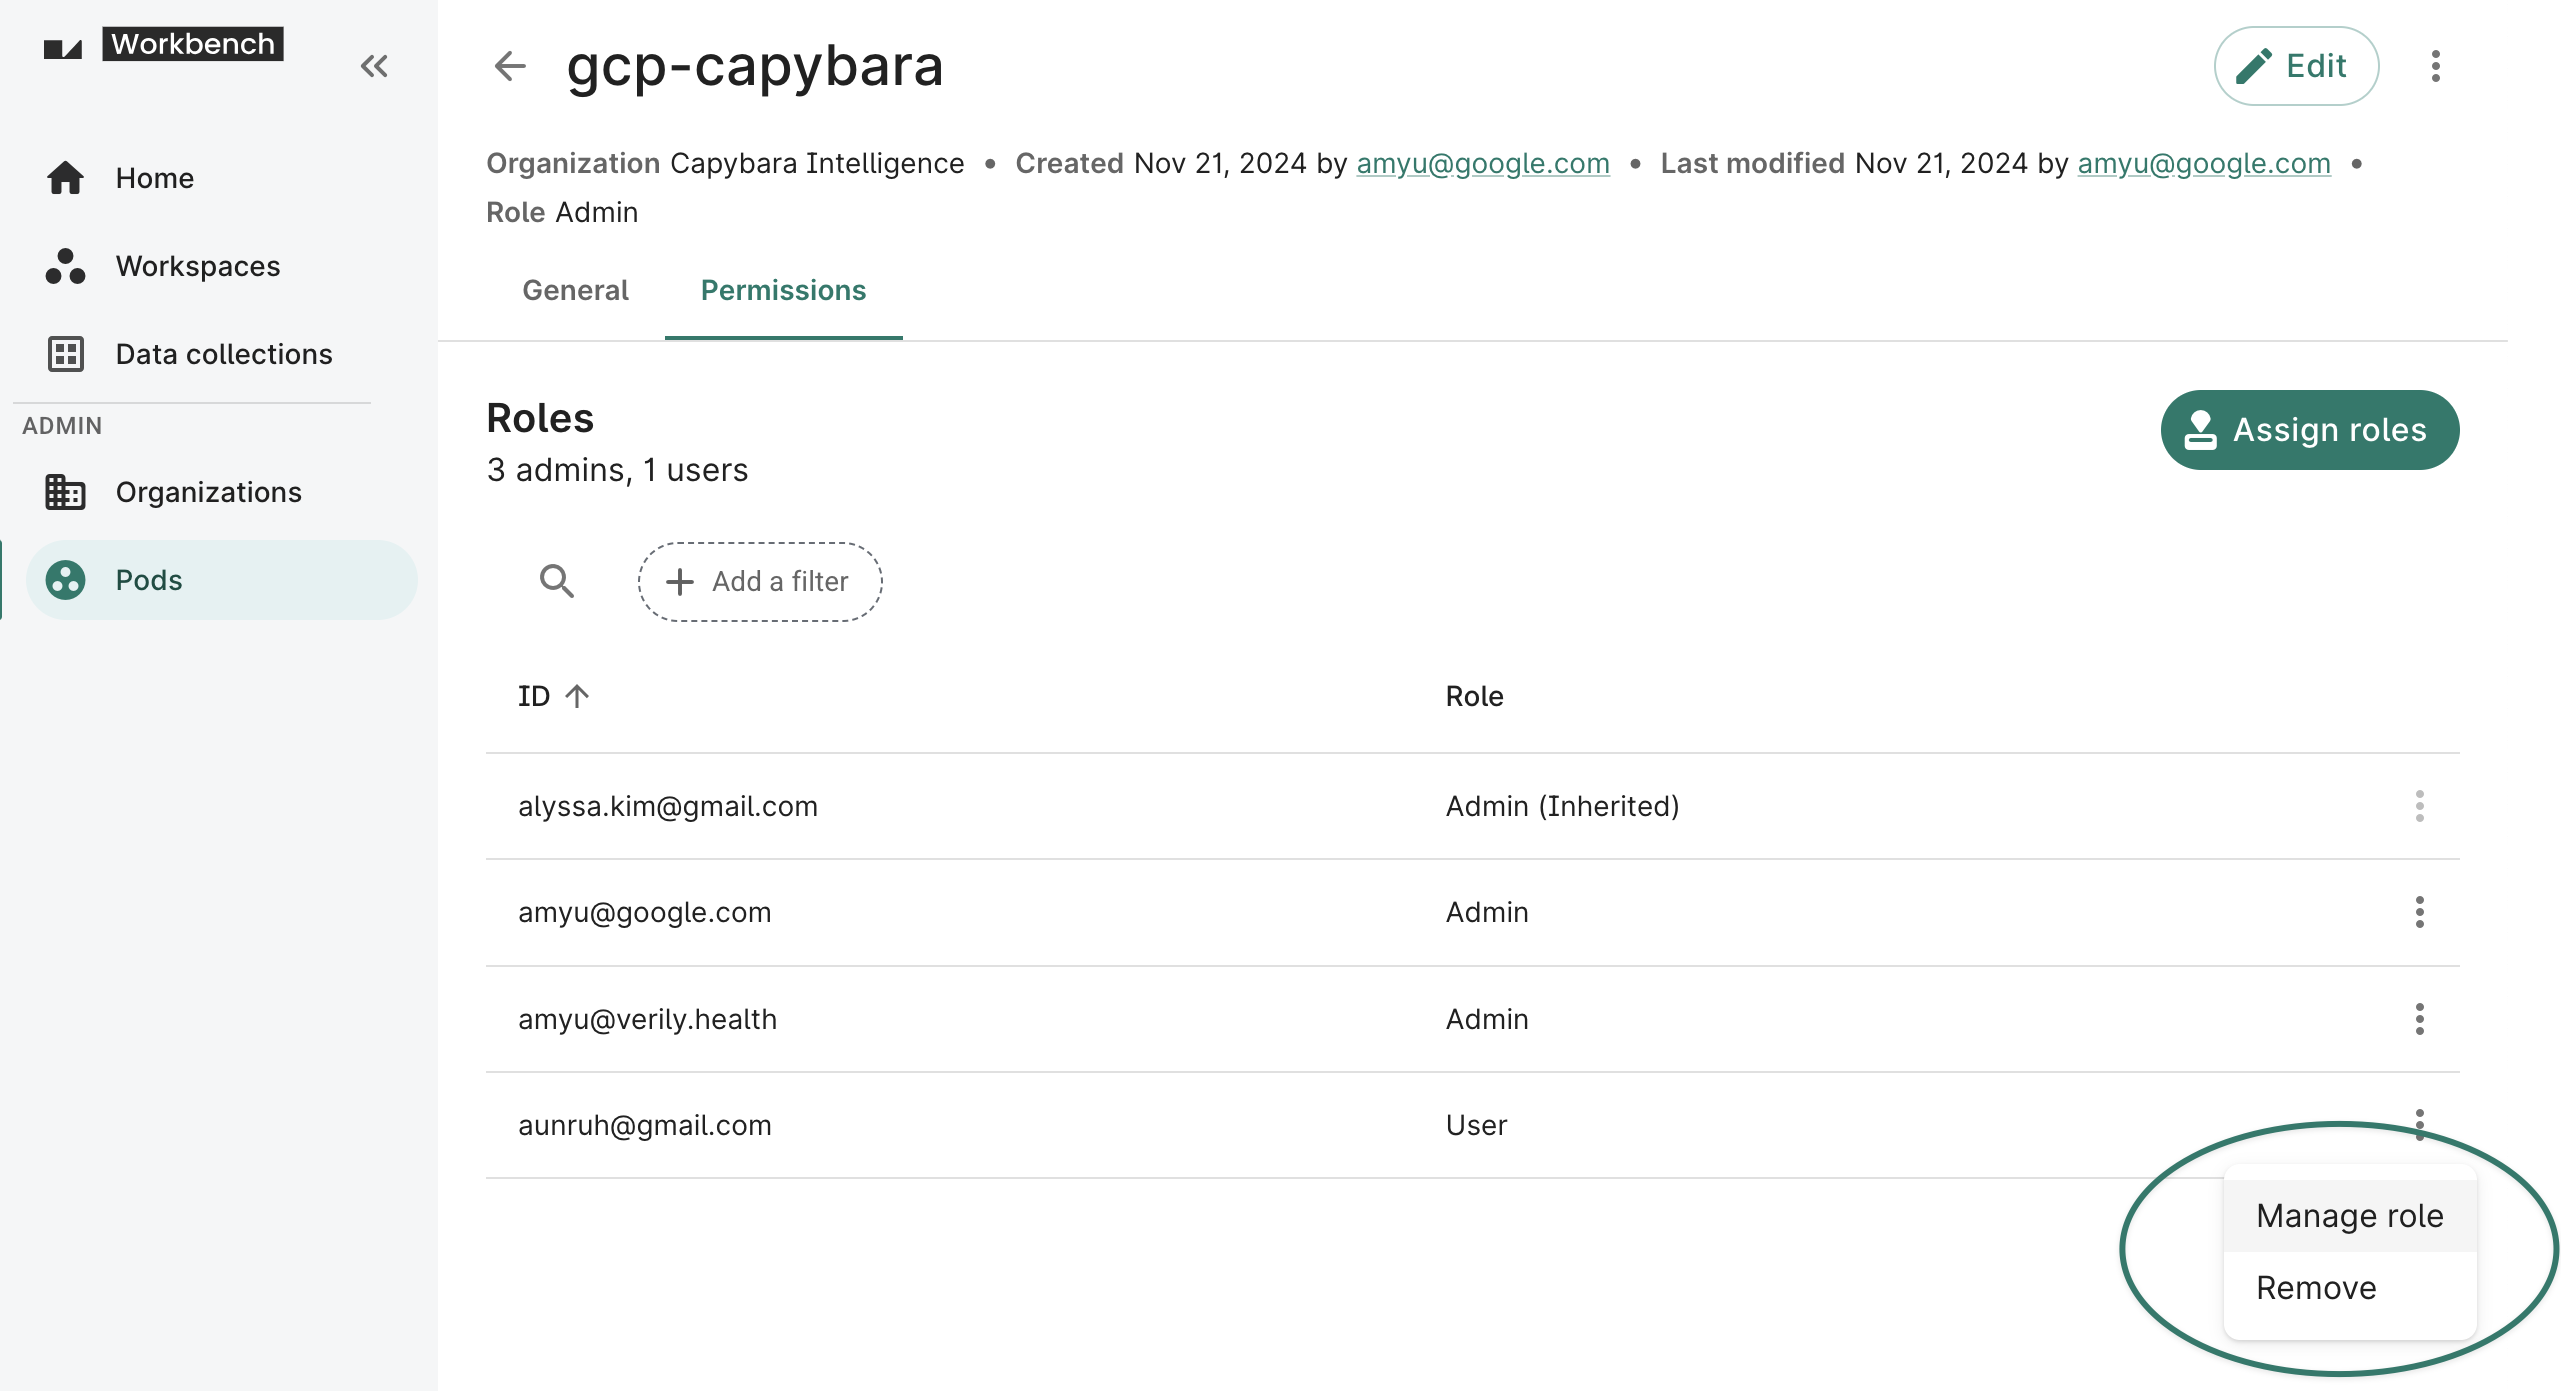
You can also update a user's role from the Permissions tab or remove them from a pod entirely.
Update a pod's billing information or description
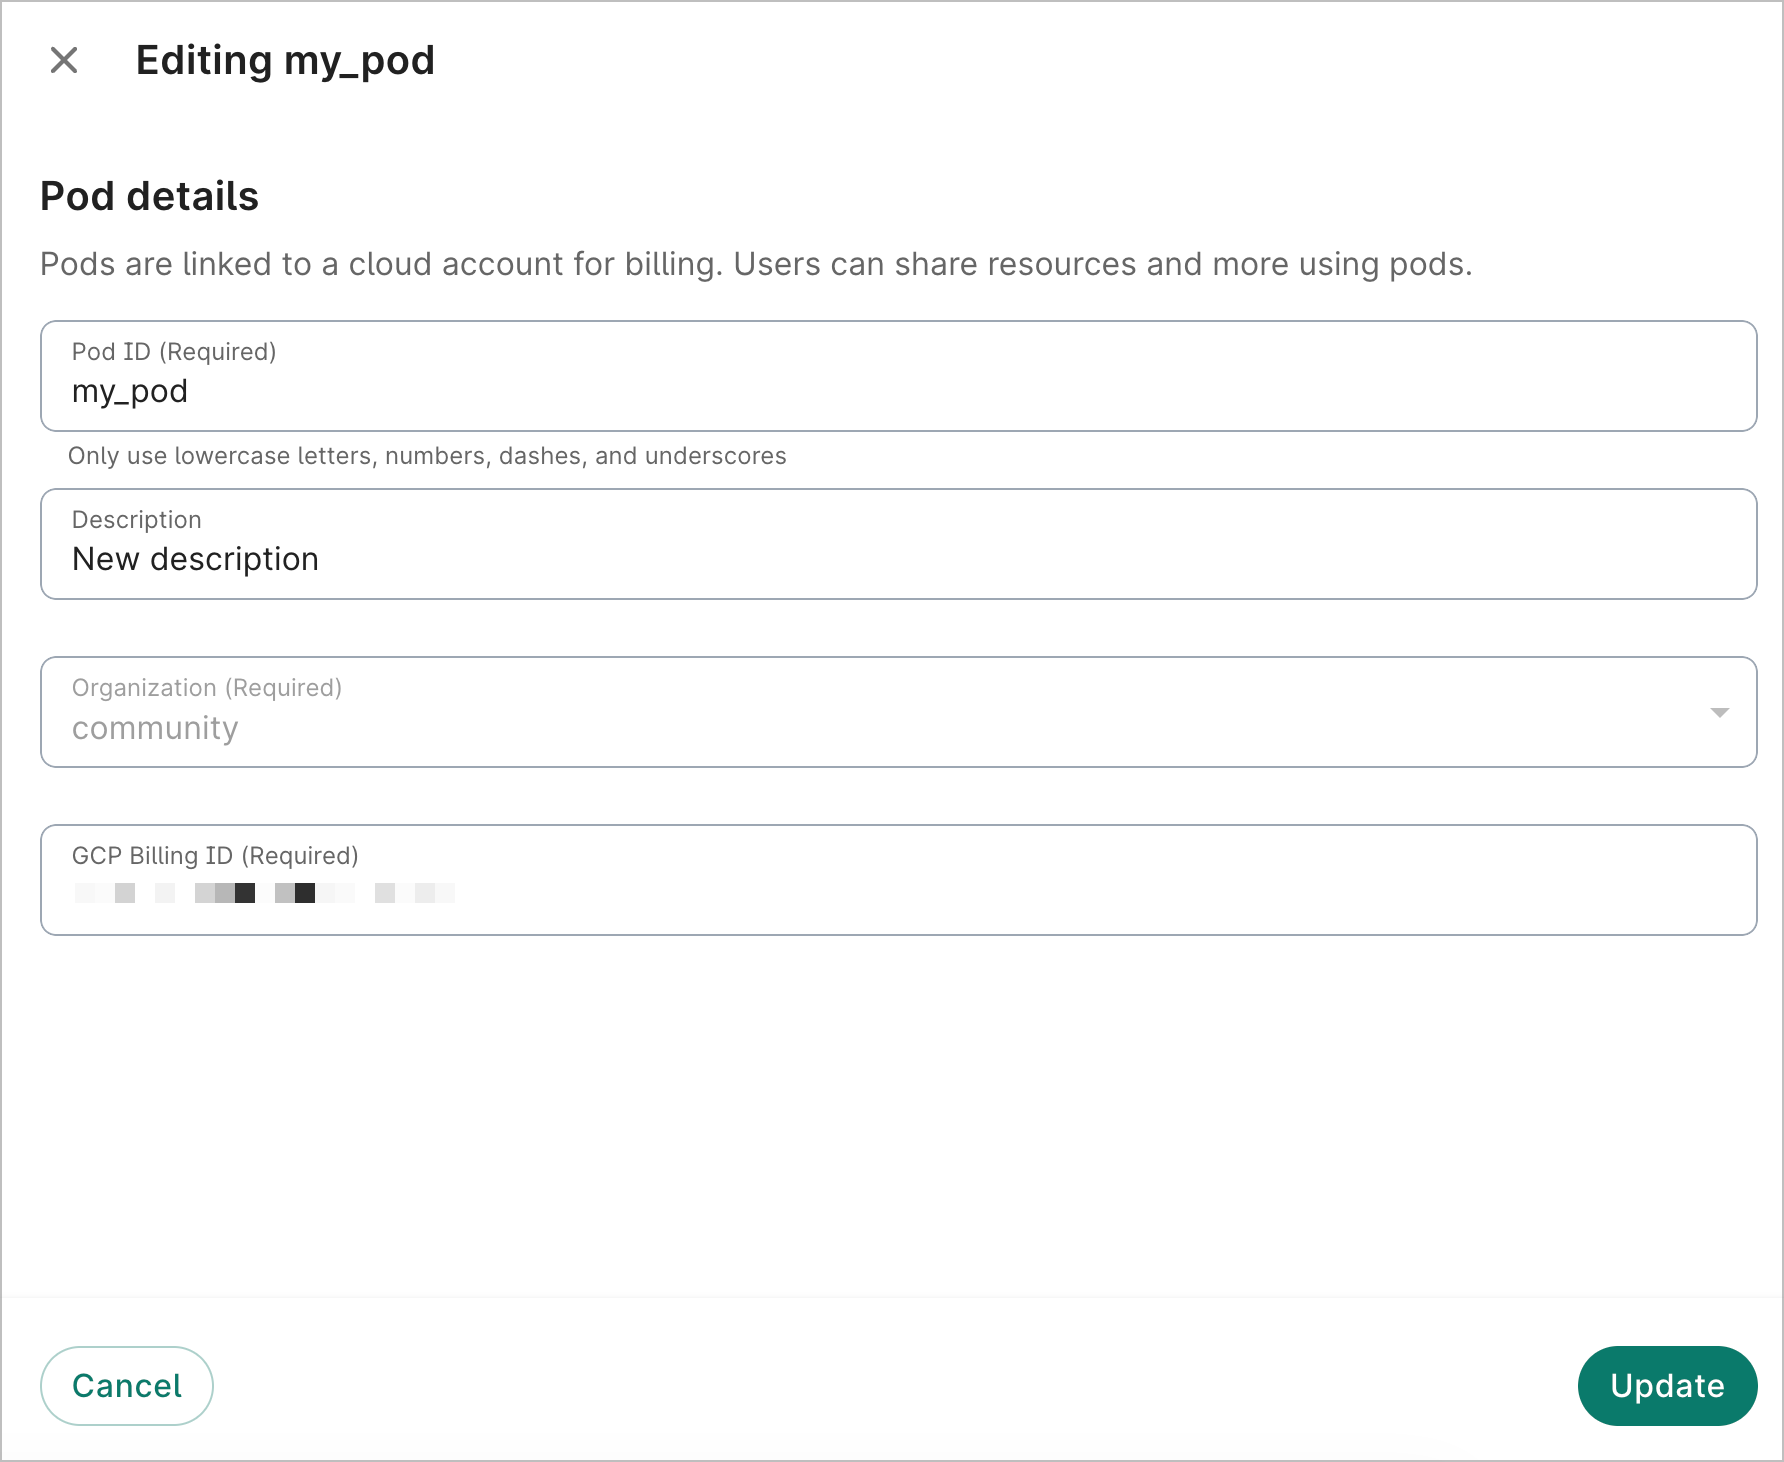
You can update a pod's description, billing account ID, and pod ID (must be unique). You cannot modify the organization.
Click the Edit button at the top right of a pod's details page A dialog will open, allowing you to edit the pod's details. Click Update to save your changes.
Delete a pod
You must contact Workbench Support at workbench-support@verily.com to delete a pod.
Be aware
You can't delete a pod if there are workspaces using that pod. Delete the workspaces first before deleting the pod.Use a pod when creating resources
When you create a new workspace or data collection, you can select which pod — and thus billing account — that you want to use for that resource.
For example, create a new workspace by navigating to the Workspaces page and clicking + New workspace. Select the pod from the dropdown.
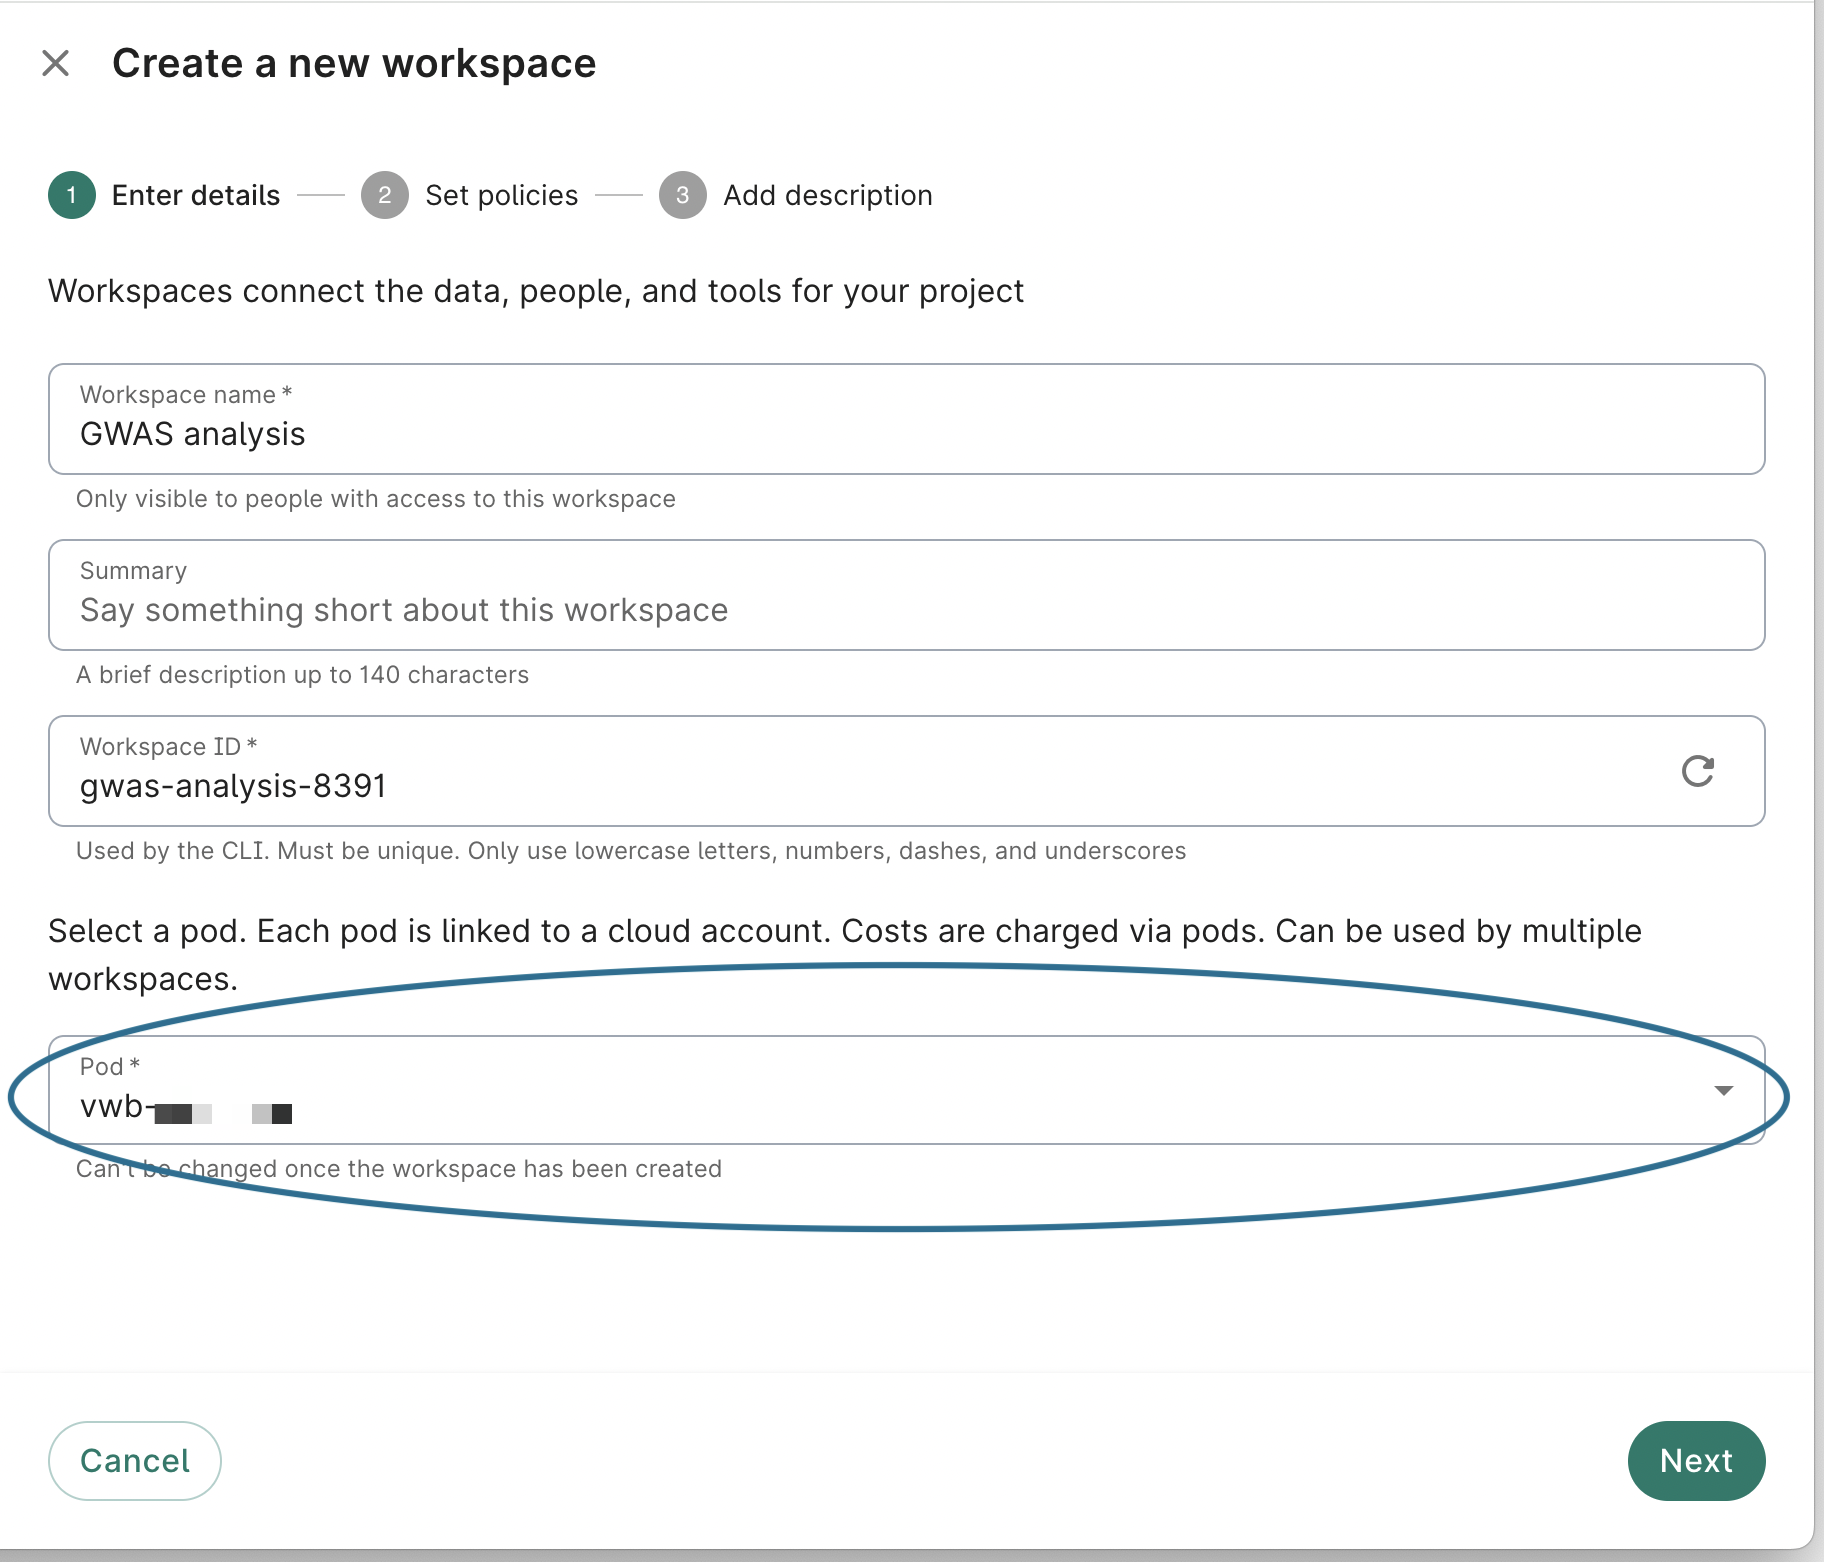
Be aware
The selected pod cannot be changed once the workspace is created.Obtain admin access to a pod
As noted above, only Workbench Org Admins or Pod Managers may initially create a pod. After the pod has been created, the Org Admin can grant any user the admin role, even if the user is not in the same org. Users with the admin role can then perform pod update actions, including renaming the pod ID, changing the pod’s billing account, and adding additional users.
If you know who your Org Admins are, you can contact them and request to be added as a Pod Admin.
If you don't know who your Org Admins are, please contact Workbench support for help.
Note
An Org Admin inherits the Pod Admin role on all pods of the org.Troubleshooting
If you've not been granted use of any pod, or have not been granted permission to create a pod, and believe you should have been, please contact your Org Admin or Workbench support for assistance.
Last Modified: 26 February 2026