Basic usage
Categories:
Prior reading: Command-line interface overview
Purpose: This document provides summary examples of commands that may be used alone or in combination to perform typical operations using the Workbench CLI.
Prerequisites
These instructions assume that you have already installed the Workbench CLI (command-line interface) or are working in a cloud app where it has been installed.
Start a new work session
This is an example of the typical flow of operations when starting a new work session with the Workbench CLI.
Note
When running the CLI commands below, be sure to replace any example values in< > with your desired values (without brackets).
Log in
Use this command to authorize the Workbench CLI to access the relevant APIs and data with user credentials.
wb auth login
You can check the authentication status to confirm the login was successful.
wb auth status
User email: xxxx@google.com
Proxy group email: PROXY_xxxxxxxxxxxxxxxxxxxxx@verily-bvdp.com
Service account email for current workspace: pet-xxxxxxxxxxxxxxxxxxxxx@terra-google-project-id-111.iam.gserviceaccount.com
LOGGED IN
Check server status
Use this command to check the status of the server and details of the current context.
wb server status
List accessible workspaces
This command lists all workspaces that you (i.e. the logged-in user) have read or write access to.
wb workspace list
Workspaces
Create a new workspace
Use this command to create a workspace.
wb workspace create --pod=<pod-id> --id=<my-workspace-id> --name=<my-workspace-name>
The --name=<my-workspace-name> argument is optional; if you don't include it, the system will
assign a randomly generated unique identifier (UUID).
Be aware
The pod you select determines whether the workspace will be GCP-backed or AWS-backed. You will not be able to change the pod once the workspace is created.Note
A Google project will be created for new GCP-backed workspaces.You can use the wb status command to confirm that the workspace was created successfully.
ℹ️ wb status
Use an existing workspace
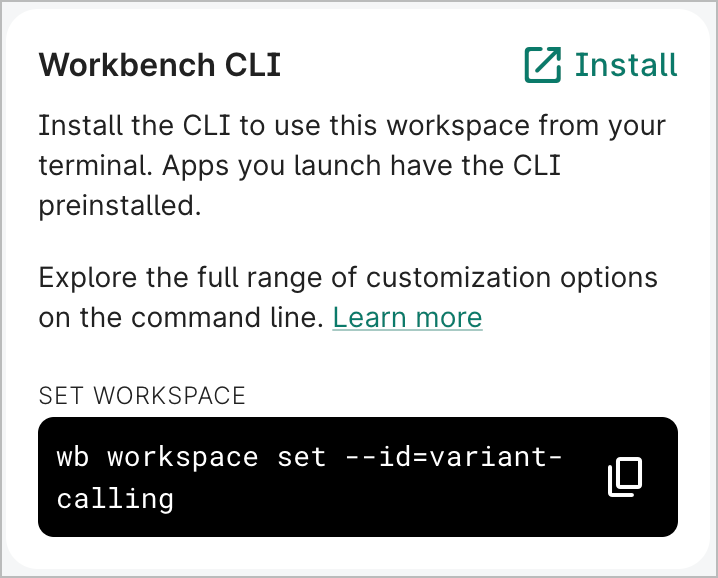
If you want to use an existing workspace, use the set command instead of create.
wb workspace set --id=<my-workspace-id>
Note that in the Workbench UI, the overview page of a workspace includes a command that can be copied and pasted to set that workspace in the CLI.
If you don't know your workspace ID but have access to your Google project, you can find your workspace UUID in the Google Cloud console and use that to set the workspace via the CLI. See View labels for your workspace's Google project for more information.
Resources
Add a controlled resource
The wb resource create command lets you add controlled resources to GCP-backed and AWS-backed
workspaces.
For GCP-backed workspaces, you can add a controlled BigQuery dataset, Cloud Storage bucket, GCP notebook, or GCP Dataproc cluster.
Cloud Storage bucket
The following example shows the command and output of a newly created Cloud Storage bucket resource named "scratch data":
wb resource create gcs-bucket --id=scratch-data --description="Scratch space for working data."

Successfully added controlled GCS bucket.
Name:         scratch-data
Description:  Scratch space for working data.
Type:         GCS_BUCKET
Stewardship:  CONTROLLED
Cloning:      COPY_RESOURCE
Access scope: SHARED_ACCESS
Managed by:   USER
GCS bucket name: scratch-data-terra-google-project-id-3014
Location: US-CENTRAL1
# Objects: 0
BigQuery dataset
wb resource create bq-dataset \
  --id=<your_dataset_name>

Successfully added controlled BigQuery dataset.
ID:           <your_dataset_name>
Description:
Type:         BQ_DATASET
Stewardship:  CONTROLLED
Cloning:      COPY_RESOURCE
Access scope: SHARED_ACCESS
Managed by:   USER
Region:       us-central1
Properties:   class Properties {
    []
}
GCP project id:      vwb-google-project-id-3016
BigQuery dataset id: test_dataset_cli
Location:            us-central1
# Tables:            0
GCP Dataproc cluster
In this example, we'll create a Dataproc cluster named test-cluster-cli. You can add the optional
--bucket and --temp-bucket flags and specify existing buckets in your workspace. If these flags
aren't included in the command, default buckets named dataproc-staging-<your-workspace-name> and
dataproc-temp-<your-workspace-name> will be automatically created. If your workspace already has
dataproc-staging and dataproc-temp buckets, the cluster will use those buckets by default.
wb resource create dataproc-cluster \
  --id=test-cluster-cli

Creating a Dataproc cluster will also create buckets: dataproc-staging-<your-workspace-name> and dataproc-temp-<your-workspace-name>. Are you sure you want to proceed (y/N)? y
Successfully created dataproc-staging-<your-workspace-name>
Successfully created dataproc-temp-<your-workspace-name>
Successfully added controlled GCP Dataproc cluster.
ID:           test-cluster-cli
Description:
Type:         DATAPROC_CLUSTER
Stewardship:  CONTROLLED
Cloning:      COPY_NOTHING
Access scope: PRIVATE_ACCESS
Managed by:   USER
Region:       us-central1
Private user: xxx@xxx.com
Properties:   class Properties {
    [class Property {
        key: terra-application-id
        value: JupyterLab_Spark_cluster_GCP_DATAPROC_CLUSTER
    }]
}
Project Id:   google-project-id-1234
Region:       us-central1
Cluster Id:   test-cluster-cli
Status:       RUNNING
Proxy URL:    https://t4wttbbtujholckkvmckzwrkyq-dot-us-central1.dataproc.googleusercontent.com/gateway/default/jupyter/lab/
Workers:      2
Secondary Workers:  0
Autoscaling Policy: (undefined)
Metadata:
   proxy-agent-image: us-west2-docker.pkg.dev/shared-pub-buckets-94mvrf/workbench-artifacts/workbench-app-proxy-agent:ov-dev-stable
   startup-script-url: https://raw.githubusercontent.com/verily-src/workbench-app-devcontainers/master/startupscript/dataproc/startup.sh
   terra-gcp-notebook-resource-name: test-cluster-cli
   enable-guest-attributes: TRUE
   terra-cli-server: dev-stable
   software-framework: NONE
   terra-workspace-id: your-workspace-name
   terra-resource-id: 9f980b13-cb37-47b7-9646-6d79597a5615
Idle Delete Ttl:   (undefined)
For AWS-backed workspaces, you can add a controlled S3 storage folder, S3 external bucket, ECR external repository, or Aurora database.
S3 storage folder
The following command creates an S3 storage folder with an ID of test-storage-folder.
wb resource create s3-storage-folder \
    --id test-storage-folder

Successfully added controlled AWS S3 storage folder.
ID:           test-storage-folder
Description:
Type:         AWS_S3_STORAGE_FOLDER
Stewardship:  CONTROLLED
Cloning:      COPY_REFERENCE
Access scope: SHARED_ACCESS
Managed by:   USER
Region:       us-east-1
Properties:   class Properties {
    []
}
S3 Storage Folder: s3://v0-saas-dev-us-east-1-workbench/test-storage-folder-aws_test/
region:            us-east-1
# Objects:         0
S3 external bucket
Create an S3 external bucket with an ID of test-bucket with the following command:
wb resource create s3-storage-folder \
    --id test-bucket

Successfully added controlled AWS S3 storage folder.
ID:           test-bucket
Description:
Type:         AWS_S3_STORAGE_FOLDER
Stewardship:  CONTROLLED
Cloning:      COPY_REFERENCE
Access scope: SHARED_ACCESS
Managed by:   USER
Region:       us-east-1
Properties:   class Properties {
    []
}
S3 Storage Folder: s3://v0-saas-dev-us-east-1-workbench/test-bucket-aws_test/
region:            us-east-1
# Objects:         0
ECR external repository
Run the following command to create an ECR external repository with an ID of test-repository:
wb resource create ecr-external-repository \
    --id=test-repository \
    --region=<your-region> \
    --account=<your-account-id> \

Successfully added controlled AWS ECR External Repository.
ID:           test-repository
Description:
Type:         AWS_ECR_EXTERNAL_REPOSITORY
Stewardship:  CONTROLLED
Cloning:      COPY_REFERENCE
Access scope: SHARED_ACCESS
Managed by:   USER
Region:       <your-region>
Properties:   class Properties {
    []
}
Repository Name: [All repositories in account/region]
URI:             <your-account-id>.dkr.ecr.<your-region>.amazonaws.com
AWS Account:     <your-account-id>
Region:          <your-region>
Running the command without the --repository-name parameter will grant you access to all ECR
repositories in the specified account and region. If you run the command with the
--repository-name parameter specified, you will be granted access only to that particular
repository.
wb resource create ecr-external-repository \
    --id=test-repository-2 \
    --region=<your-region> \
    --account=<your-account-id> \
    --repository-name=<your-repo-name>

Successfully added controlled AWS ECR External Repository.
ID:           test-repository-2
Description:
Type:         AWS_ECR_EXTERNAL_REPOSITORY
Stewardship:  CONTROLLED
Cloning:      COPY_REFERENCE
Access scope: SHARED_ACCESS
Managed by:   USER
Region:       <your-region>
Properties:   class Properties {
    []
}
Repository Name: <your-repo-name>
URI:             <your-account-id>.dkr.ecr.<your-region>.amazonaws.com/<your-repo-name>
AWS Account:     <your-account-id>
Region:          <your-region>
Aurora PostgreSQL database
The following command creates an Aurora database with an ID of my-database and a database ID of
my_data_workspace123:
wb resource create aurora-database \
    --id my-database \
    --database-name my_data_workspace123

Successfully added controlled AWS Aurora Database.
ID:           my-database
Type:         AWS_AURORA_DATABASE
Stewardship:  CONTROLLED
Database name:        my_data_workspace123
Cluster identifier:   <your-region>-pg-16-6-20251211-01
Region:               <your-region>
RW endpoint:          cluster-abc123.<your-region>.rds.amazonaws.com
RW user:              my_data_workspace123_rw
RO endpoint:          cluster-abc123.cluster-ro.<your-region>.rds.amazonaws.com
RO user:              my_data_workspace123_ro
Port:                 5432
Engine:               aurora-postgresql
Engine version:       16.9
For detailed information on querying an Aurora database, see Query data in Aurora.
Add a referenced resource
You can create referenced resources via the wb resource add-ref command.
You can add a BigQuery dataset/table, Cloud Storage bucket/object, or a Git repo as a referenced resource.
The following is an example of a BigQuery table reference creation:
wb resource add-ref bq-table \
    --dataset-id=samples \
    --project-id=bigquery-public-data \
    --table-id=github_timeline \
    --id=github_timeline

Successfully added referenced BigQuery data table.
Name:         github_timeline
Description:
Type:         BQ_TABLE
Stewardship:  REFERENCED
Cloning:      COPY_REFERENCE
GCP project id: bigquery-public-data
BigQuery dataset id: samples
BigQuery table id: github_timeline
# Rows: 6219749
You can create referenced resources for S3 storage folders, external S3 buckets, and Aurora databases.
If you have at least Reader access to a source workspace with a controlled Aurora database, you can create a referenced Aurora database resource:
wb resource add-ref aurora-database \
    --id <new-reference-id> \
    --source-workspace-id <source-workspace-id> \
    --source-resource-id <source-database-id>
This will create a referenced resource in your workspace that points to the controlled resource Aurora database. Permissions will be inherited from the source workspace, and you can resolve and query the referenced database as if it were a controlled resource. See Query data in Aurora for more information.
Update a resource
You can update certain properties of a resource. See the
wb resource update documentation for details
for a specific resource type.
The following command updates an Aurora database's name and description:
wb resource update aurora-database \
    --id=<resource-id> \
    --new-id "<new-id>" \
    --new-description "<new-description>"

Successfully updated Aurora Database.
ID:           <new-id>
Description:  <new-description>
Type:         AWS_AURORA_DATABASE
Stewardship:  CONTROLLED
Cloning:      COPY_REFERENCE
Access scope: SHARED_ACCESS
Managed by:   USER
Region:       us-east-1
Properties:   class Properties {
    []
}
Database name:        <new_id>_<workspace_name>
Cluster identifier:   us-east-1-pg-xx-x-20251211-01
Region:               us-east-1
RW endpoint:          v0saasdevuseast1-us-east-1-pg-xx-x-20251211-01.cluster-abcdef123456.us-east-1.rds.amazonaws.com
RW user:              <new_id>_<workspace_name>_rw
RO endpoint:          v0saasdevuseast1-us-east-1-pg-xx-x-20251211-01.cluster-ro-abcdef123456.us-east-1.rds.amazonaws.com
RO user:              <new_id>_<workspace_name>_ro
Port:                 5432
Engine:               aurora-postgresql
Engine version:       16.9
Delete a resource
The wb resource delete command deletes the specified resource.
wb resource delete --id=<resource-id>
For databases, this command will delete the database, its users, and its data.
Locate a data resource
Use this command to list all resources in your workspace.
wb resource list
You'll see a list of resources with their respective names, resource types, and stewardship types:
NAME                            RESOURCE TYPE         STEWARDSHIP TYPE      DESCRIPTION
nb-repo                         GIT_REPO              REFERENCED            (unset)
nextflow_tests                  AI_NOTEBOOK           CONTROLLED            (unset)
nf-core-sample-data-repo        GIT_REPO              REFERENCED            (unset)
rnaseq-nf-repo                  GIT_REPO              REFERENCED            Respository containing a Nextflow RNA...
tabular_data_autodelete_aft...  BQ_DATASET            CONTROLLED            BigQuery dataset for temporary storag...
workbench-examples              GIT_REPO              REFERENCED            (unset)
ws_files                        GCS_BUCKET            CONTROLLED            Bucket for reports and provenance rec...
ws_files_autodelete_after_t...  GCS_BUCKET            CONTROLLED            Bucket for temporary storage of file ...
You can print details of a resource given its id (i.e., the name of the resource):
$ wb resource describe --id=ws_files
Name:         ws_files
Description:  Bucket for reports and provenance records.
Type:         GCS_BUCKET
Stewardship:  CONTROLLED
Cloning:      COPY_NOTHING
Access scope: SHARED_ACCESS
Managed by:   USER
Properties:   class Properties {
    []
}
GCS bucket name: terra-google-project-id-111-ws-files
Location: US-CENTRAL1
# Objects: 0
You can then use this command to print the underlying cloud location.
wb resource resolve --id=<resource-name>
Cloud apps
Create a Compute Engine app
Use the wb app create gcp command to create a Compute Engine app. The example below shows a
JupyterLab app configuration with a specific machine type, data disk size, and GPUs.
wb app create gcp \
--app-config=jupyter-lab \
--id=<instance_name> \
--machine-type=n1-highmem-16 \
--data-disk-size=800 \
--accelerator-type=nvidia-tesla-v100 \
--accelerator-core-count=1 \
Configure autostop idle time
Use this command to update the autostop idle time (in seconds) for your app.
For Google Compute Engine:
wb app update gcp --id=<instance-name> --new-idle-timeout-seconds=<autostop-time>
For AWS EC2:
wb resource update ec2 --id=<ec2-id> --new-metadata=idle-timeout-seconds=<autostop-time>
Note: Make sure to replace <instance-name> and <ec2-id> with the desired computing service ID.
Replace <autostop-time> with the desired idle time in seconds. This should be a whole number.
Utilities
Set gcloud credentials
Use this command to set user and application default credentials that the gcloud utilities should use to access data.
gcloud auth login
gcloud auth application-default login
ℹ️ gcloud auth
Last Modified: 5 February 2026