Create cohorts from the Data Exchange
Categories:
Prior reading: Find existing data collections
Purpose: This document explains how you can create cohorts directly from a data collection in the Data Exchange.
Introduction
In addition to creating a cohort from a workspace, you can create a cohort from a data collection in the Data Exchange.
Video guide
This video shows you how to create cohorts and data snapshots from the Exchange:
Step-by-step guide for creating a cohort via the Data Exchange
-
After logging in to Workbench, select Exchange in the left sidebar to see a list of data collections.
-
You can create cohorts with data collections that have the Explore cohorts button enabled. If a data collection has multiple versions available, they will appear in a dropdown menu. Select the version you want to use (defaults to latest version) and click Explore cohorts to open the Data Explorer cohort creation page.
If you'd like to see more details about the data collection first, select the data collection's name. You can then create a cohort by selecting the Analyze button and then the Explore cohorts option.
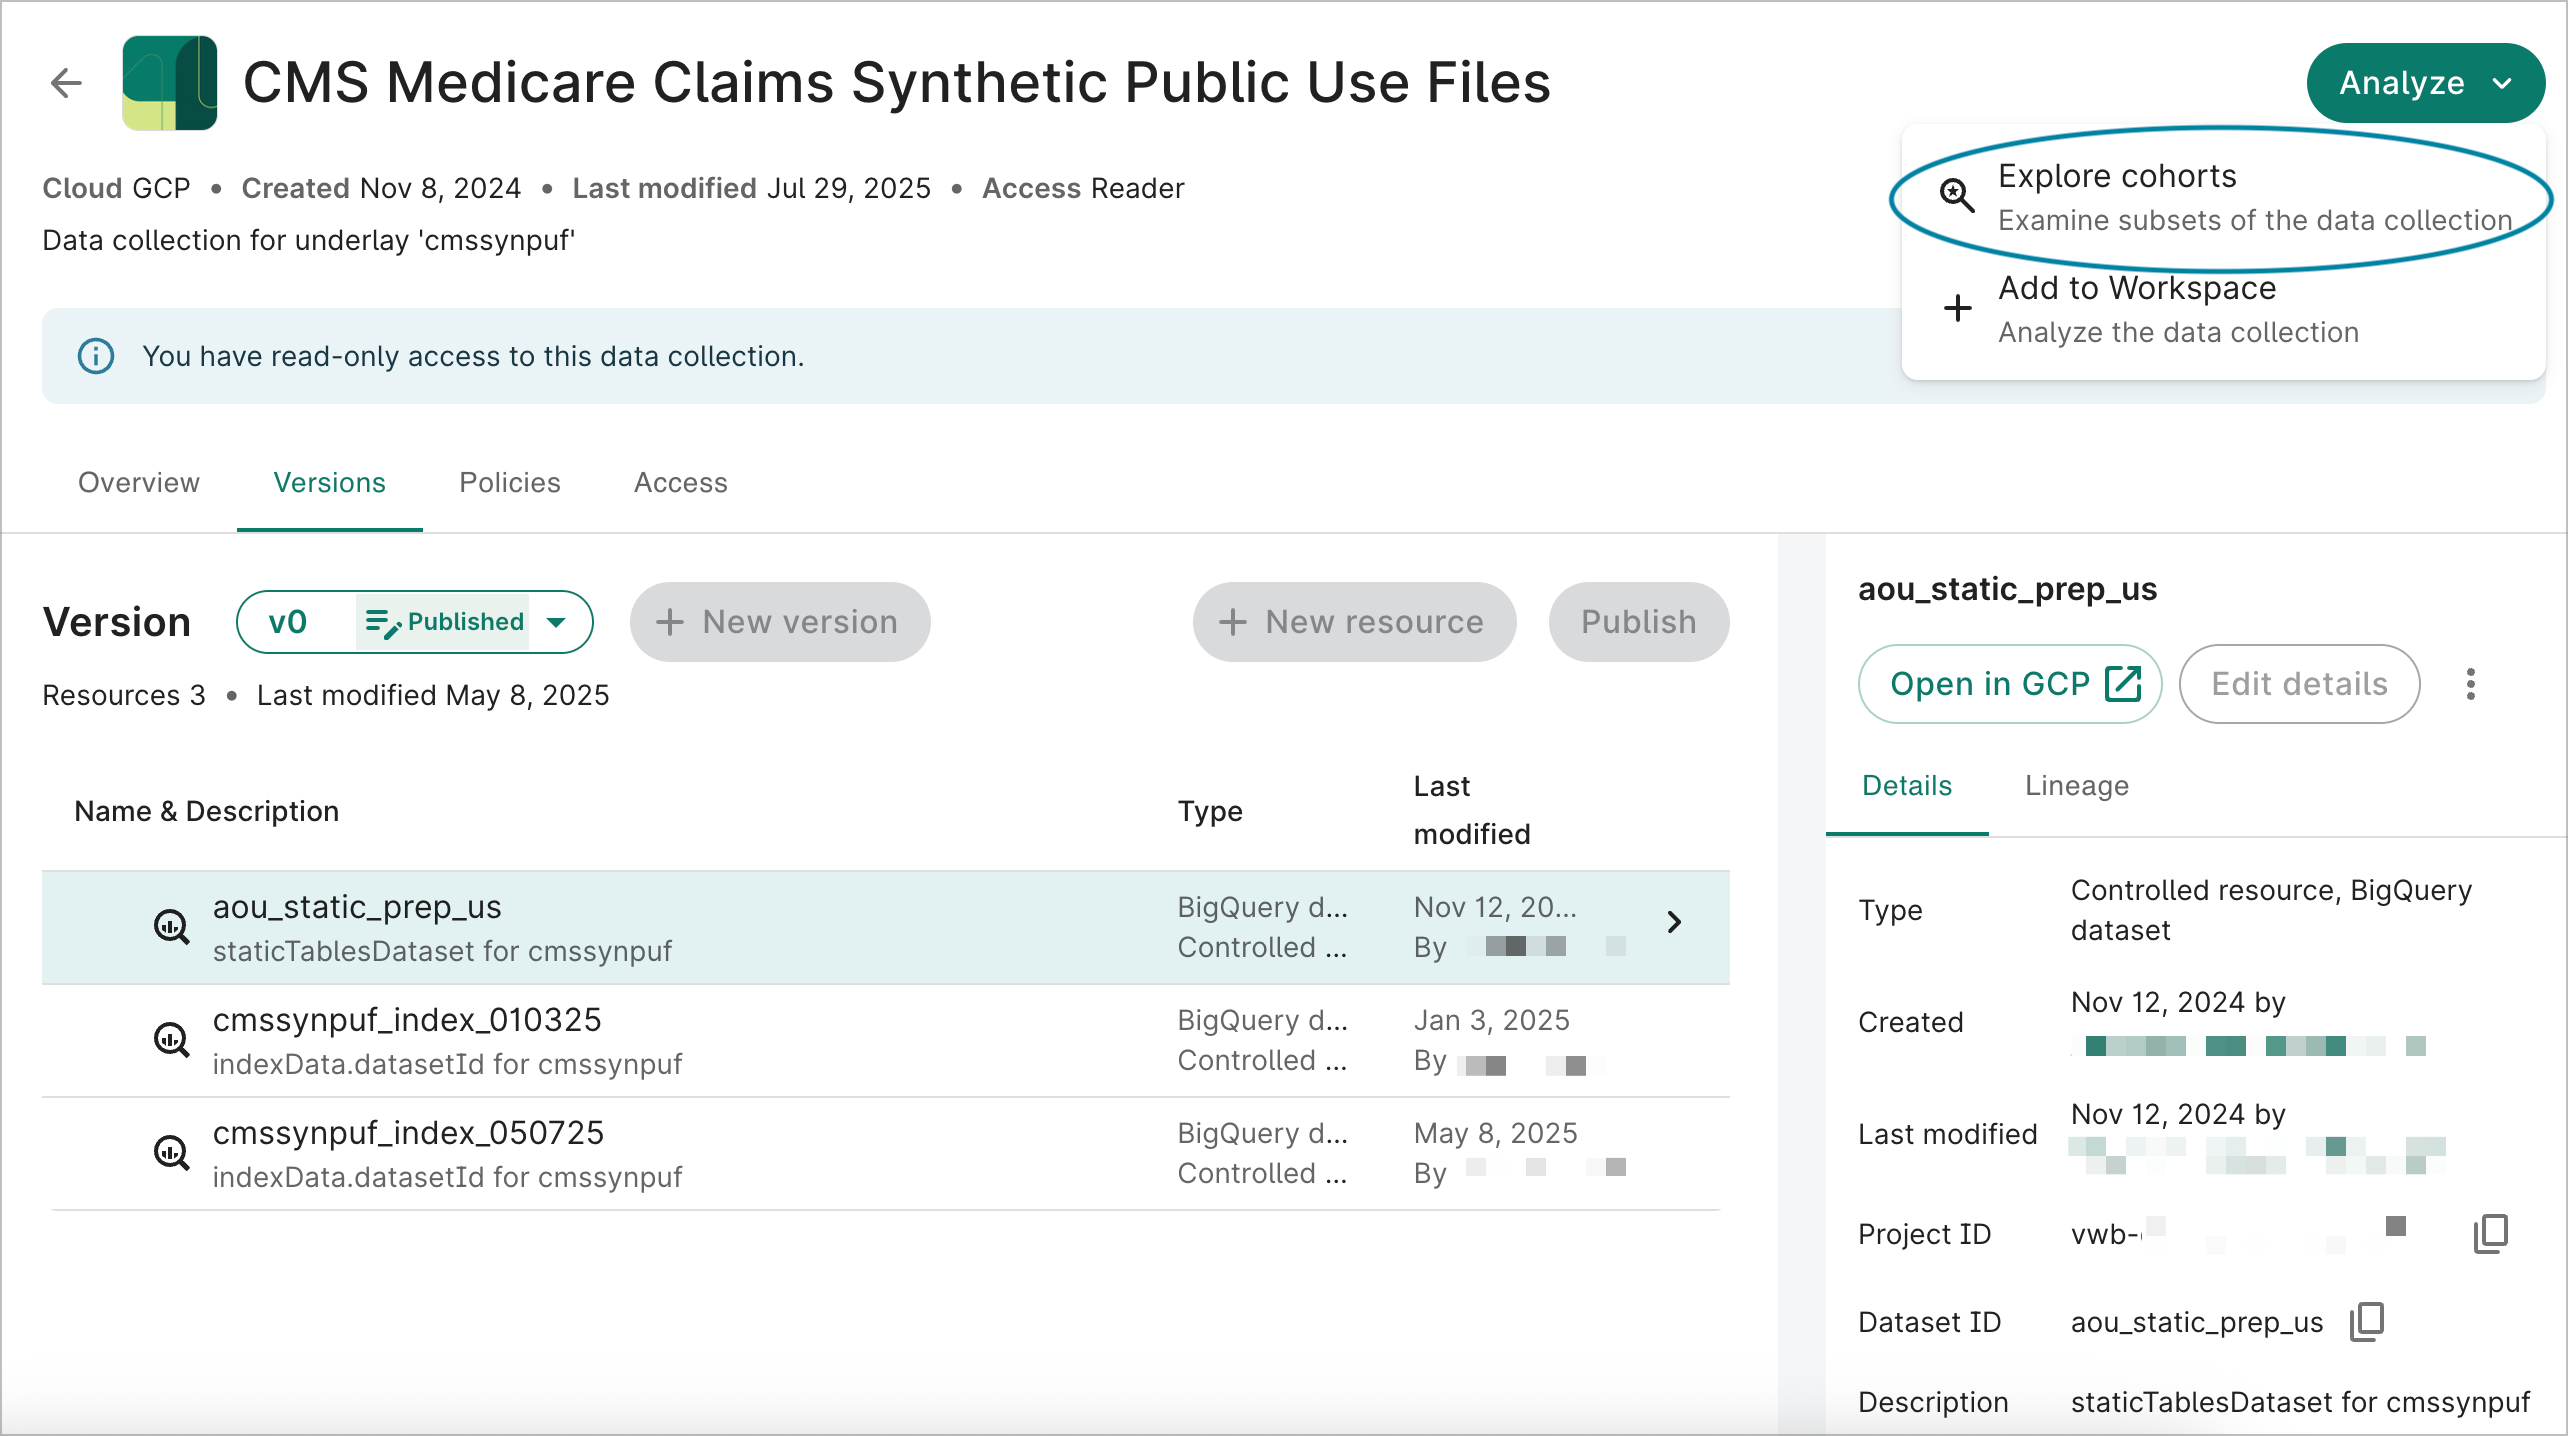
Select Explore cohorts to create a cohort. -
Define your cohort by using the Cohort filter to select your criteria. If you're not familiar with creating a Data Explorer cohort, see the Step-by-step guide.
Be aware
When creating a cohort via the Exchange, cohorts will not auto-save. -
Once you've defined your cohort, you can save it to a workspace or view data snapshot.
To save the cohort, select Save cohort to workspace. Choose an existing workspace or create a new one by selecting Create new workspace. Once you complete the steps and a workspace has been created, it will appear in the list of workspaces where you can save the cohort.
You'll have to confirm that you understand any policies and terms for the data collection prior to saving the cohort to a workspace.
Be aware
Policies and terms applied to the data collection will also apply to the workspace.Give your cohort a name and specify which folder it should be added to. You can select an existing folder or create a new one. Select Save. You'll be taken to the saved cohort page.
Alternatively, select View data snapshot to get a preview of the data, select data criteria, and view tables and SQL queries. After defining your data criteria, select Save cohort to save to a workspace. Once saved, you'll be taken back to your cohort page where you can save data snapshot.
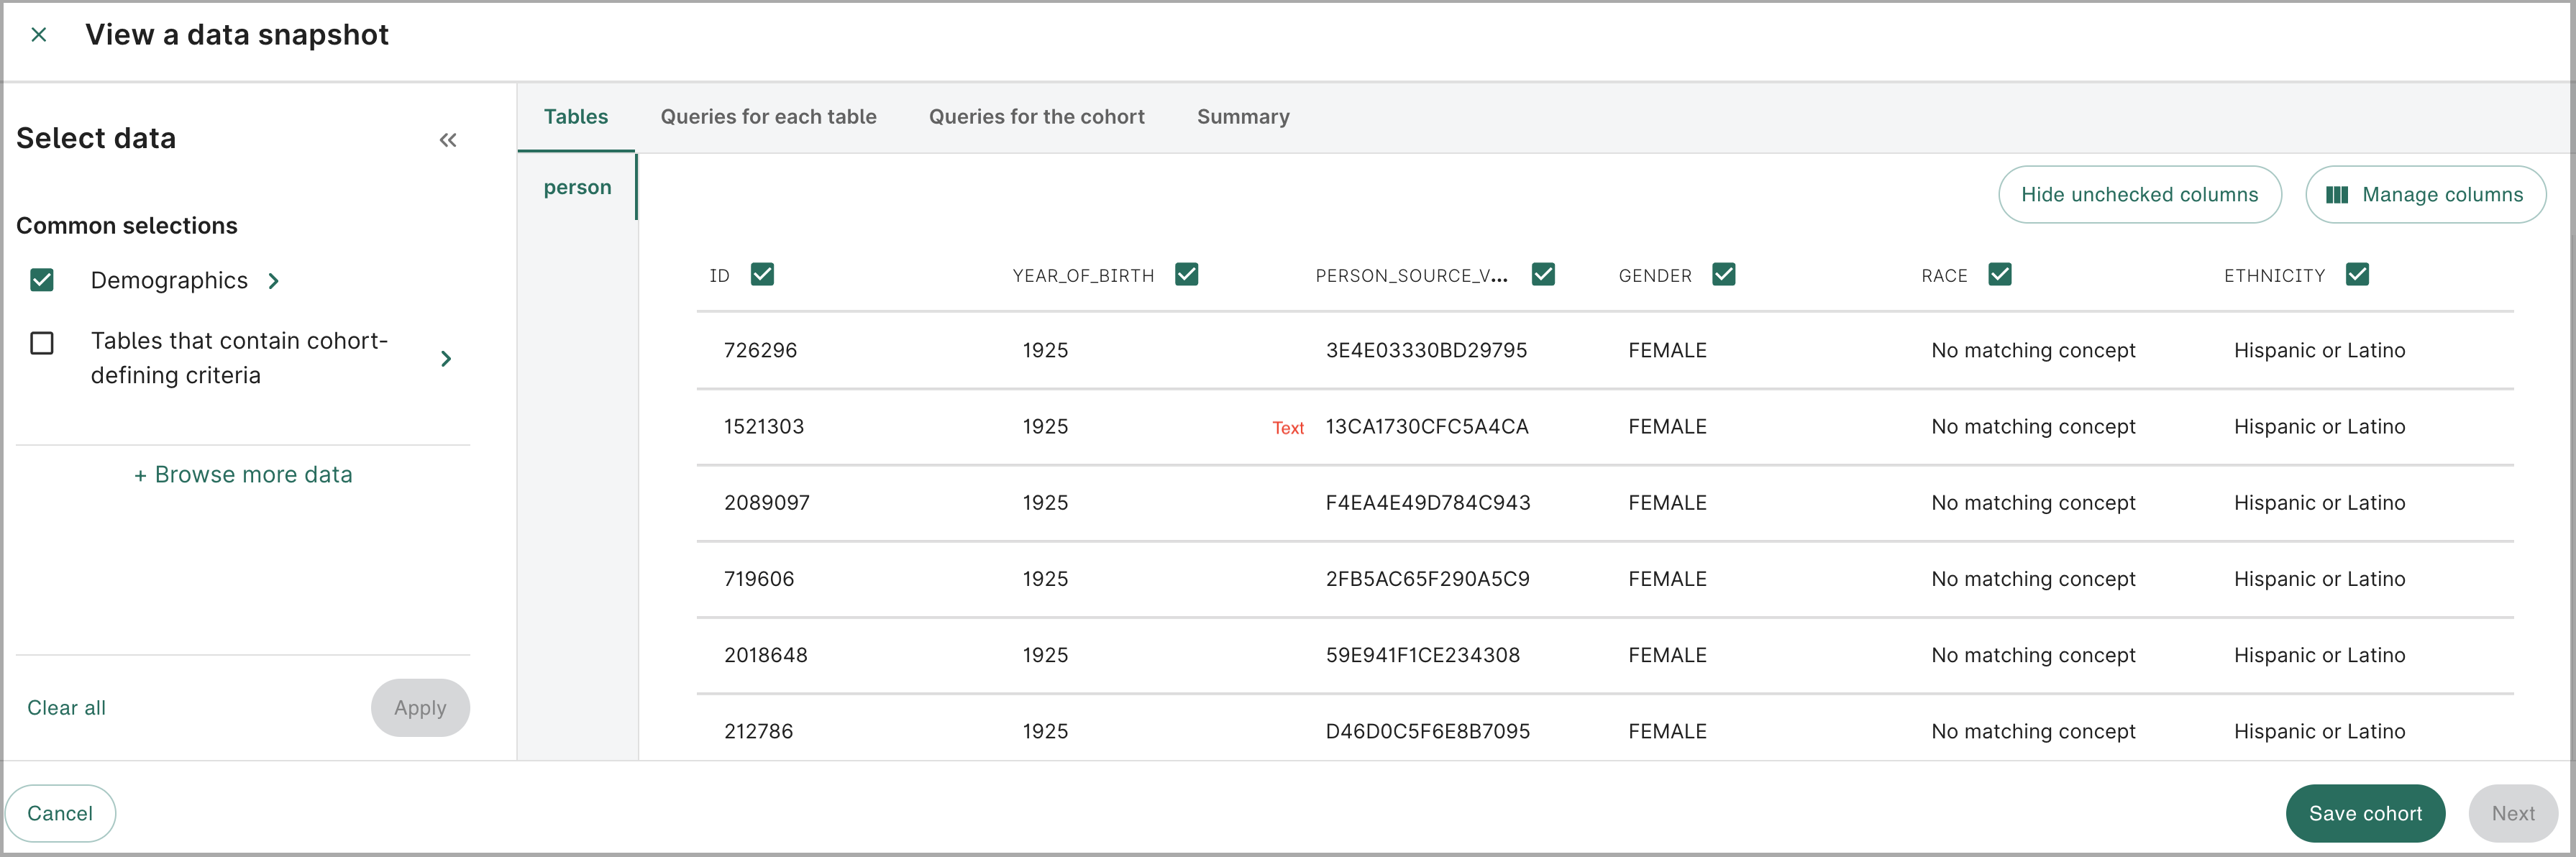
Select your data criteria. -
With the cohort saved, you can now save a data snapshot.
Select Save data snapshot from the cohort page. Confirm the selected criteria that appears and select Next.
Select the export file format for tables and queries. Select Next.
Finally, select the destination bucket where the files should be saved. Select Save.
Saved cohorts and data snapshots can be accessed at any time via the Resources tab in your workspace. For snapshots, select the bucket where you saved the data snapshot and select Browse to see the list of data snapshot files.
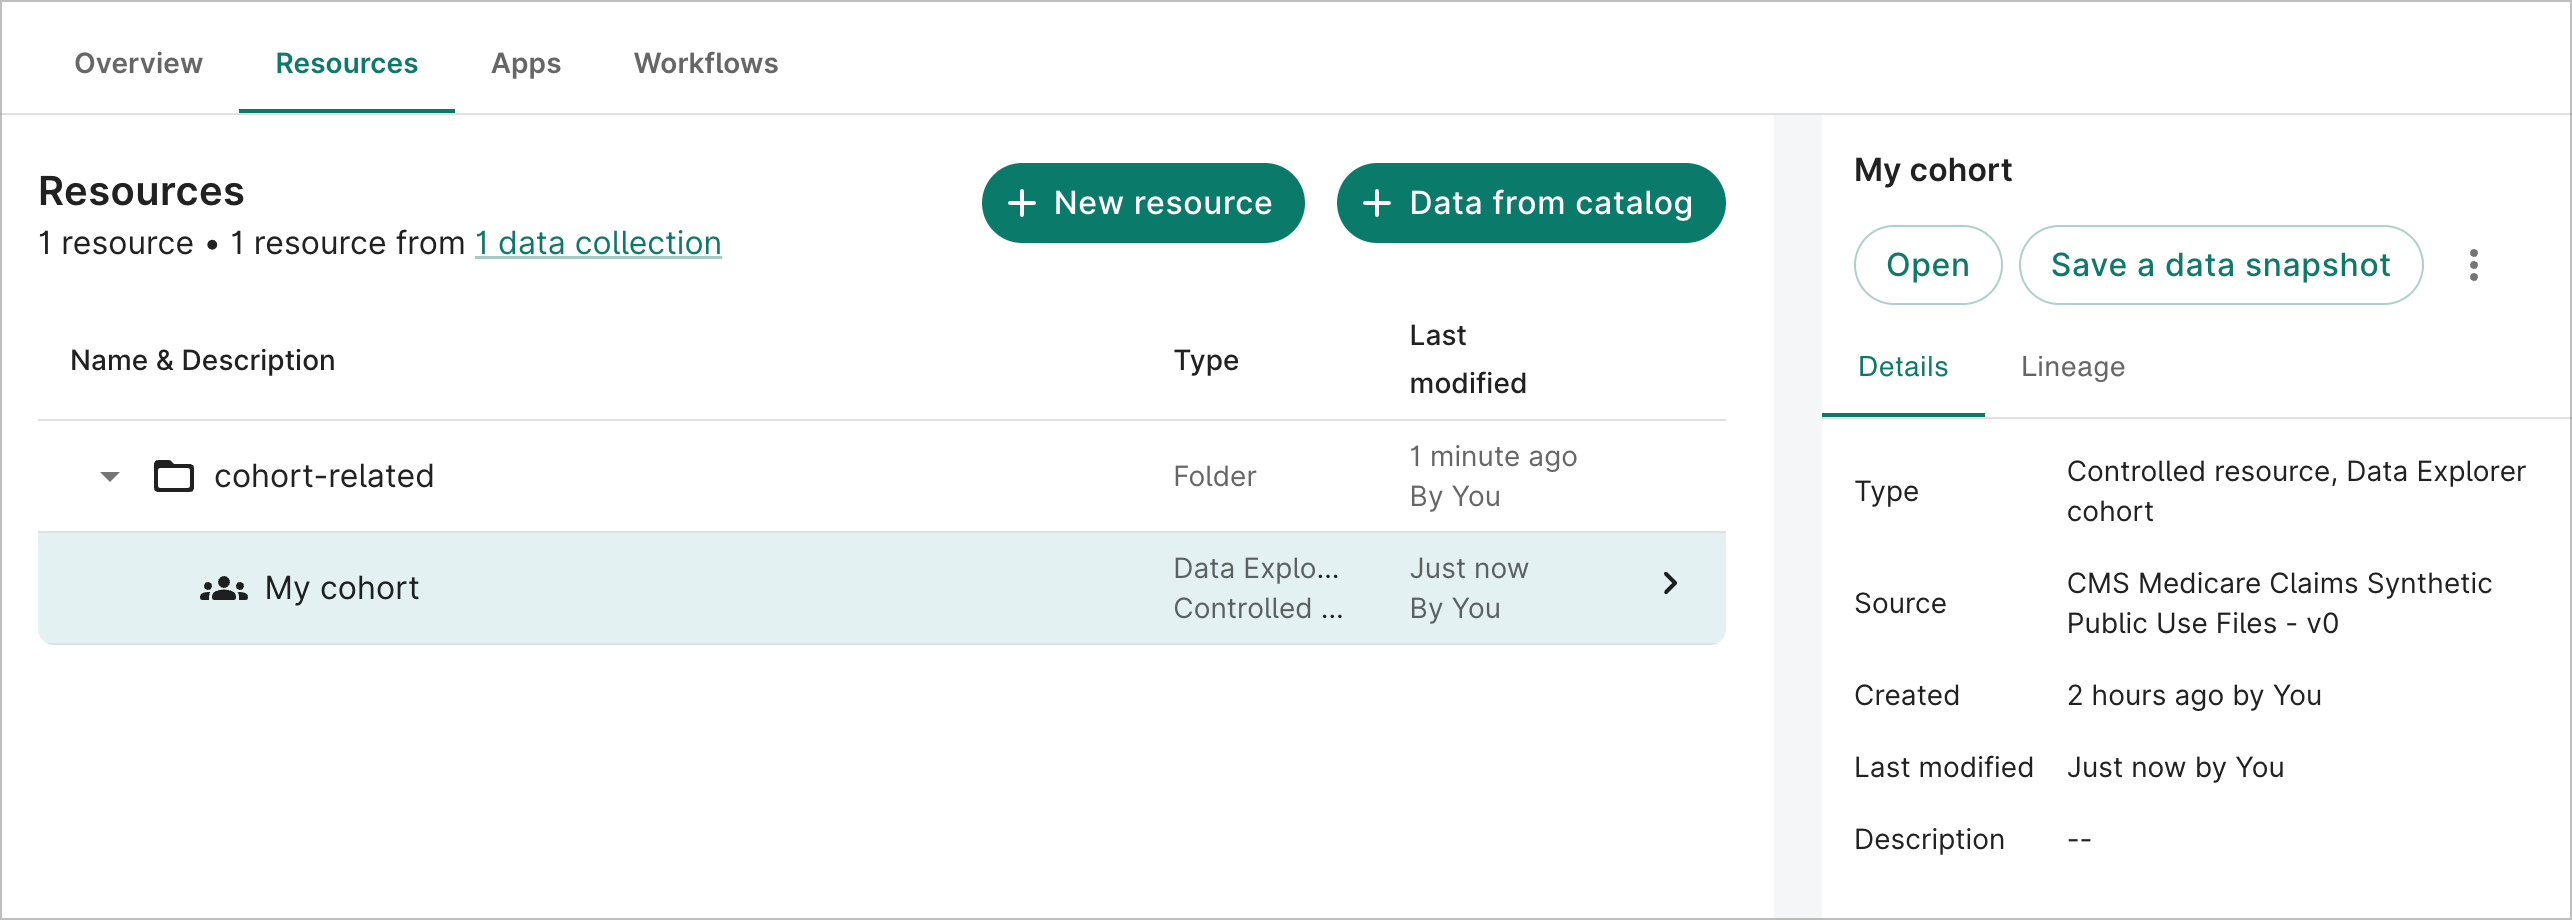
Access your saved cohort via the Resources tab in your workspace. Note
Keep in mind that a data snapshot is a snapshot of the cohort data at that particular point in time. If you modify the cohort, the snapshot will not update and you'll need to save another snapshot.
Last Modified: 20 May 2026