Workspace operations via the Workbench UI
Categories:
Prior reading: Workspaces overview
Purpose: This document provides detailed instructions for performing operations on workspaces through the Workbench UI.
Note: Most of these instructions assume that you have already opened a workspace in the Workbench UI.
List your workspaces
From any page in Verily Workbench, select Workspaces in the left navigation bar to go to the list of workspaces you have access to. You will see workspaces that were shared with you, as well as workspaces that you have created.
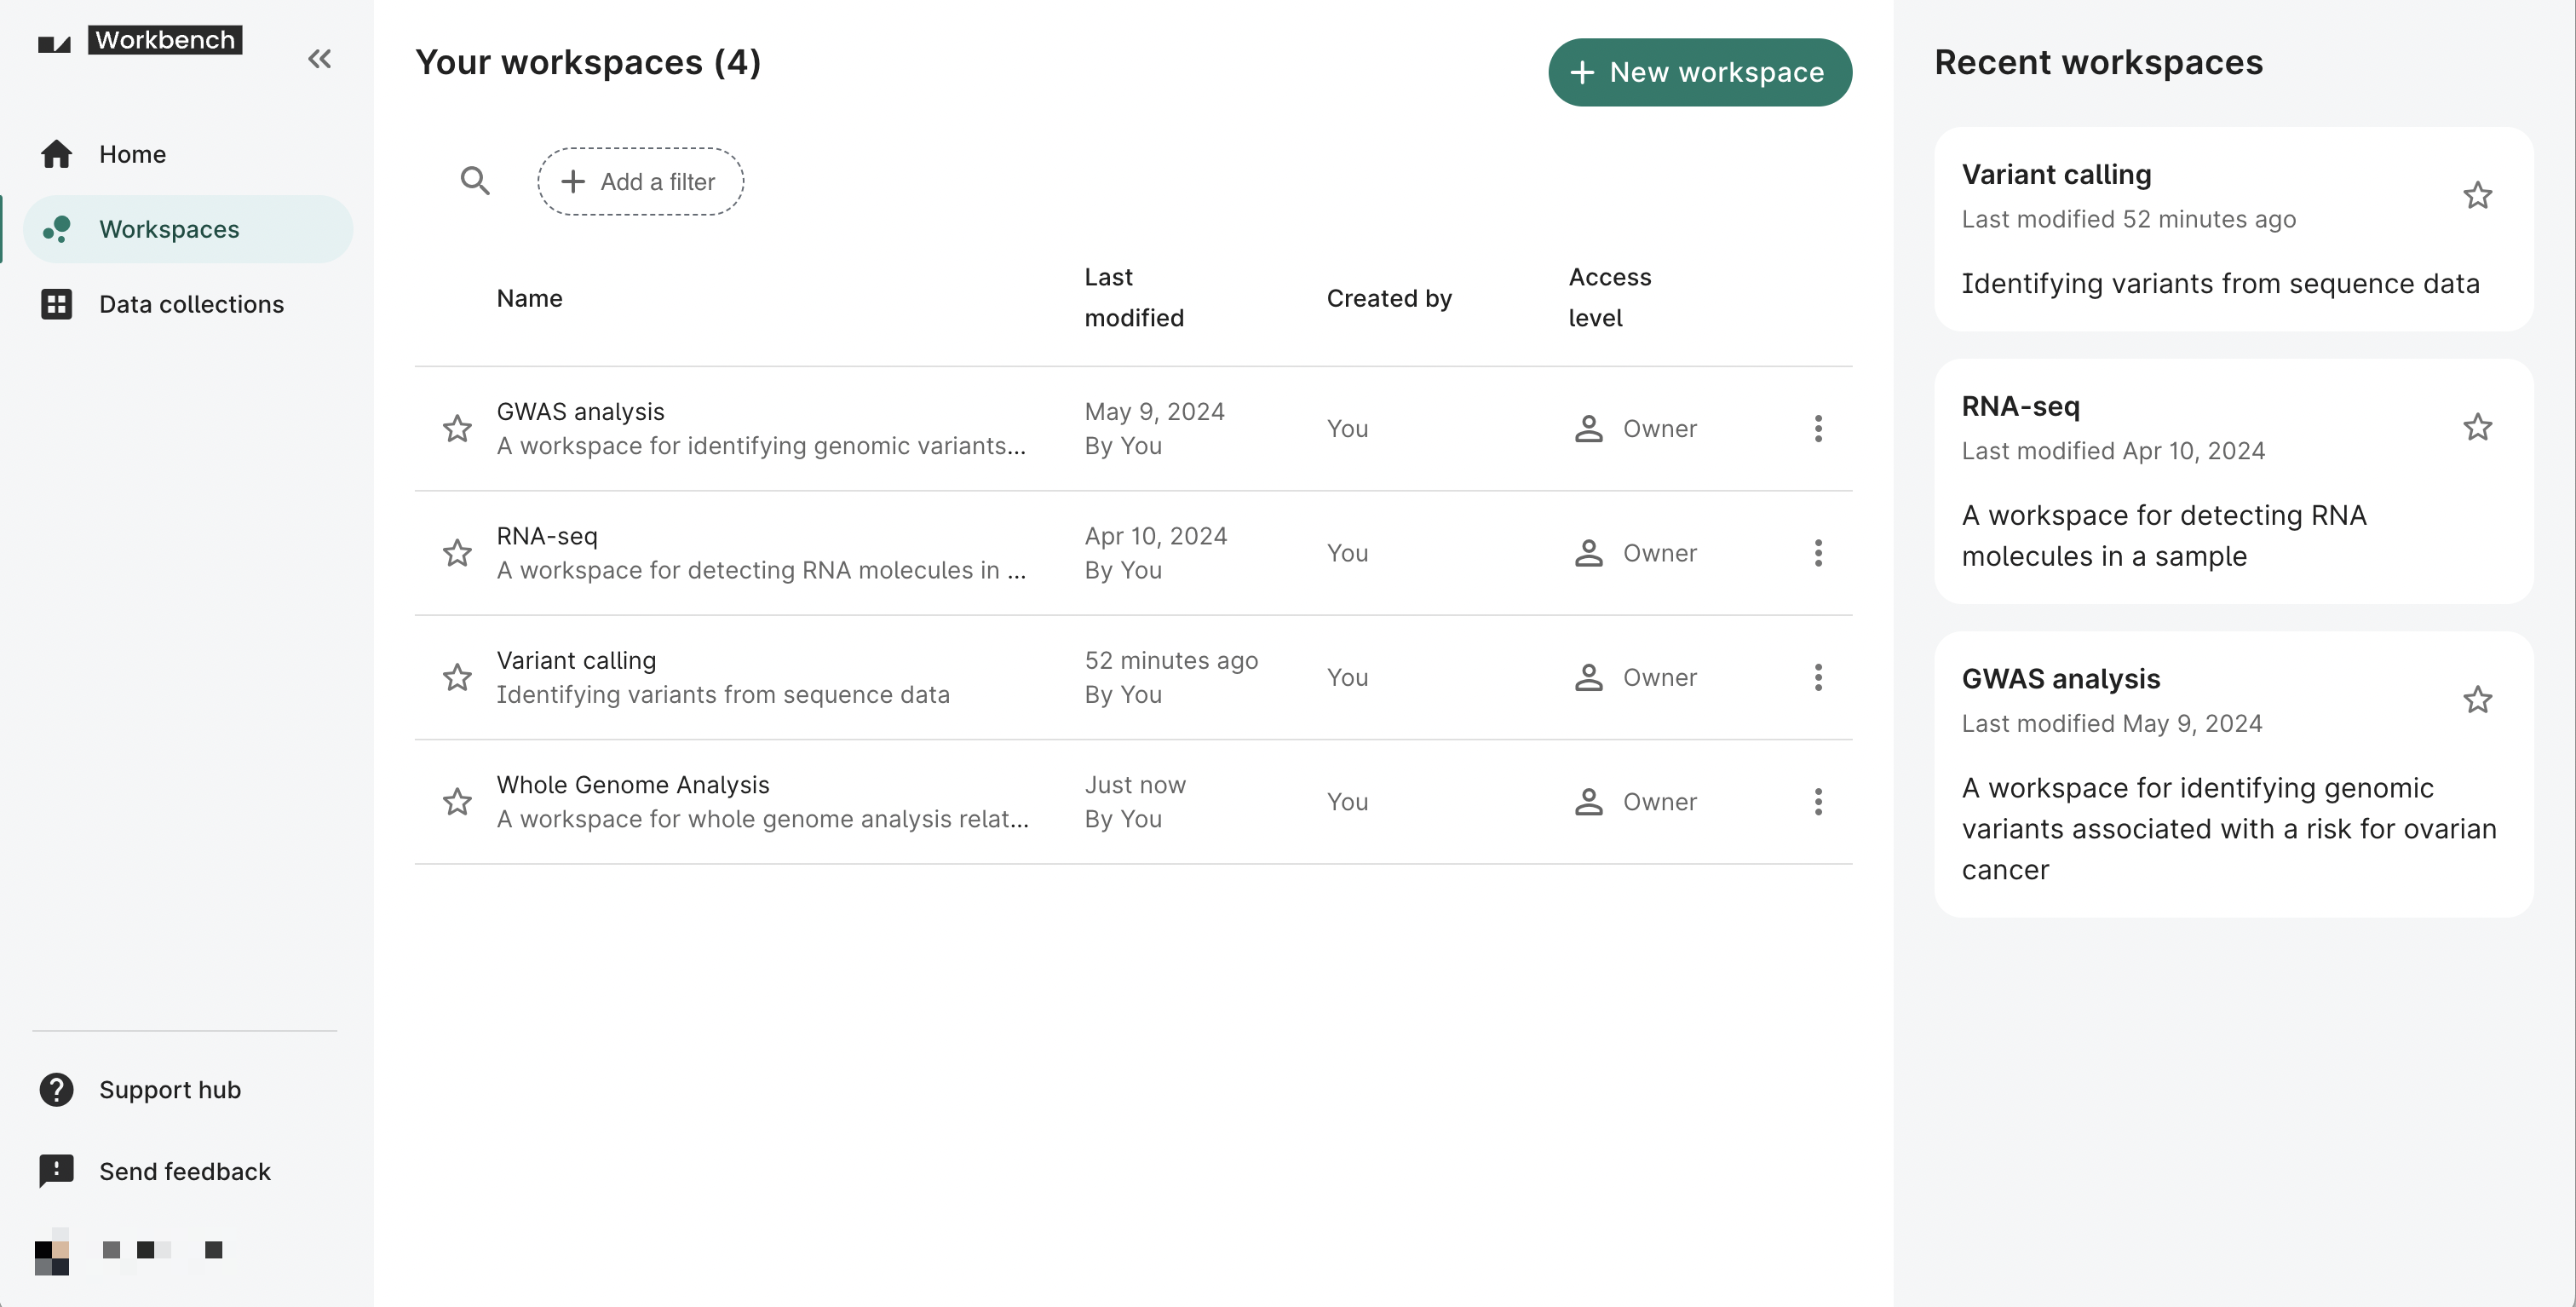
You can also access the Workspaces page directly at https://workbench.verily.com/workspaces/.
Create a new workspace
From the Workspaces page, select the New workspace button to create a new workspace. You'll need to enter a workspace name and select a pod for billing costs.
Be aware
You can't change the assigned pod once the workspace has been created.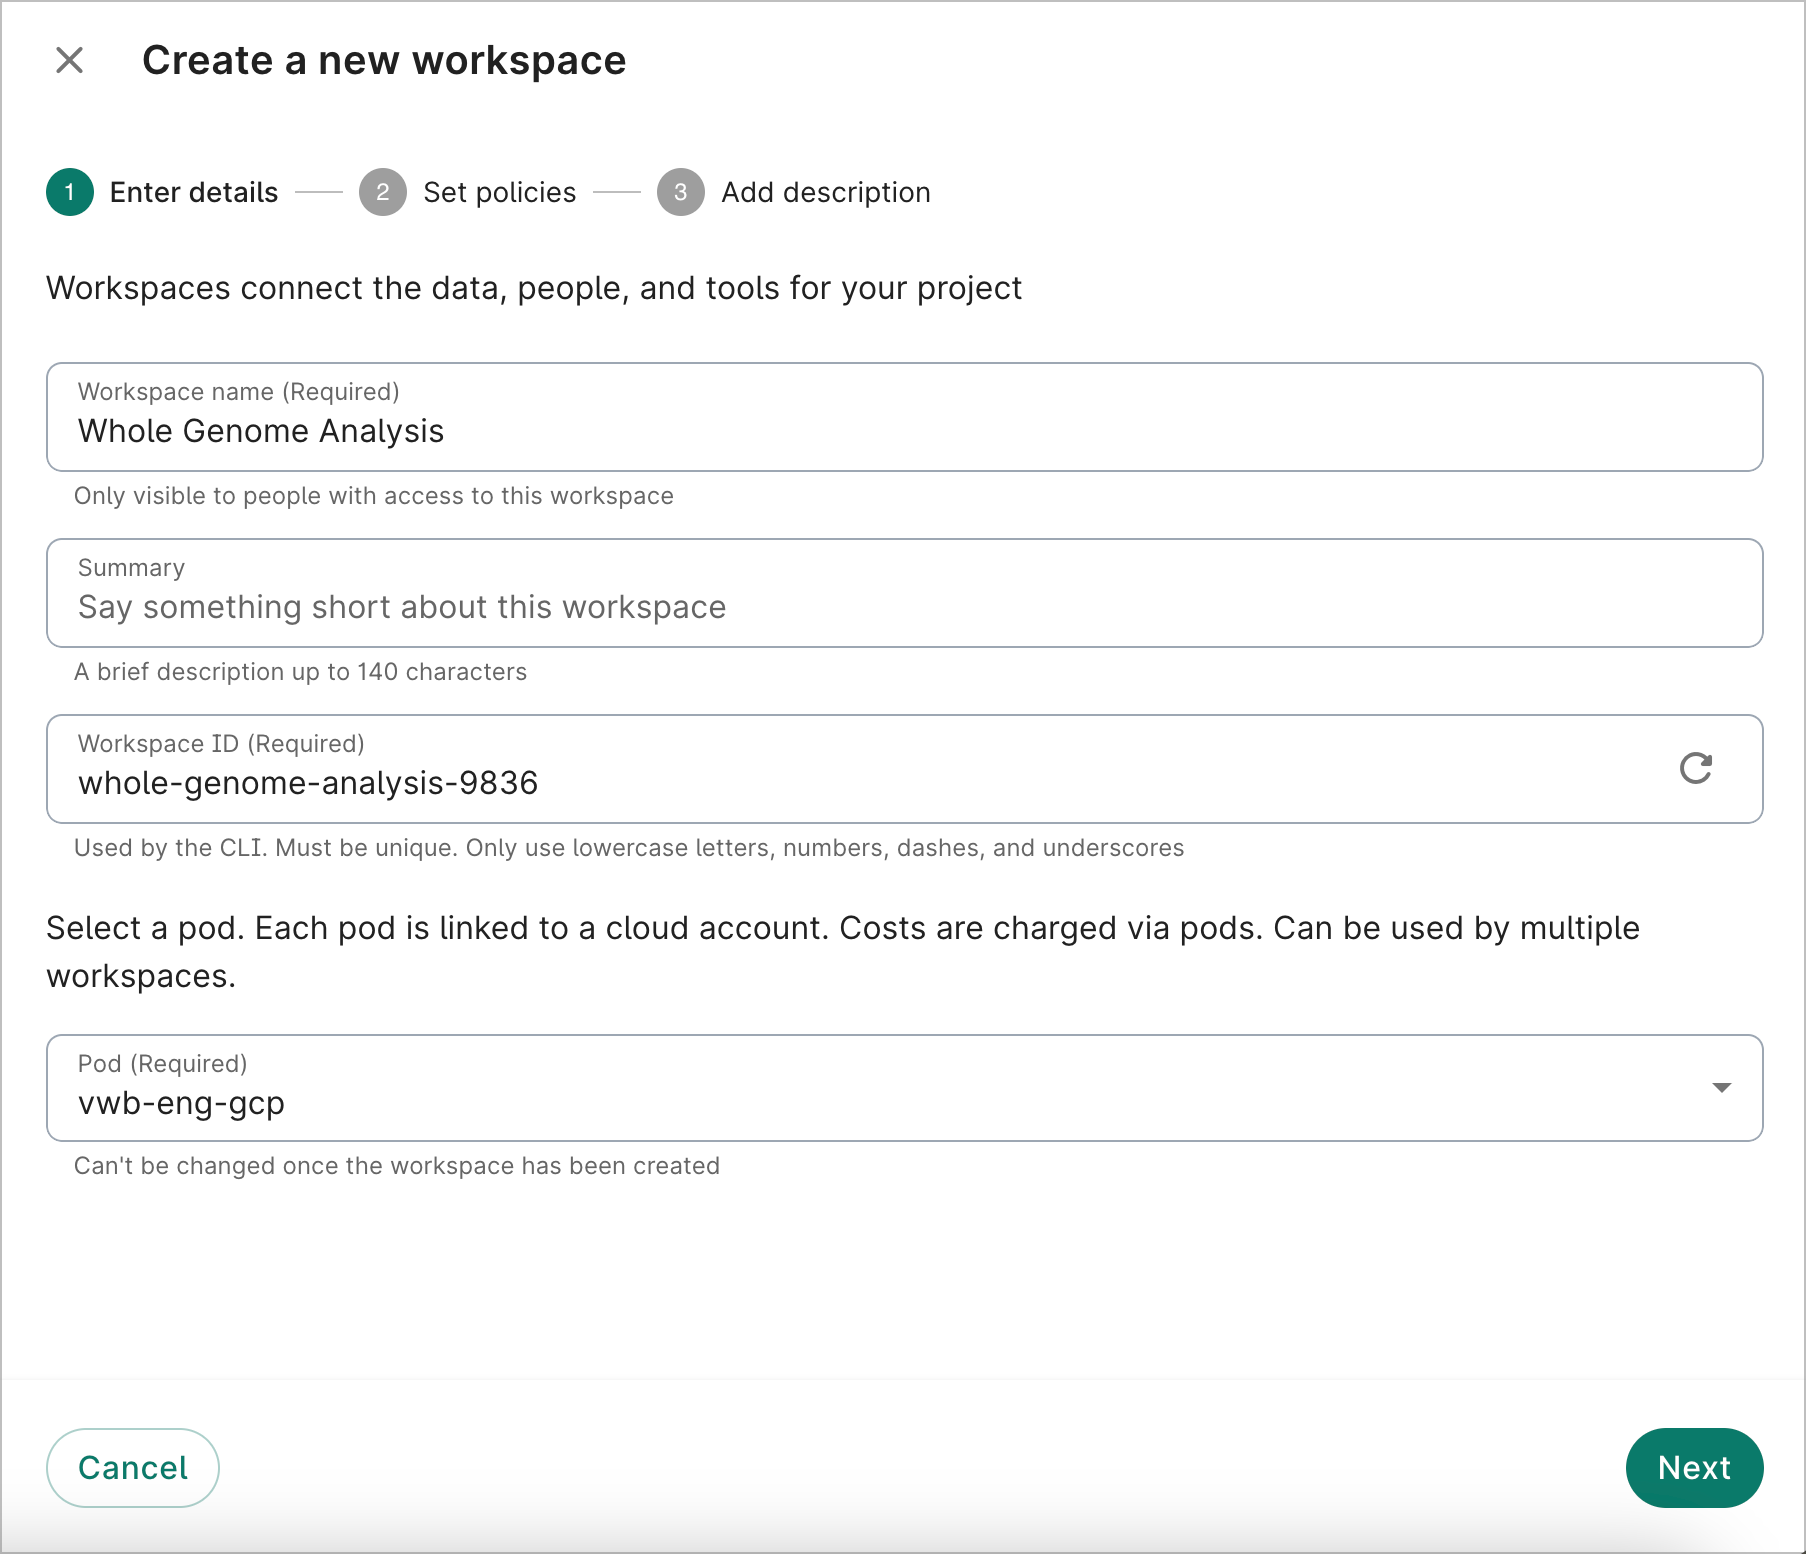
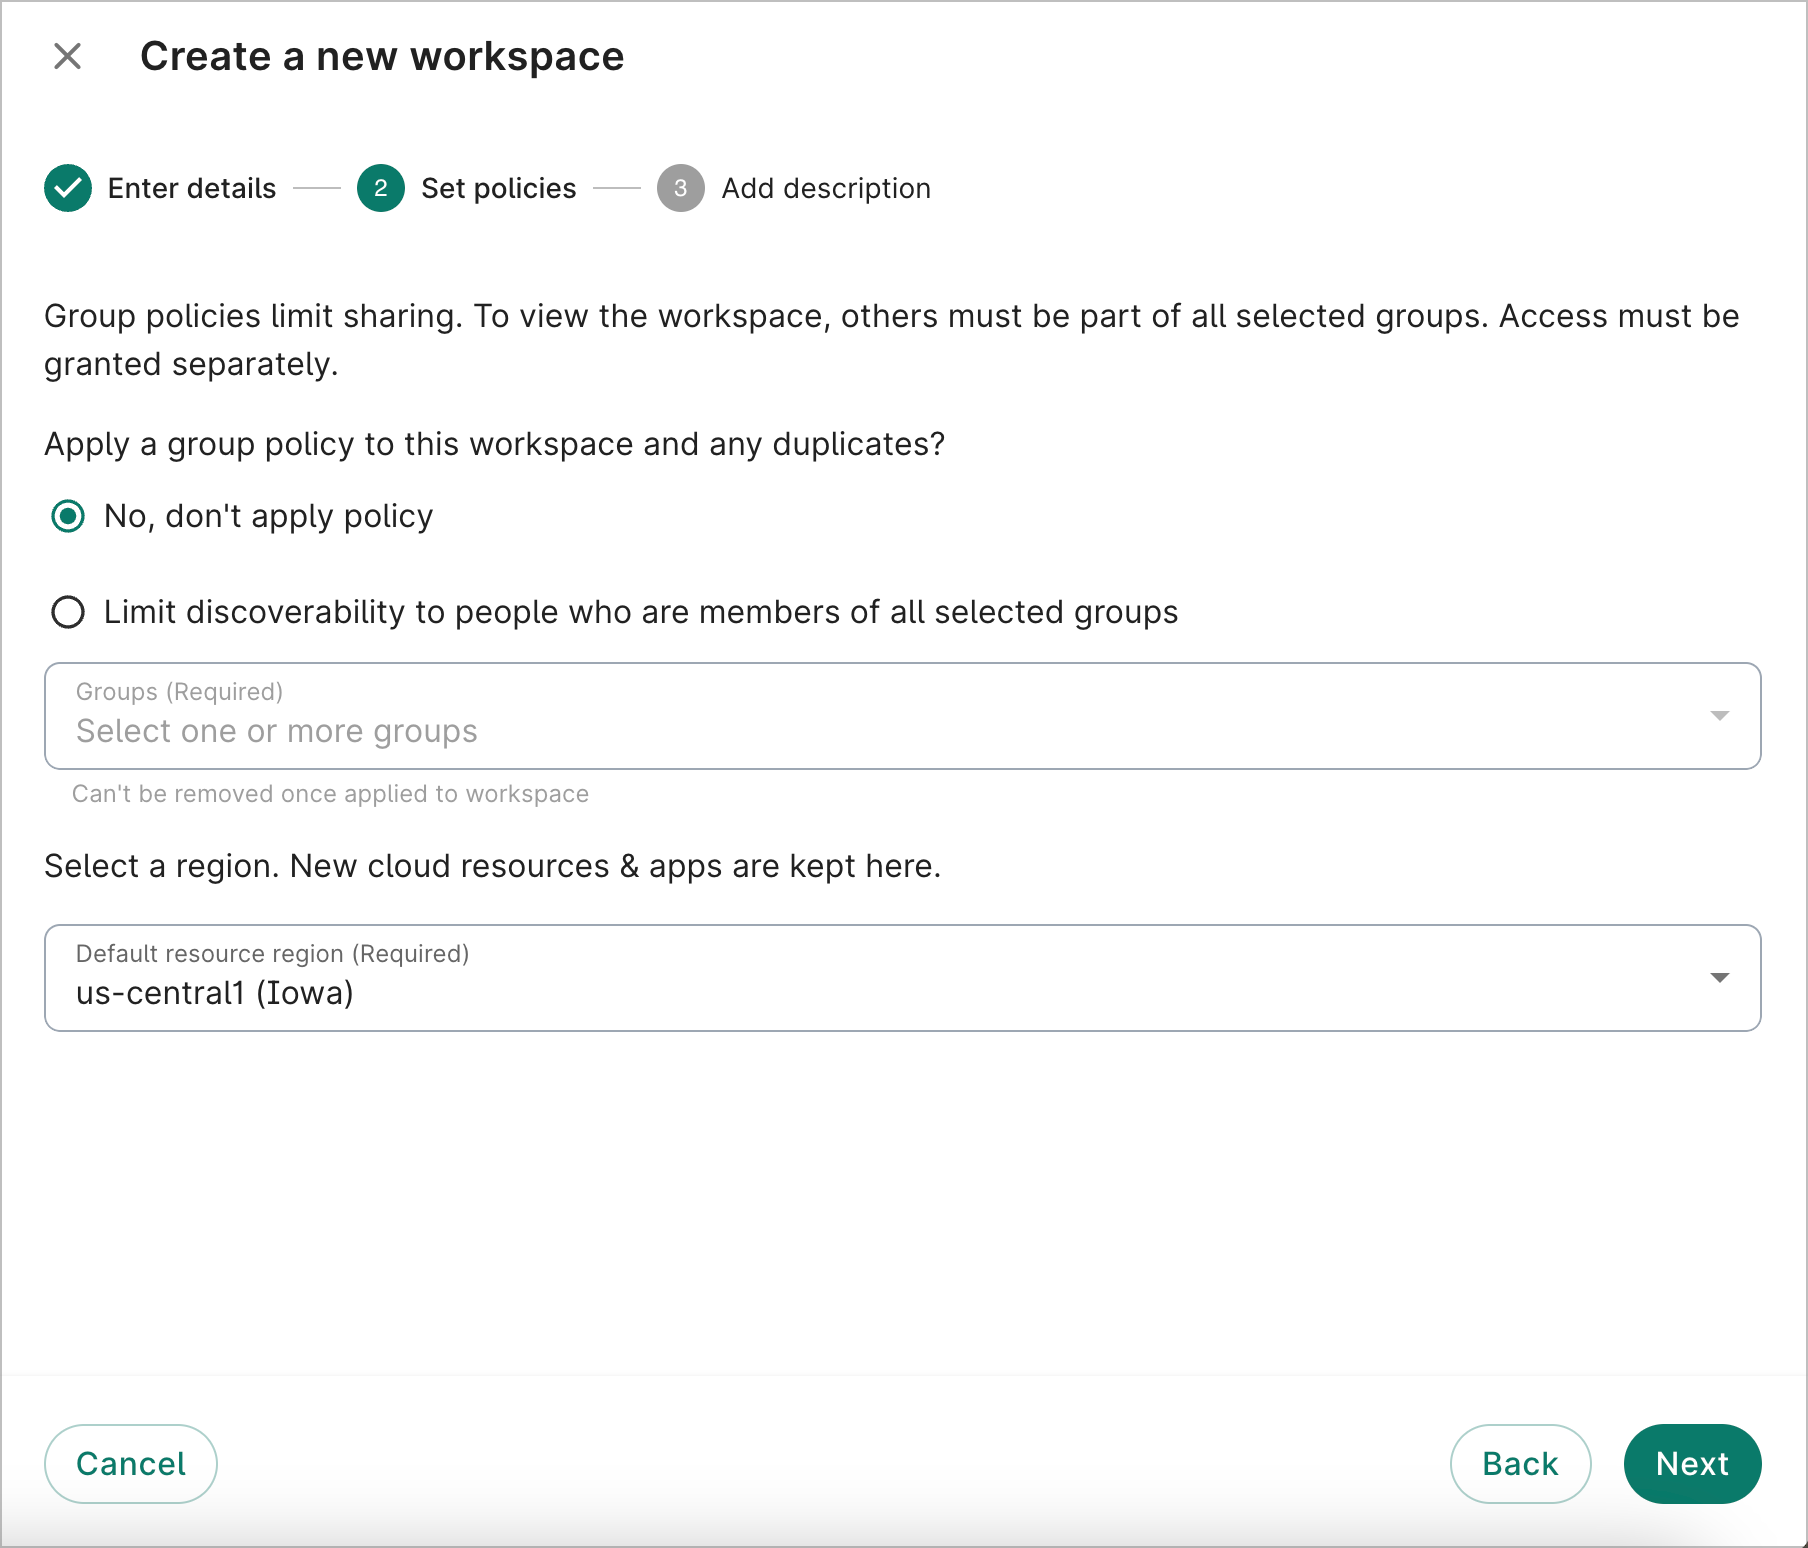
On the next page, you can apply a group policy and select a region.
On the last page, you can add a description. Select Create workspace.
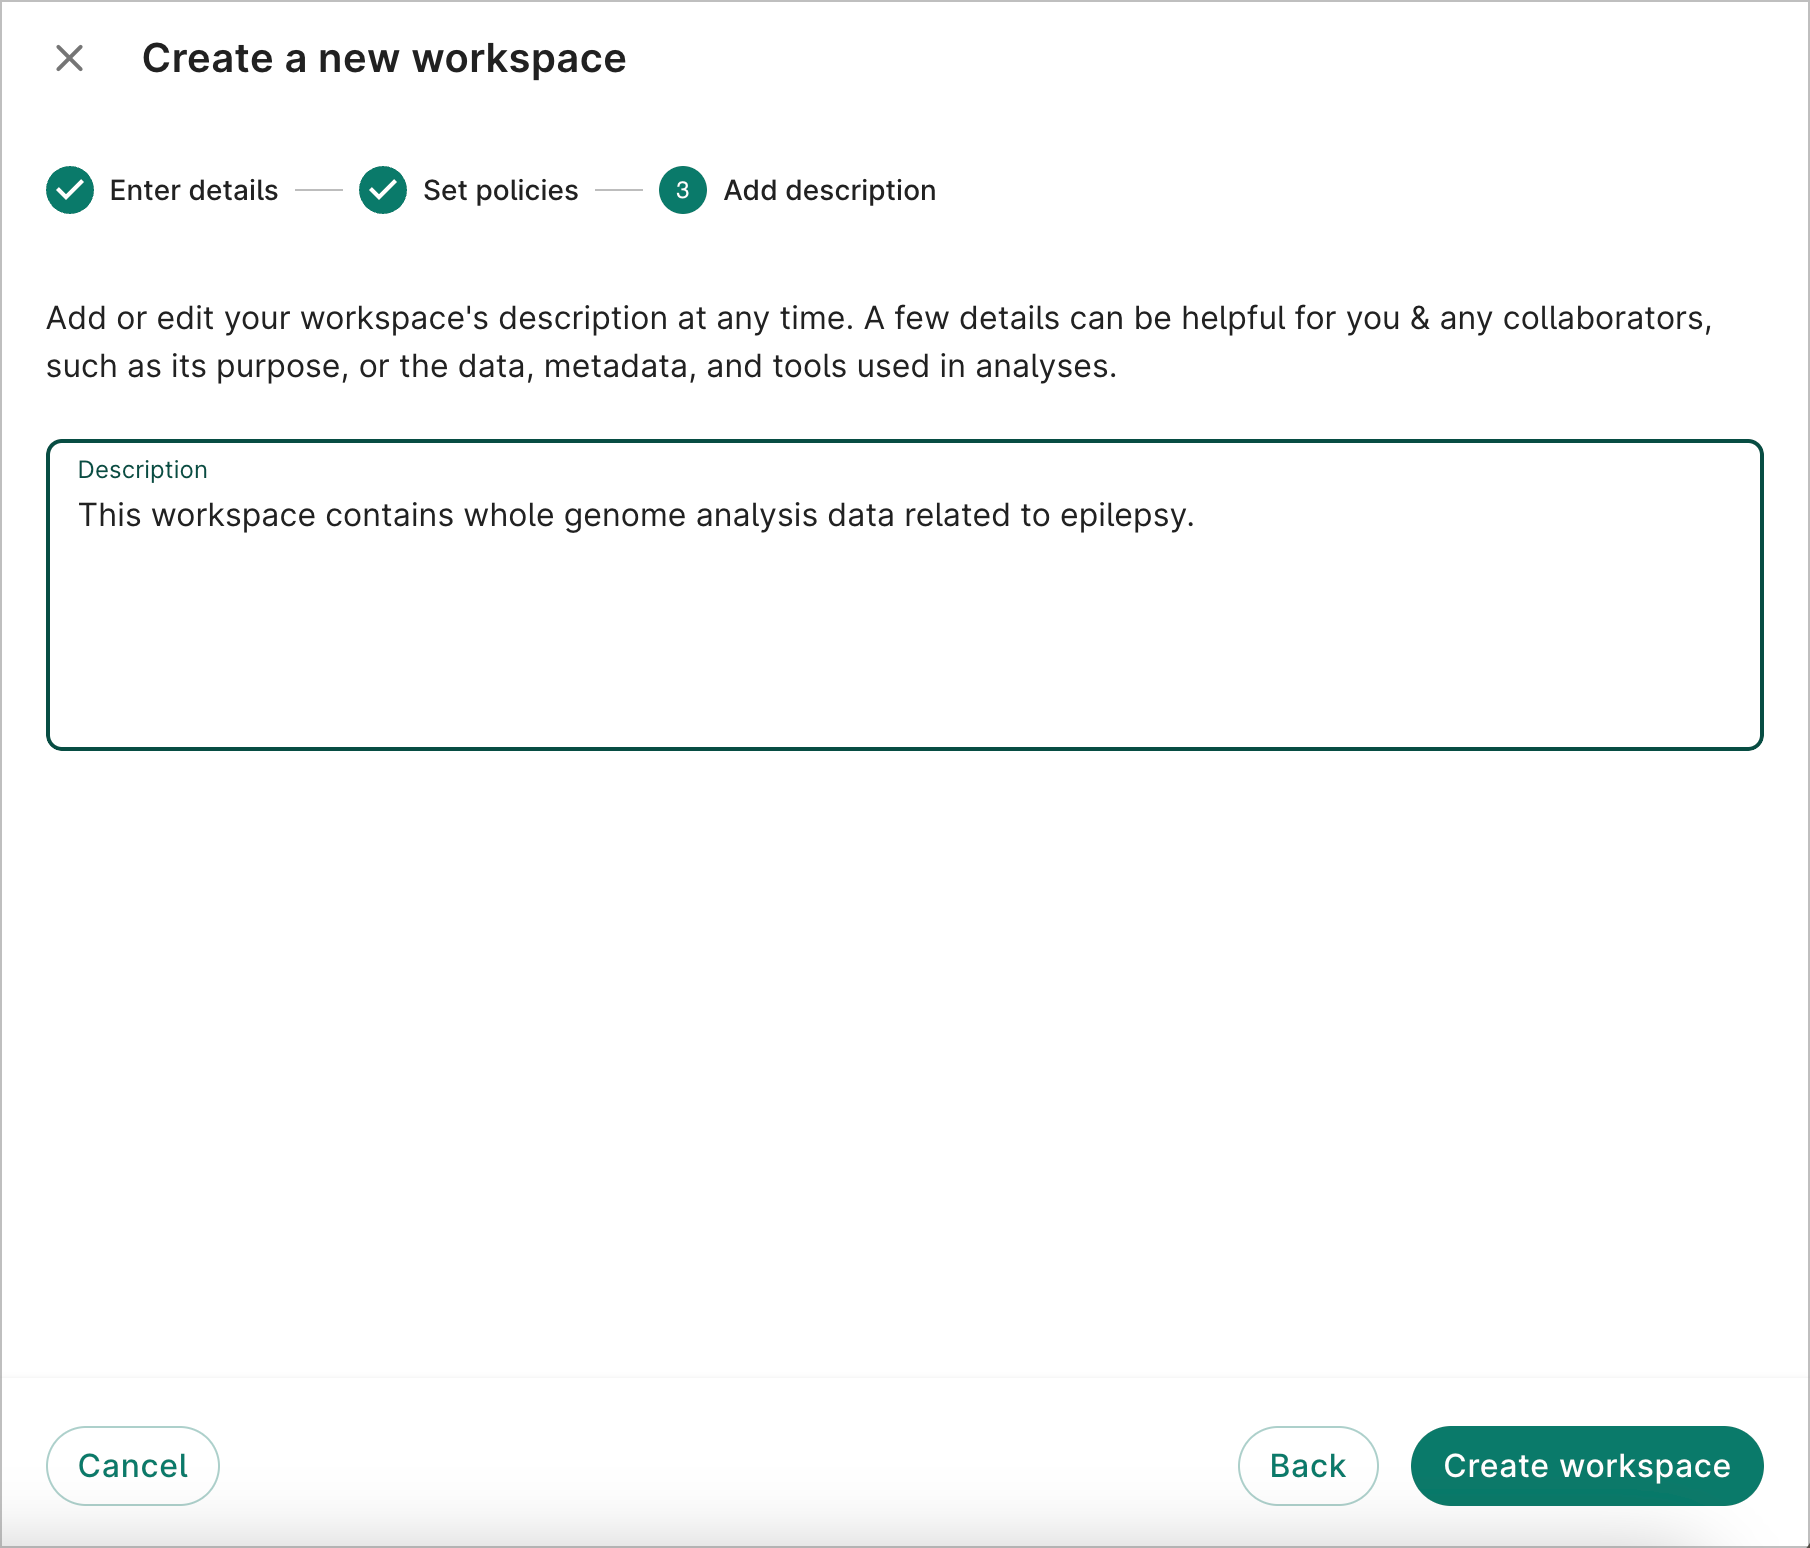
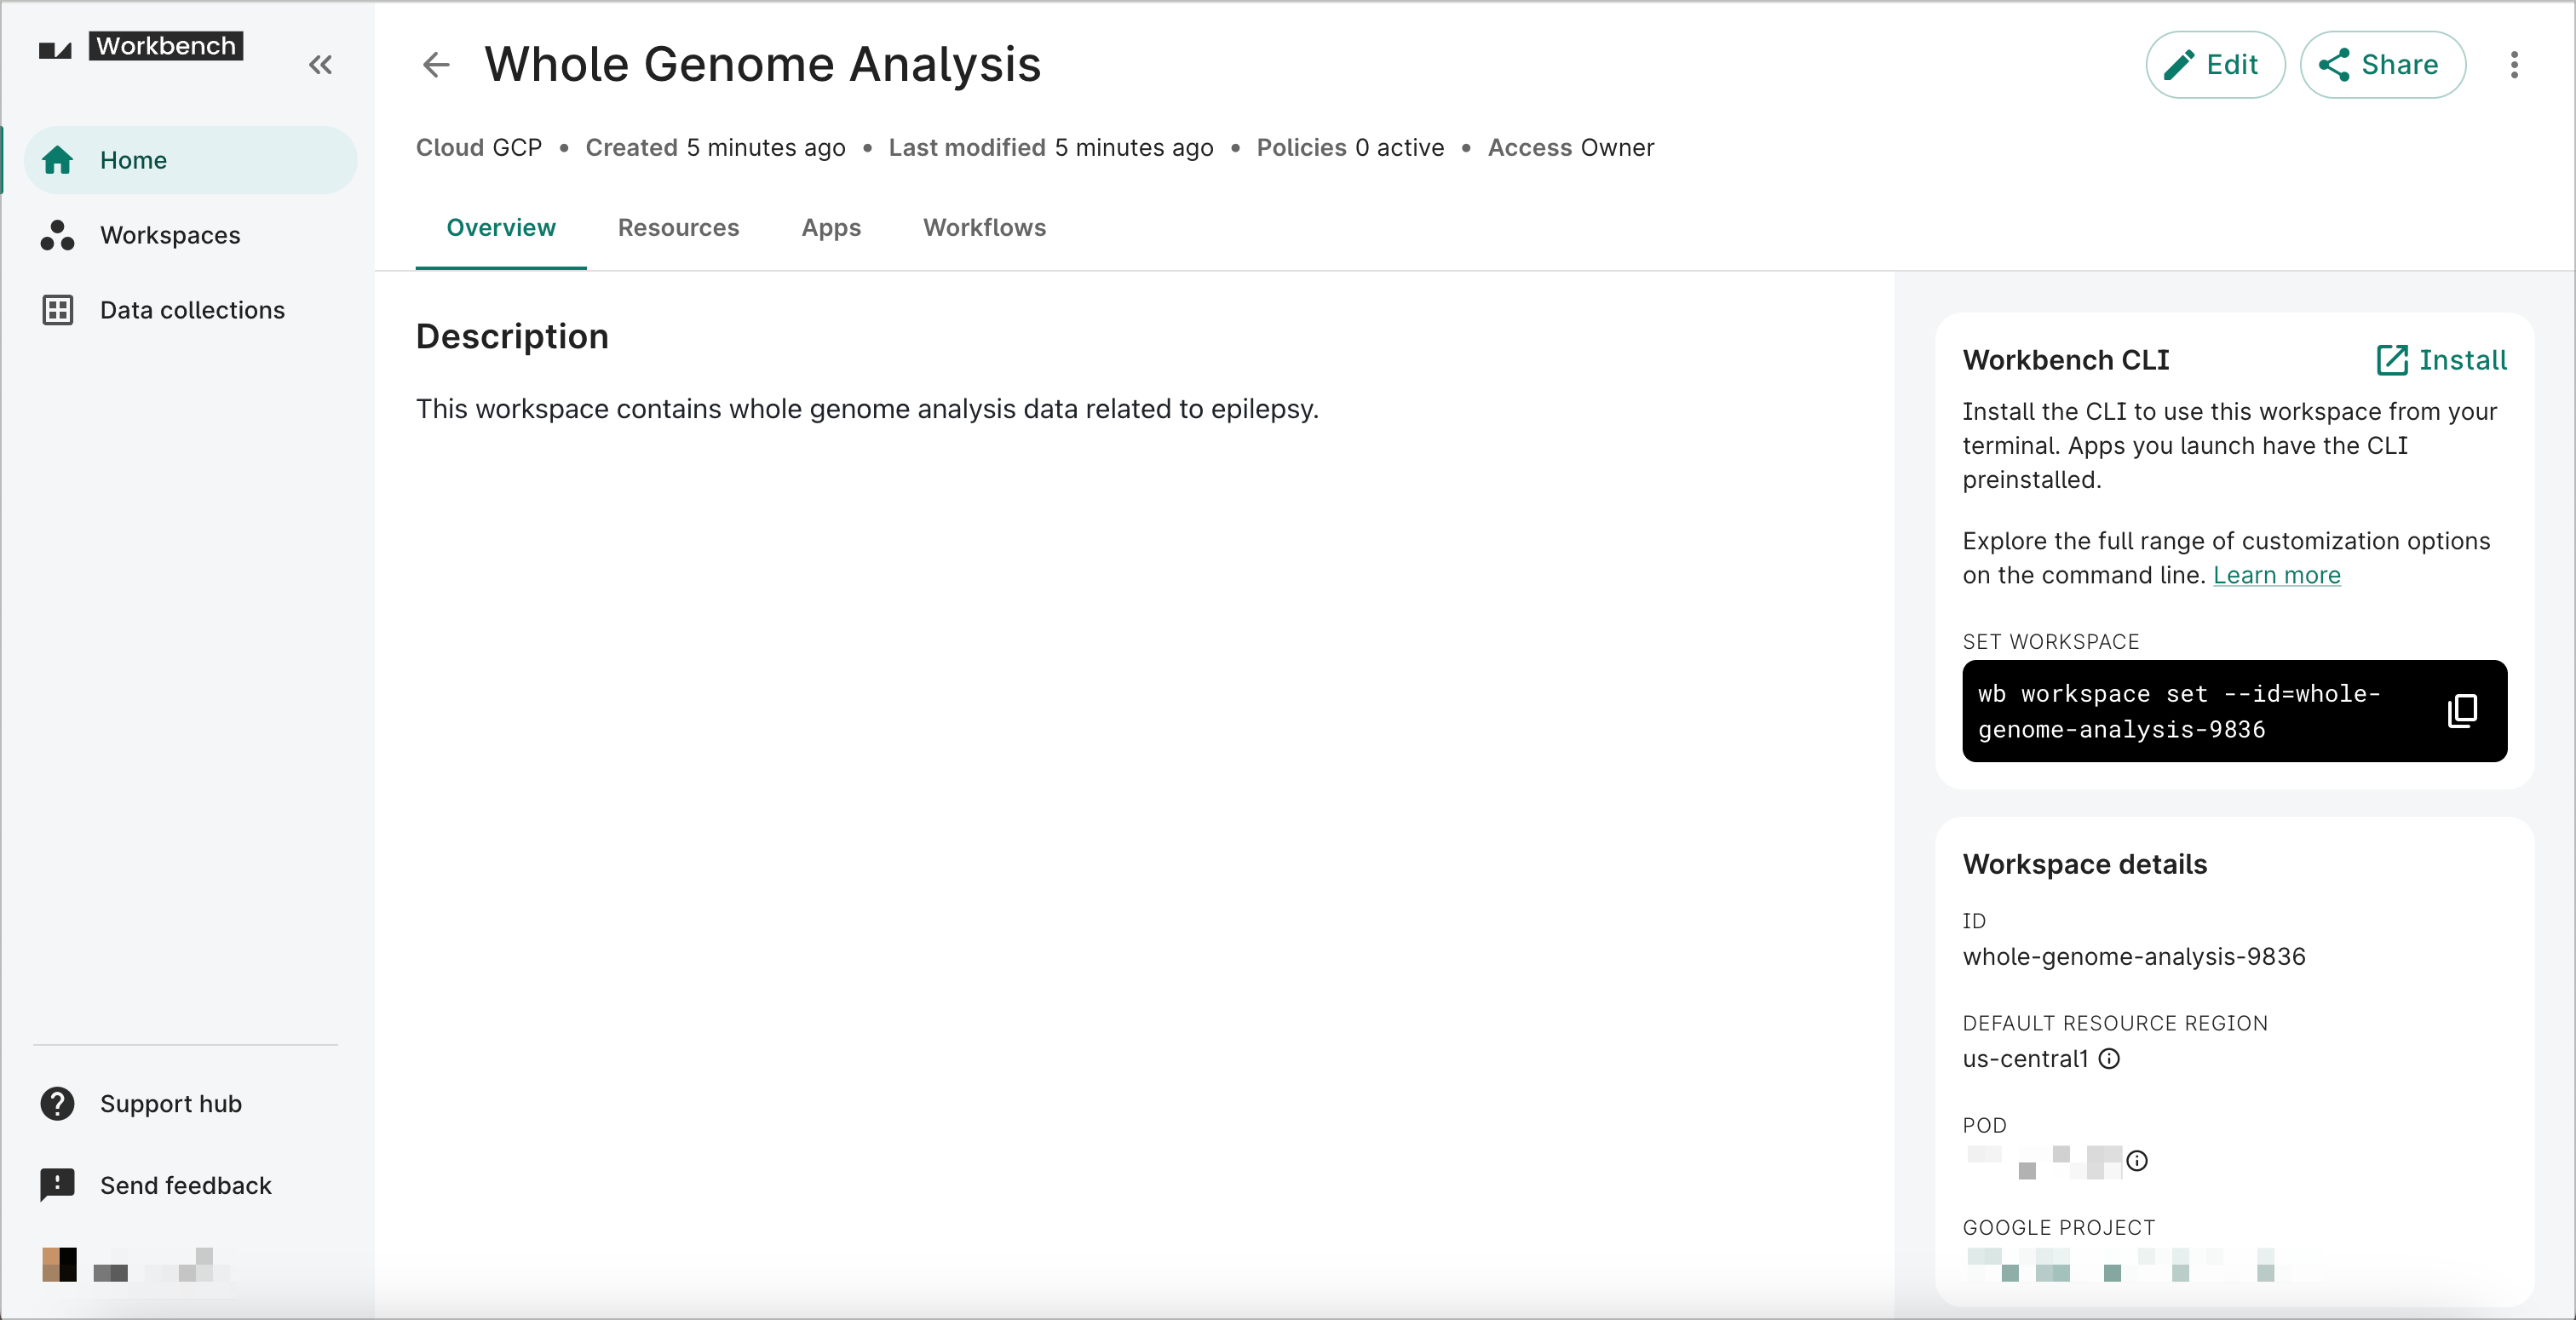
Once the workspace is created, you'll see a page with your workspace details.
Note
If you see an error when creating a workspace, it's possible you've reached your Google project quota. See Unable to create workspaces for instructions on increasing your quota.Operations on existing workspaces
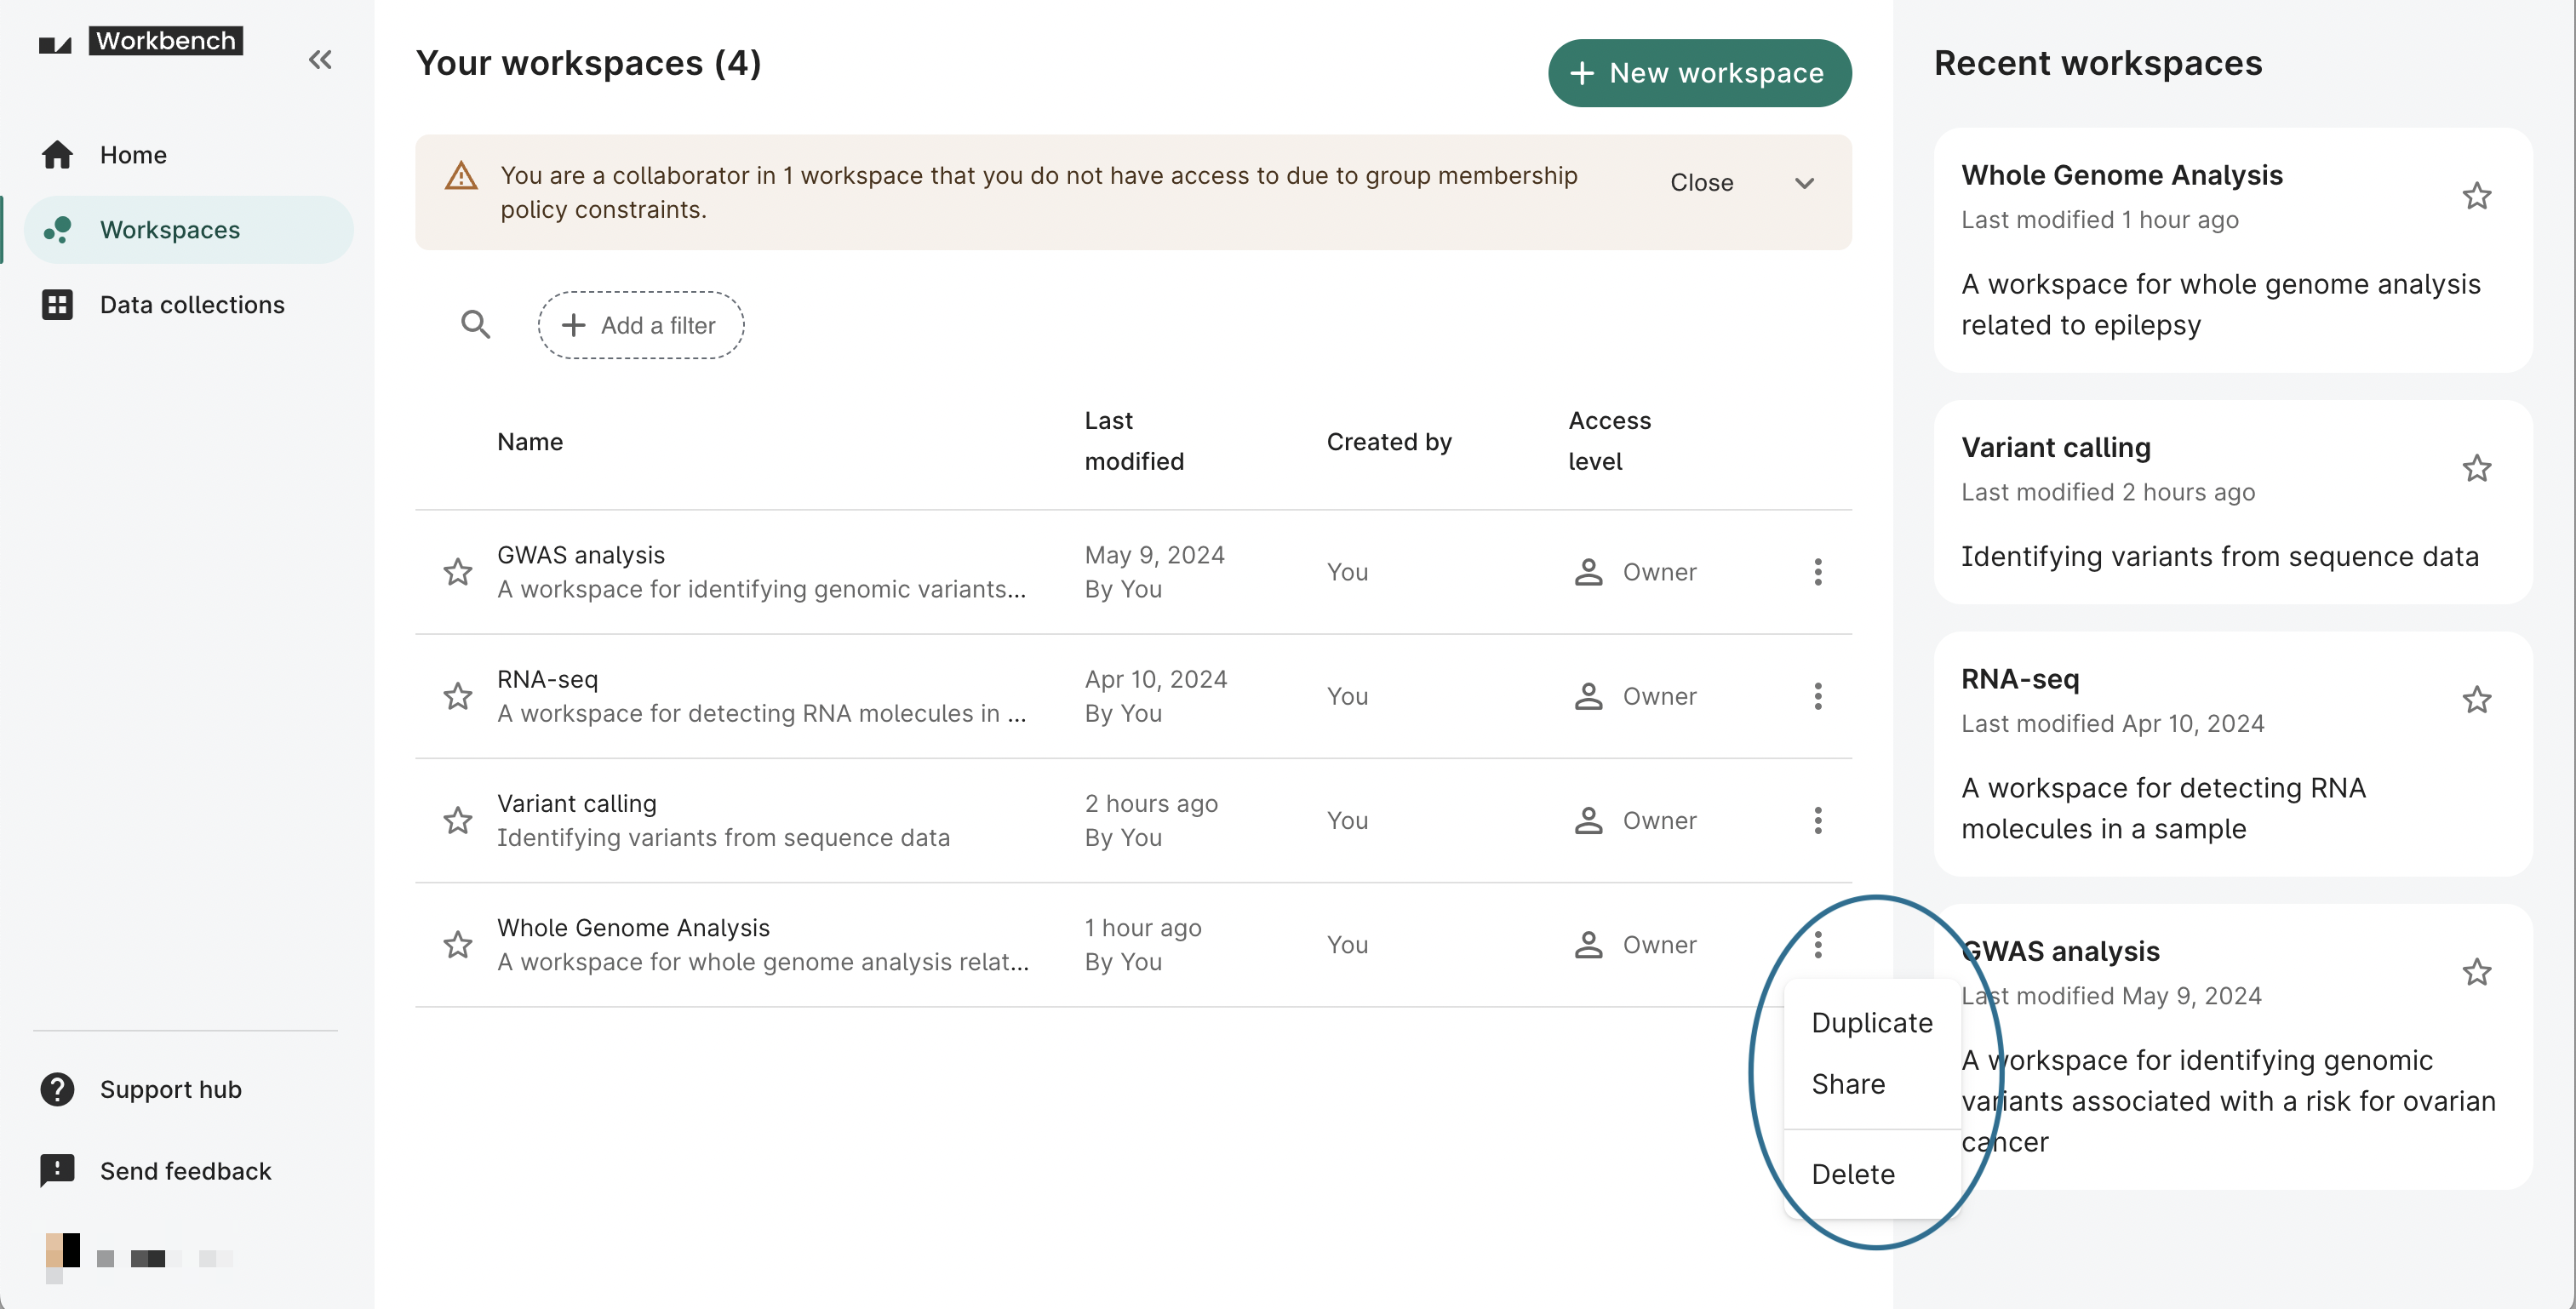
Once you've created a workspace, you can edit, share, duplicate, or delete it. You can find these operations on the Your workspaces page or on an individual workspace's page.
On the Your workspaces page, select the additional actions menu, which is represented by a three-dot icon at the end of each row in the list of workspaces. You'll see options to Duplicate, Share, and Delete a workspace.
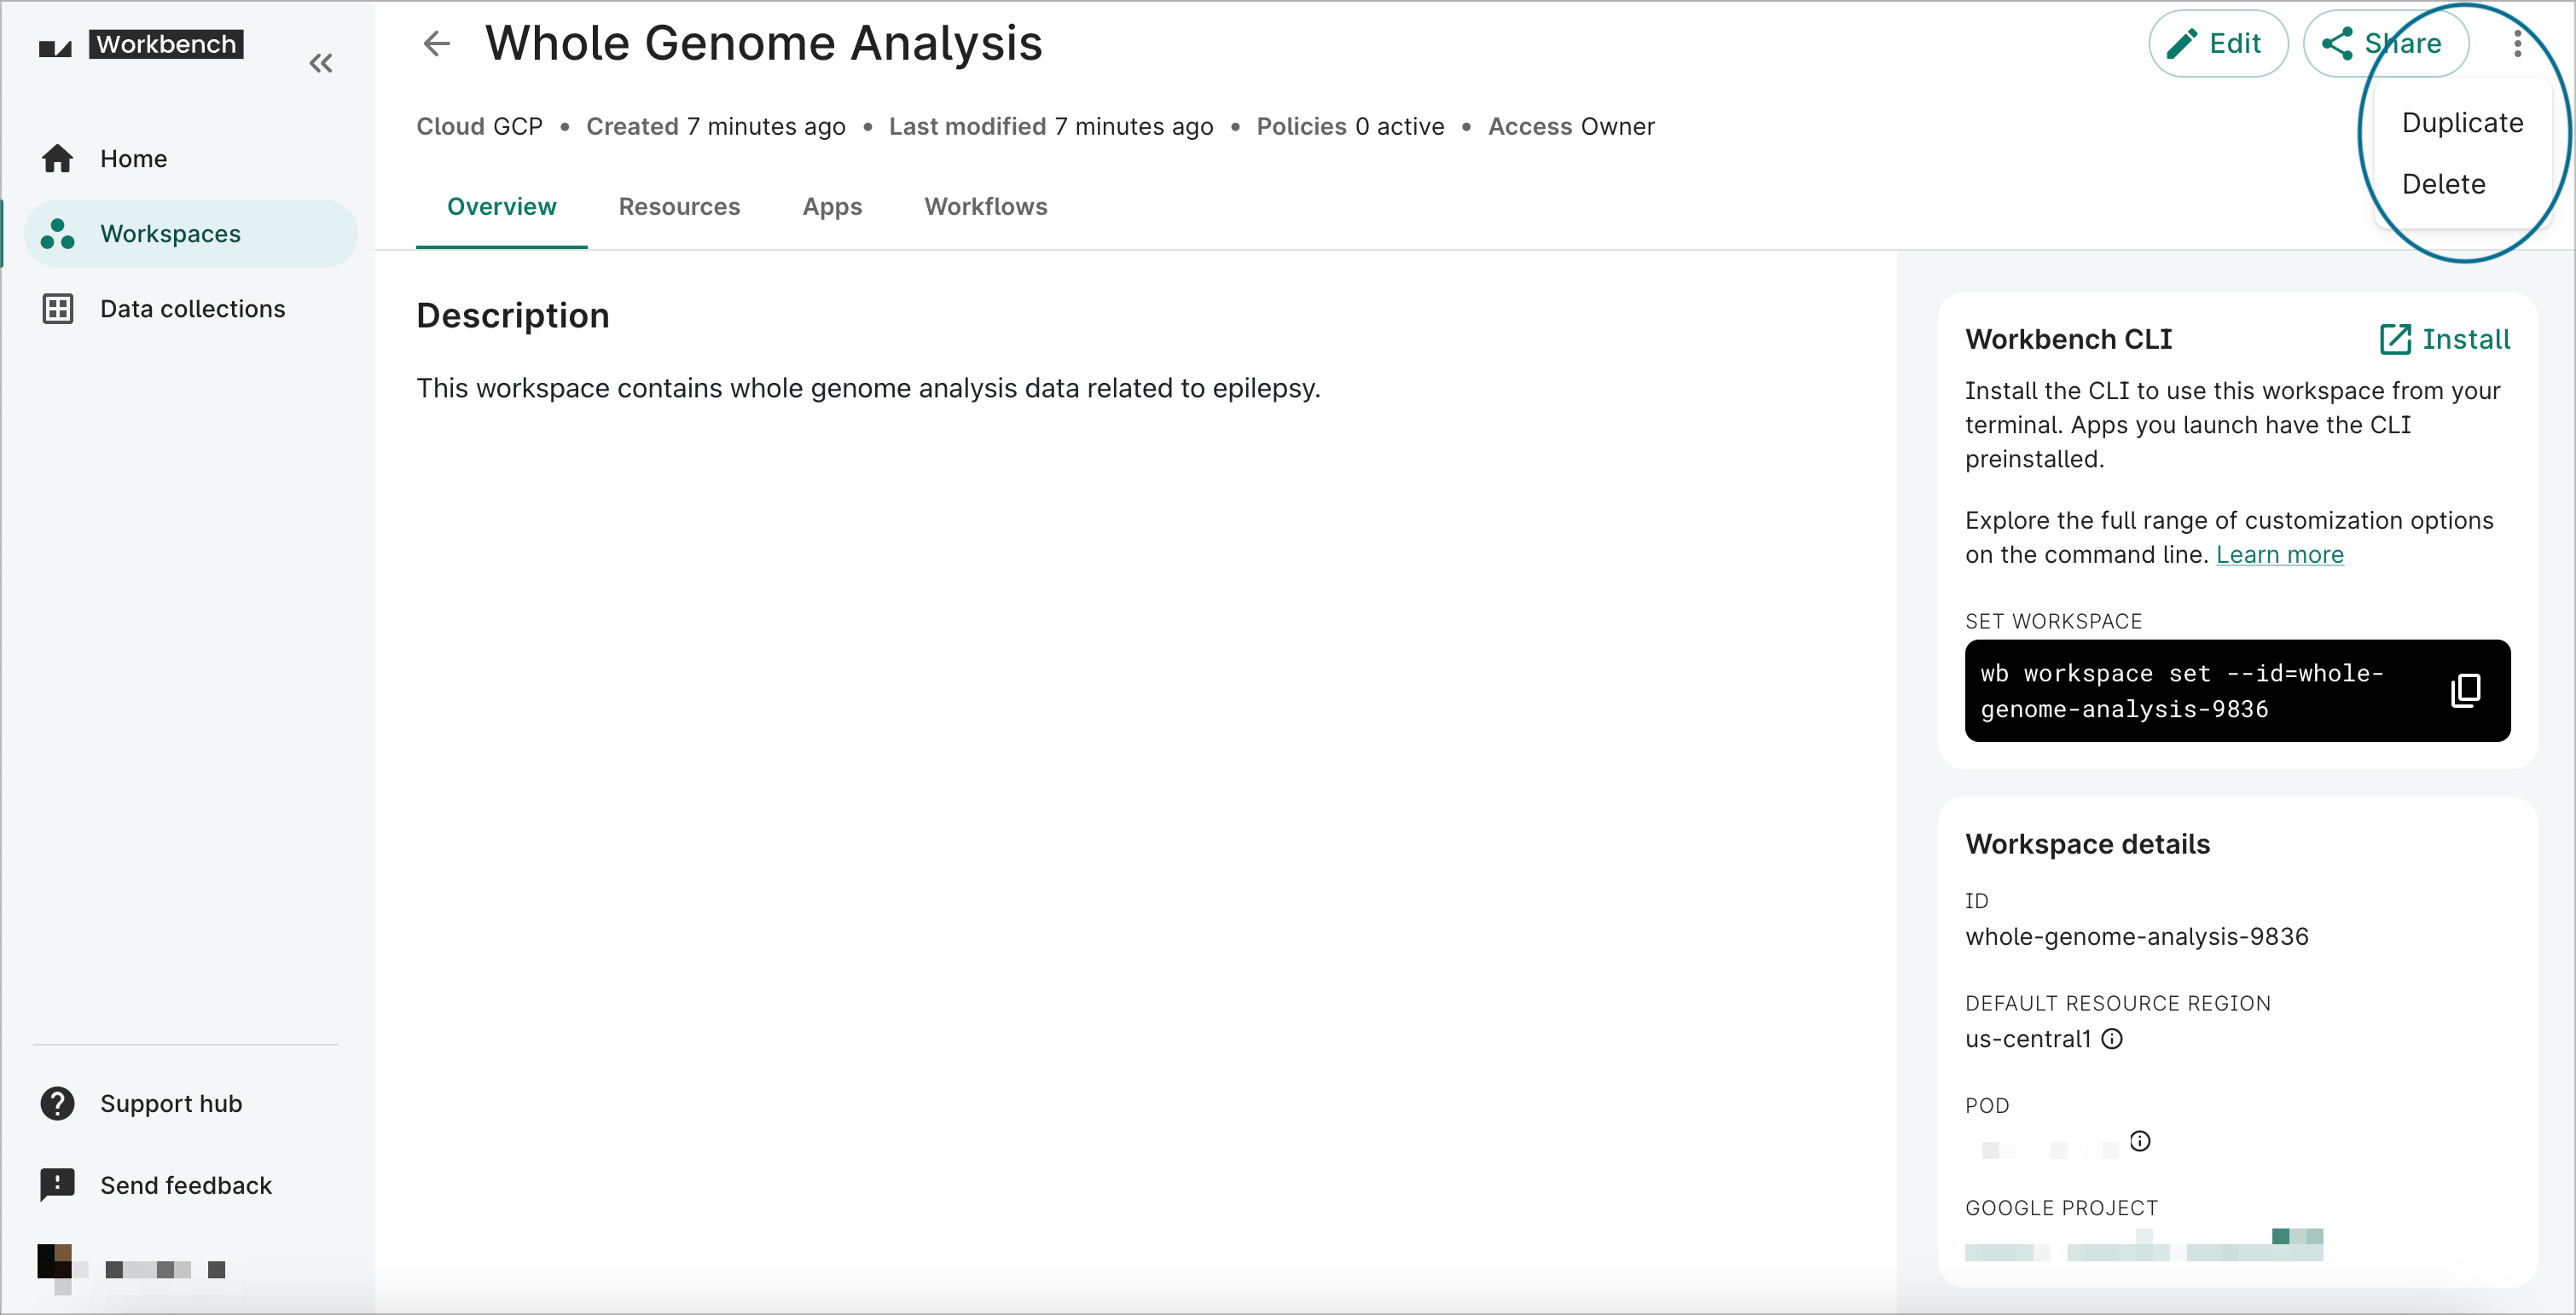
On an individual workspace's page, you can find buttons to Edit and Share the workspace in the top right corner. You can also select the additional actions menu to Duplicate or Delete the workspace.
Be aware
If the Cloud billing account linked to the pod associated to your workspace is invalid, you'll see an alert at the top of your individual workspace's page about adding a payment method. See Update workspace billing account for more information.

Edit workspace details
You can edit the name, identifier (ID), region, and description of your workspace at any time. You can also add a group policy to an existing workspace. To do so, select the Edit button on the workspace page. This will bring up the editing dialog. Edit the fields as needed, then select the Update button to save your changes.
The following video shows how to edit a workspace by adding a description, which will then appear in the Overview tab. The description field can include basic Markdown content.
Be aware
You cannot edit or remove the group policy of a workspace after it has been created. See Access control & sharing for more details.
Editing the ID of a workspace will break any URLs linking to the workspace, so you and your collaborators will need to update any existing bookmarks. Your collaborators will still have access to the workspace if you've shared it with them previously.
If you change the region of a workspace, any new controlled resources that you create will be created in the new workspace region. The region of existing resources will not be updated.
Share a workspace
Note
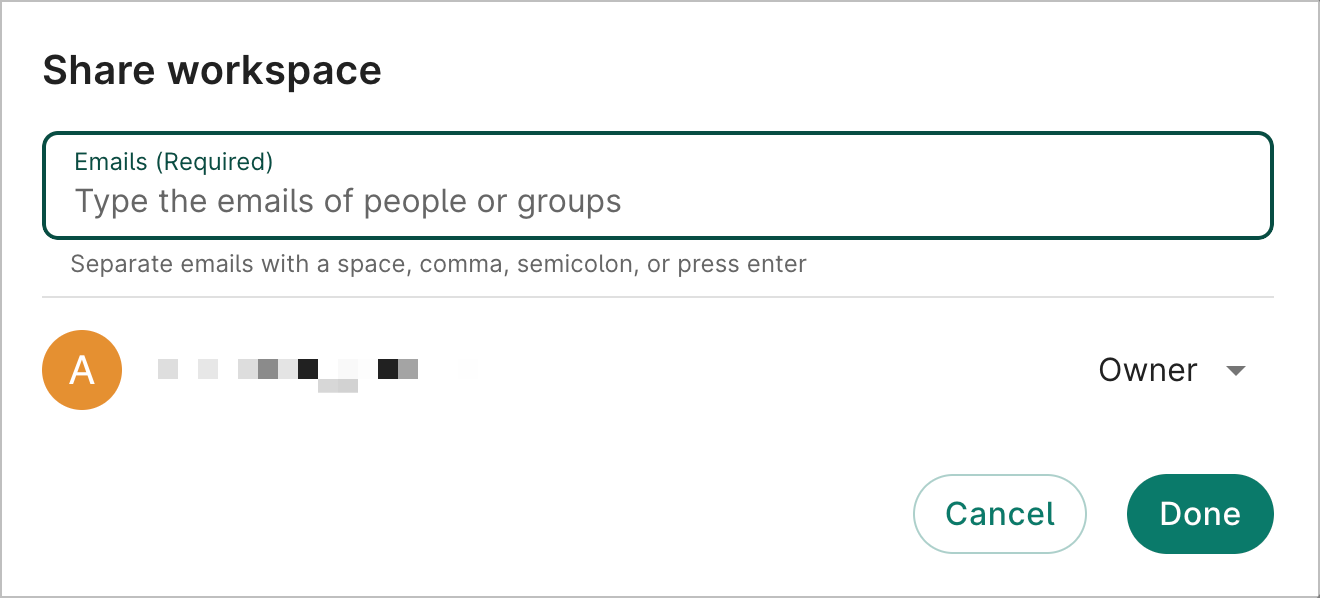
Only workspace Owners can share workspaces.To share a workspace, select the Share button.
In the sharing dialog, add the people and Workbench groups you want to share with, and indicate the level of access you want to give them. This determines what privileges they will have in the workspace. Select Done to apply the changes.
To learn more about access levels, privileges, and implications for access to resources, see Access control & sharing.
Duplicate a workspace
To duplicate a workspace, select Duplicate.
Duplicating a workspace will create a copy of the workspace, including controlled and referenced resources, that you can then modify.
Be aware
Cloud apps are not copied over when a workspace is duplicated.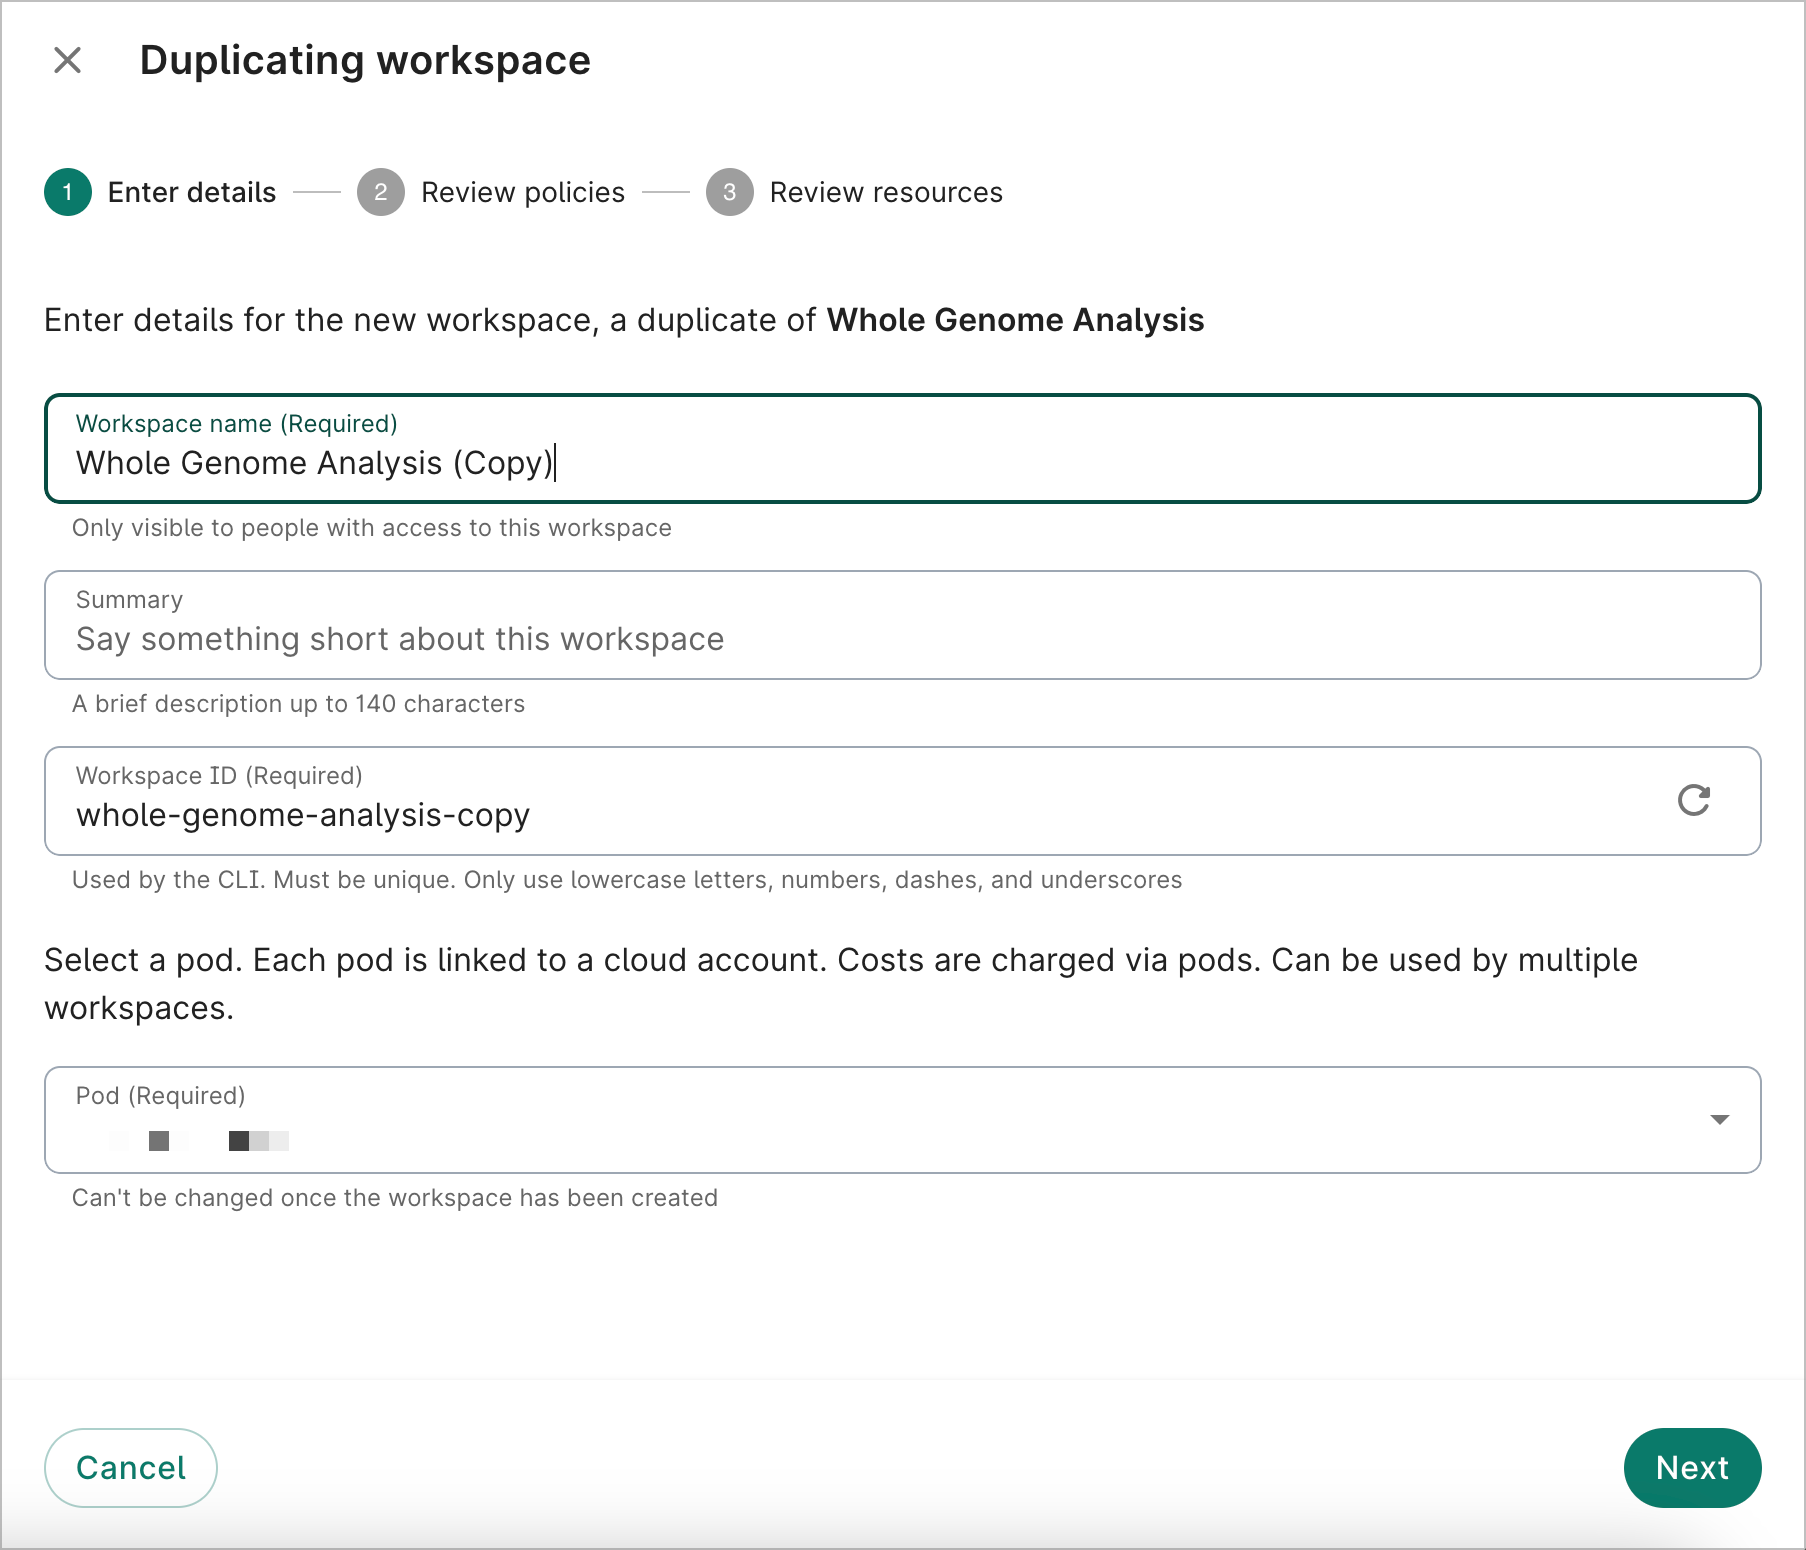
To learn more about how access to resources works in duplicated workspaces, see Access control & sharing.
Delete a workspace
Note
Only workspace Owners can delete workspaces.To delete a workspace, select Delete. A dialog will appear, asking you to confirm that you no longer need the workspace and its contents.
Be aware
When you delete a workspace, any controlled resource attached to that workspace will be deleted permanently.To save data stored in a controlled resource, you must copy it to a different resource that does not belong to that workspace. It's not possible to recover deleted resources, so please confirm that you've accounted for all data before deleting a workspace.
Last Modified: 20 May 2025