Use the Cromwell engine to run WDL workflows
Categories:
Prior reading: Workflows in Verily Workbench: Cromwell, dsub, and Nextflow
Purpose: This document provides detailed instructions for running and monitoring Cromwell workflows in Workbench.
Run and monitor Cromwell workflows
Verily Workbench provides built-in support for running and monitoring WDL-based workflows via the Cromwell workflow engine. Right within the UI, you can add workflows, run them with a set of inputs, and monitor their execution.
Note
The following steps are for running one job at a time. To perform batch jobs, see Create batch jobs.Add workflows
Before running a workflow on Workbench, it first needs to be added to the workspace. Workbench supports WDL files stored in Google Cloud Storage and GitHub. This article covers adding workflow files from Google Cloud Storage. For GitHub, see Integrate GitHub with Workbench.
To add a workflow, you first need a Google Cloud Storage bucket to add the source WDL file to. Create a bucket if one does not already exist. To do so, navigate to the Resources tab in a workspace, click the + New resource button, and select New Cloud Storage bucket.
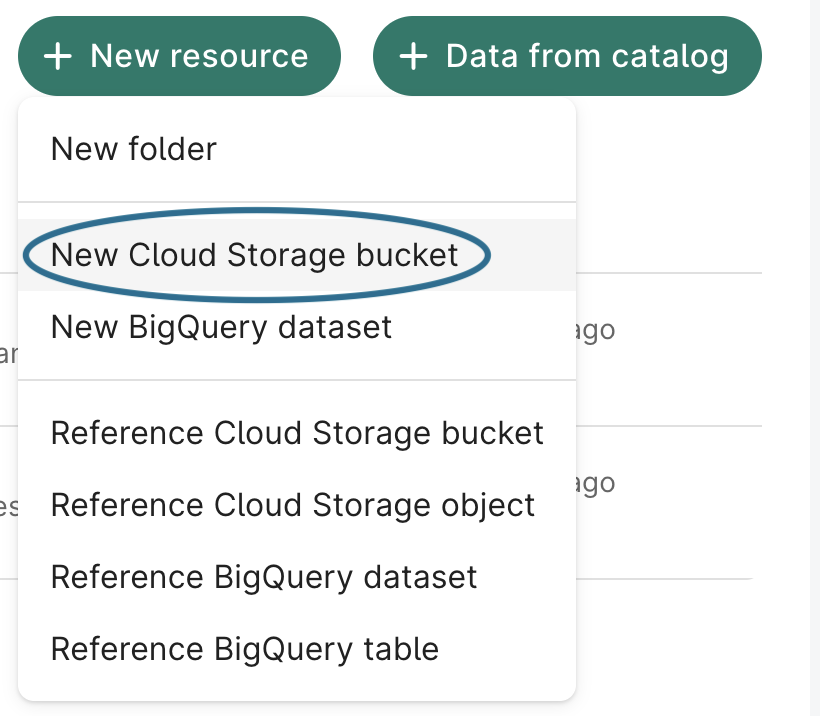
Next, upload the source WDL file to the bucket with gcloud storage. Some alternative methods for workflow upload include:
- Creating and opening a cloud notebook app, which has gcloud storage already installed.
- Uploading the WDL file via the Google Cloud Console.
- Using the Add File Via URL feature to specify a URL to the given workflow.
Workbench supports the execution of workflows with sub-workflows, so if your workflow is composed of multiple WDLs, add them all to the bucket.
gcloud storage cp path/to/workflow.wdl gs://some-bucket-name/
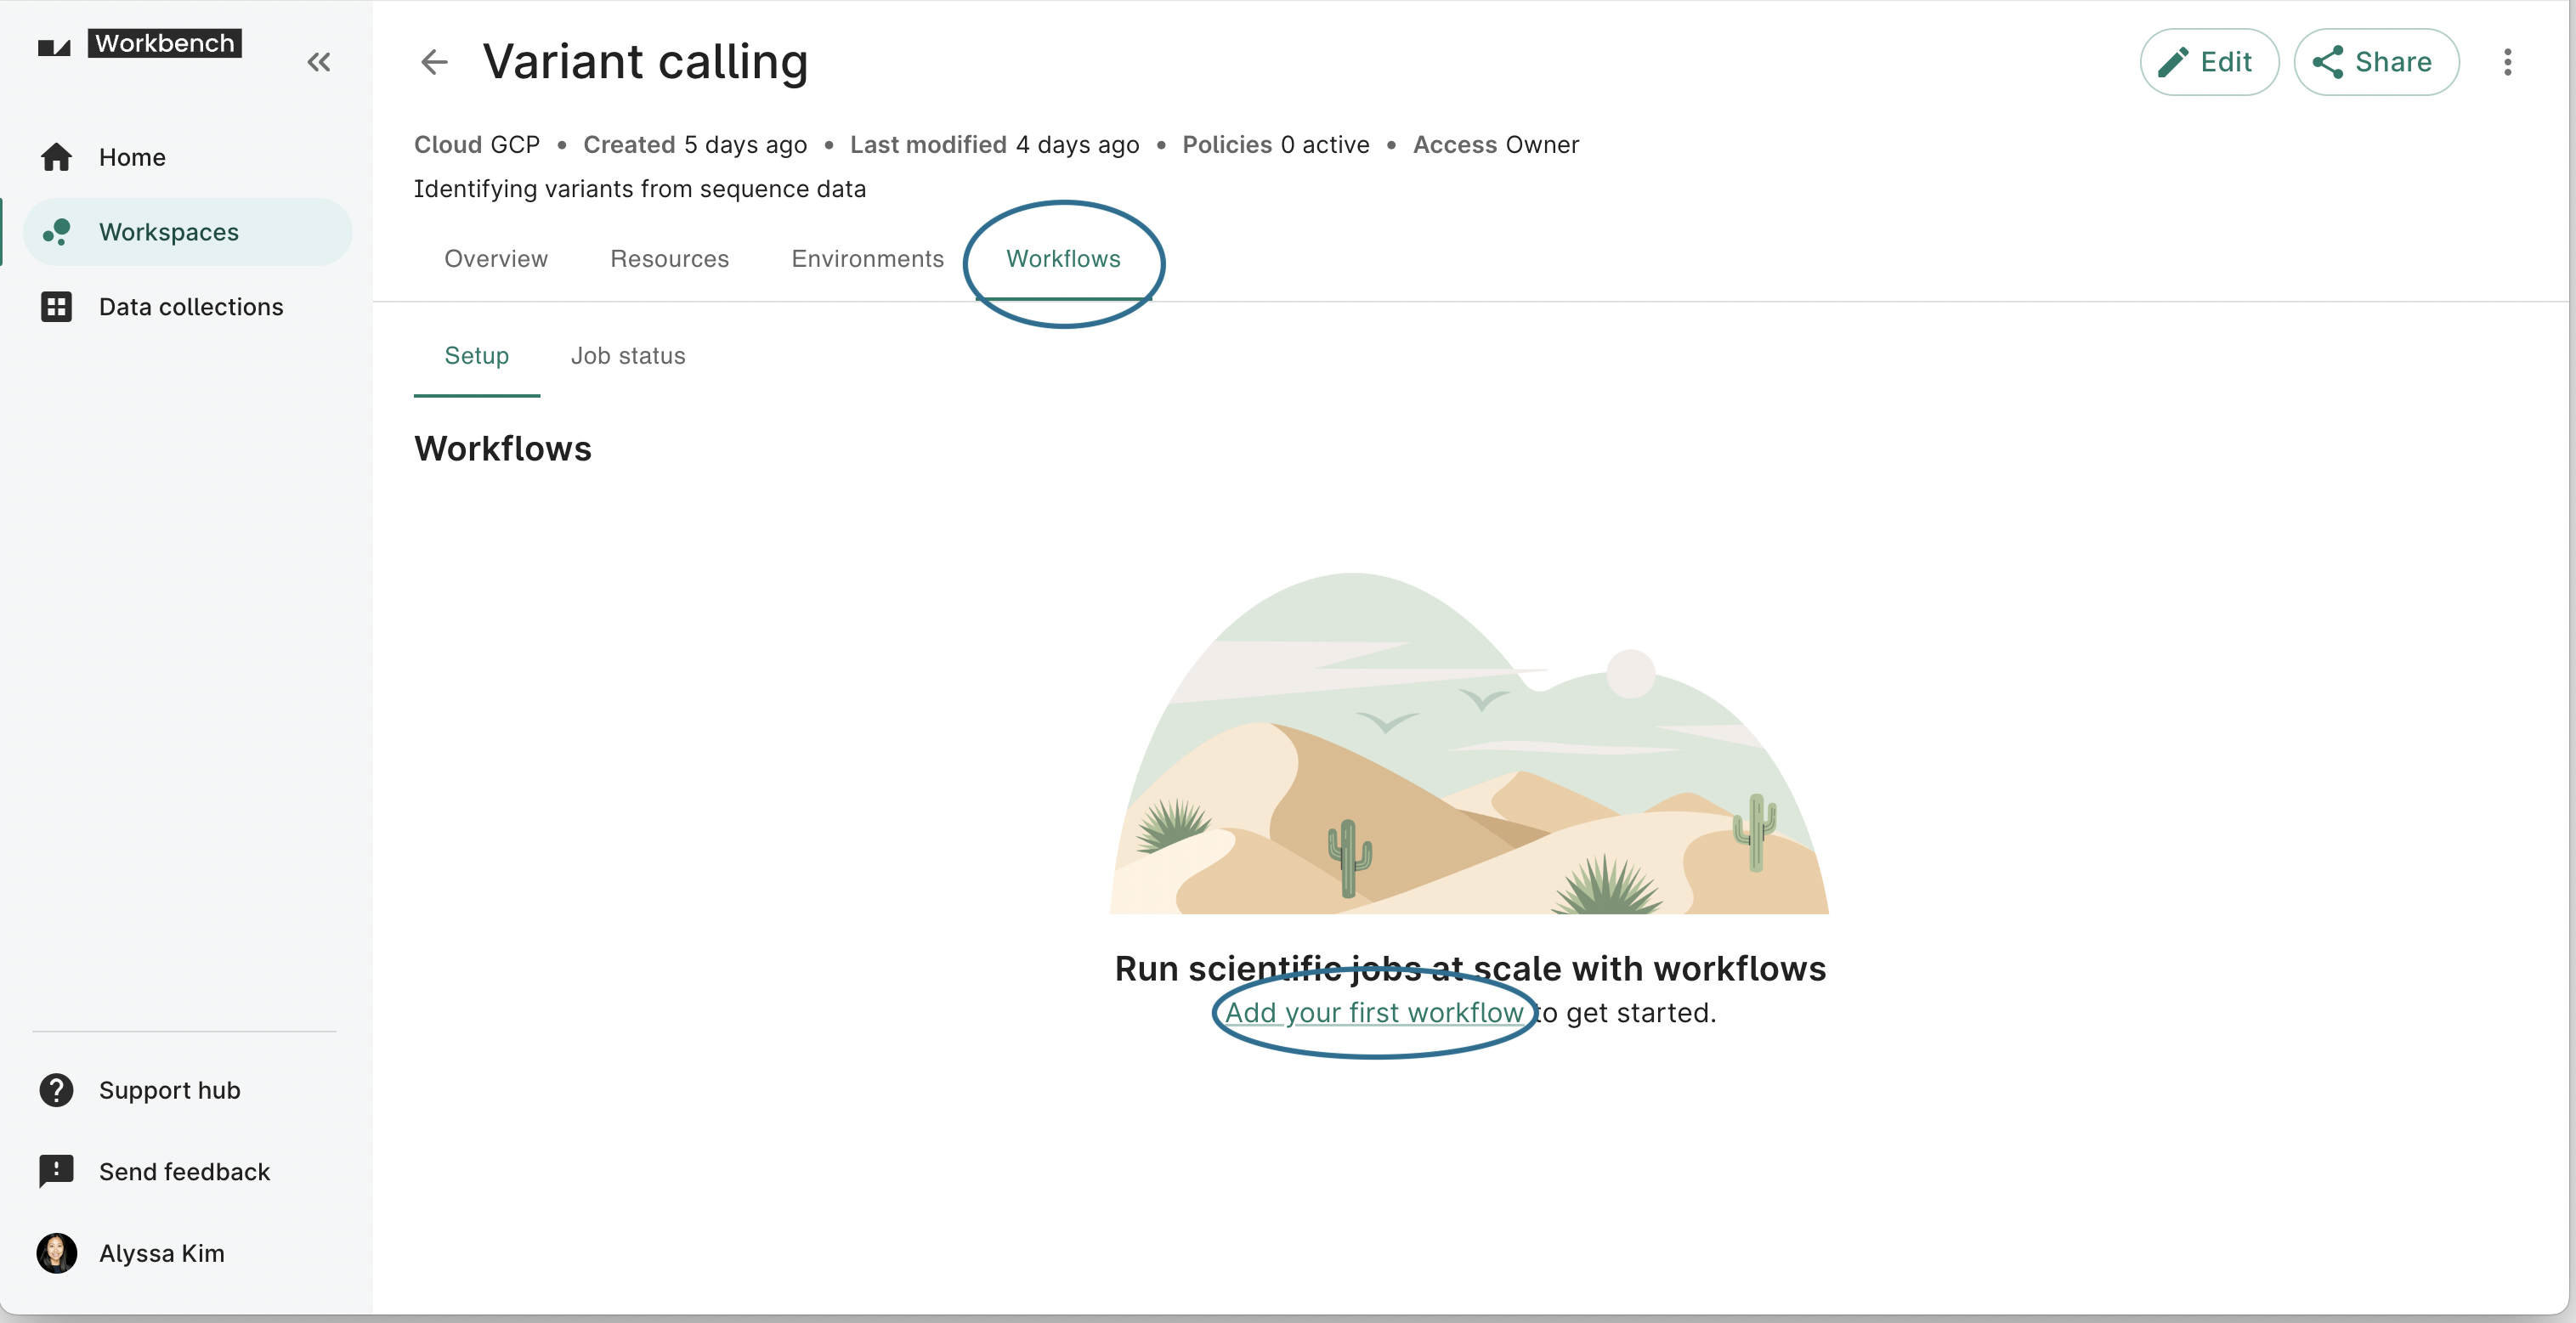
The final step is to create the workflow. First navigate to the Workflows tab. If this is your first workflow, click the Add your first workflow link. Otherwise, click the Add workflow button.
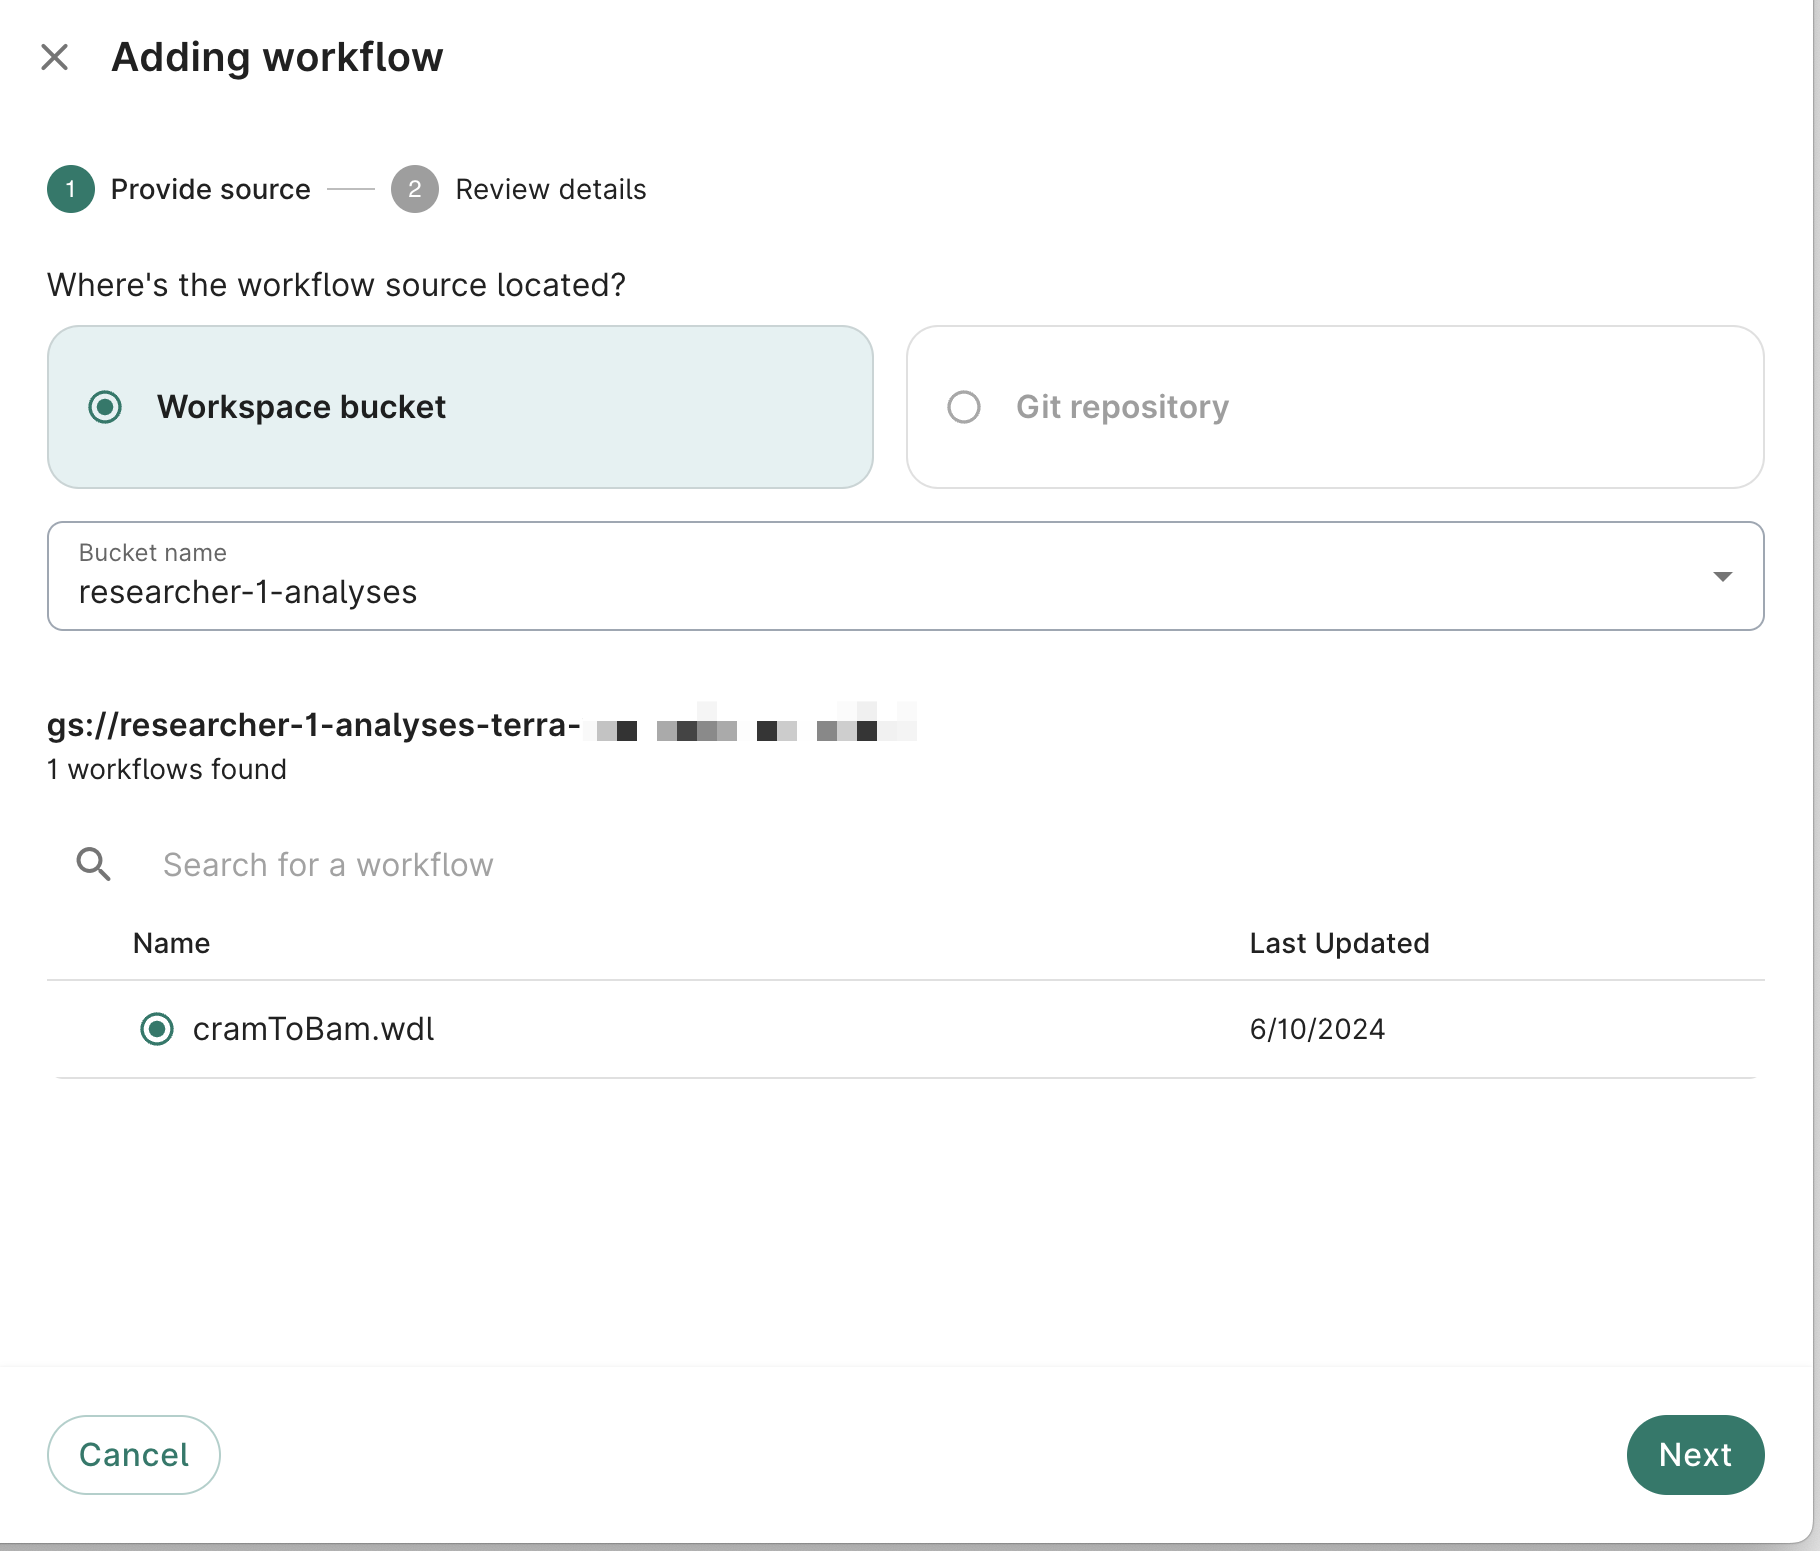
On the first page of the dialog, select the bucket that contains your WDL(s), then select the main WDL file. Click Next.
Note
If the Workbench UI does not find your WDLs and gives you a "No .wdls in bucket" error, this indicates that there are too many objects in the bucket for the UI to handle currently. Start typing in the path to your workflow config files to limit the range of the search.Be aware
If this workspace is inside a VPC-SC perimeter, the file browsing functionality will be disabled due to exfiltration prevention. As a workaround, paste thegs://bucket-cloud-name/path/to/your/workflow.wdl URI of the main workflow file into the search
input field.
Add a display name for the workflow. Click Add to workspace.
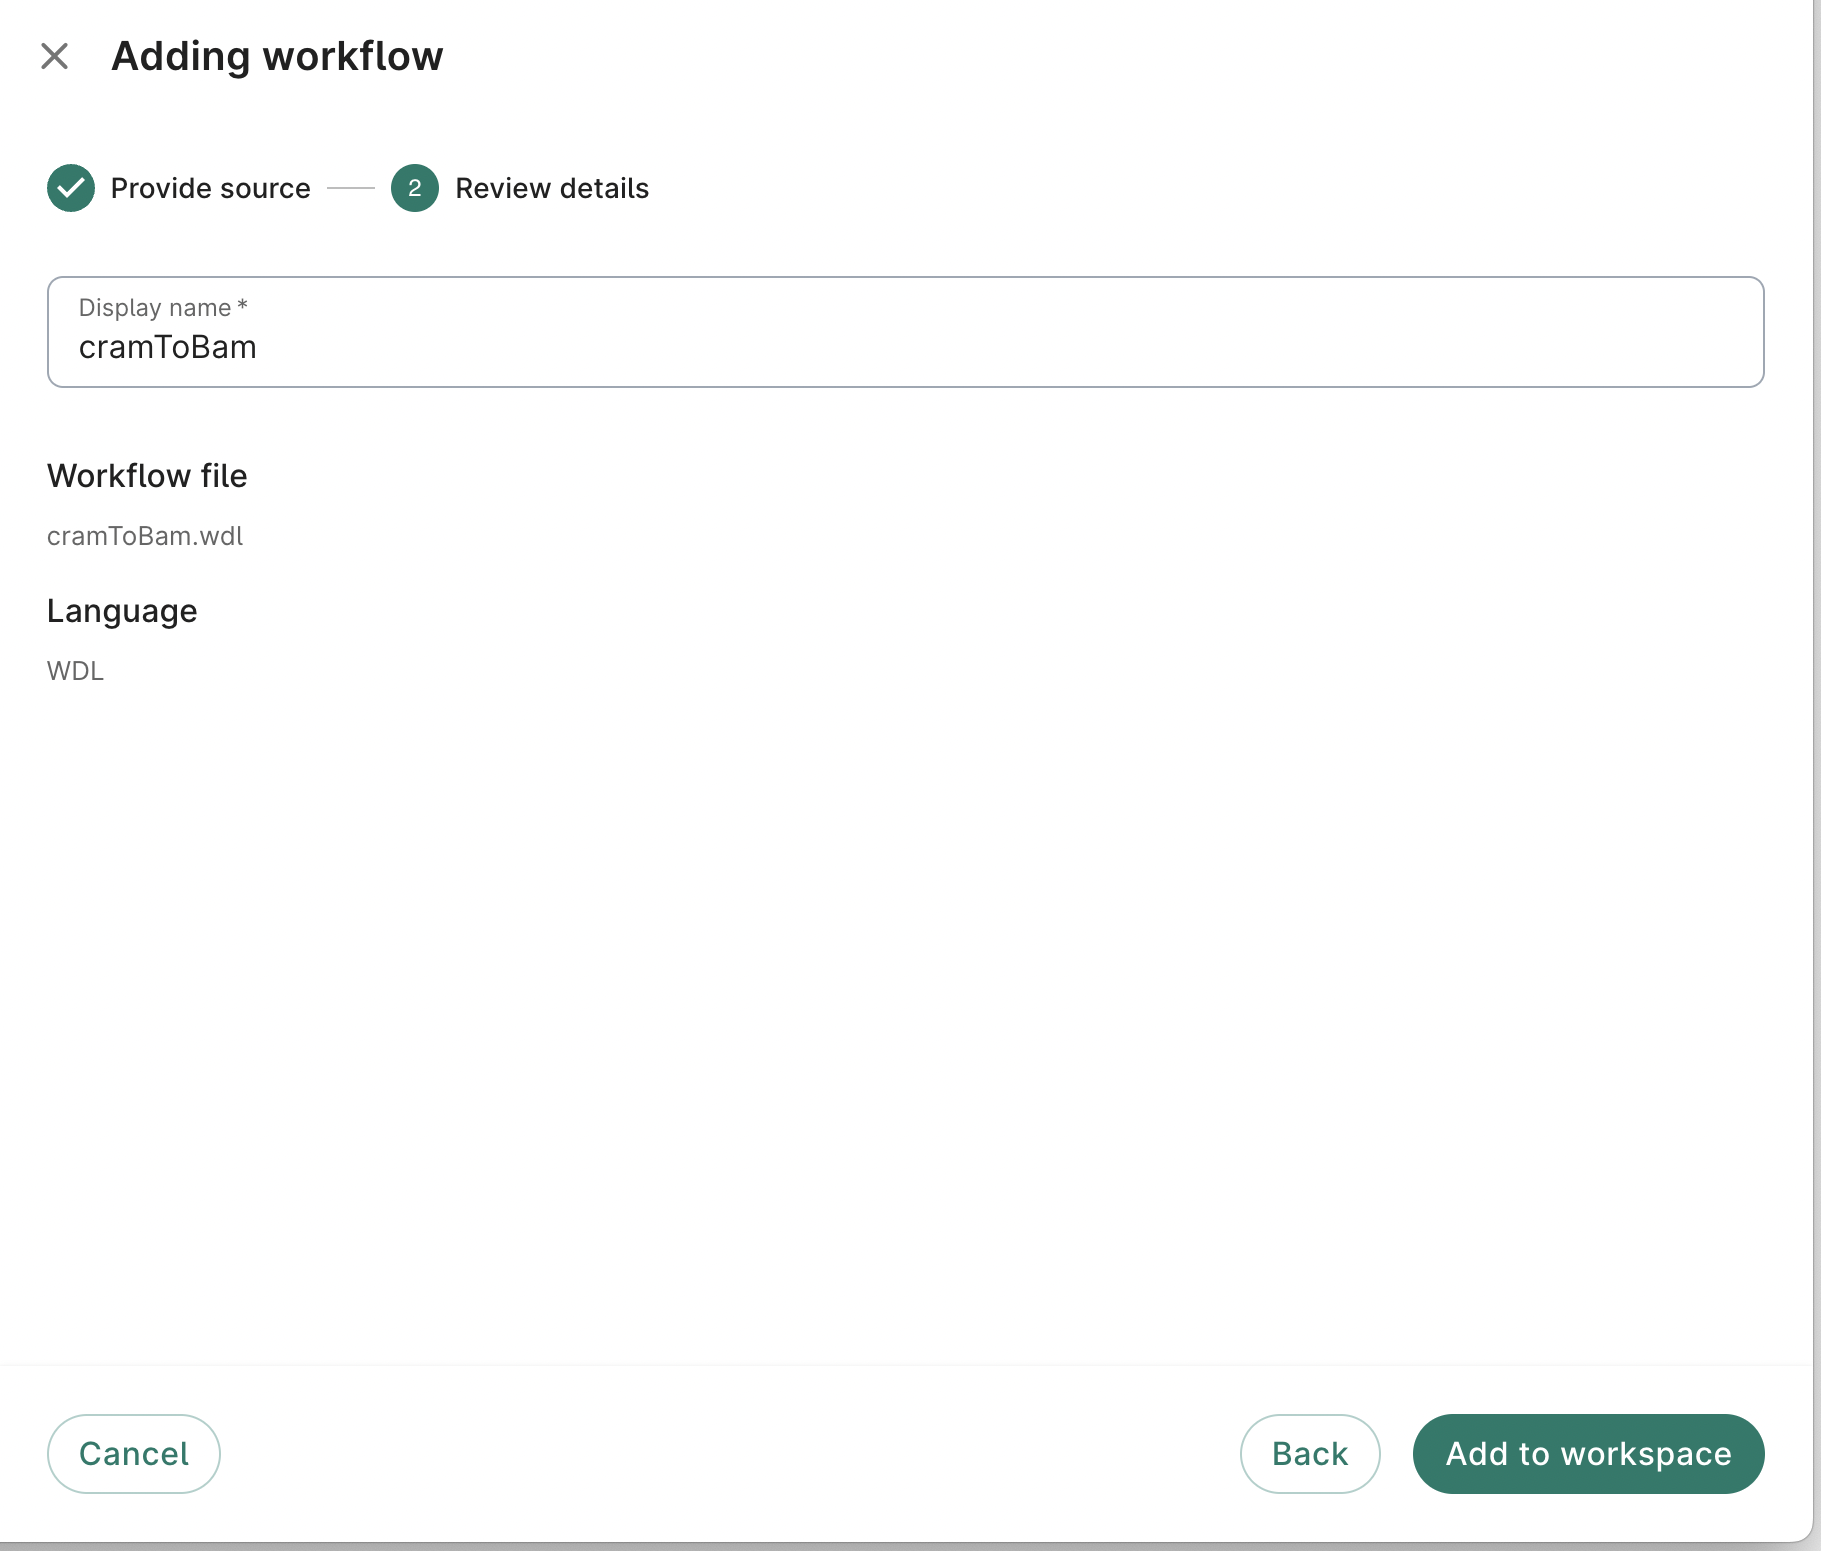
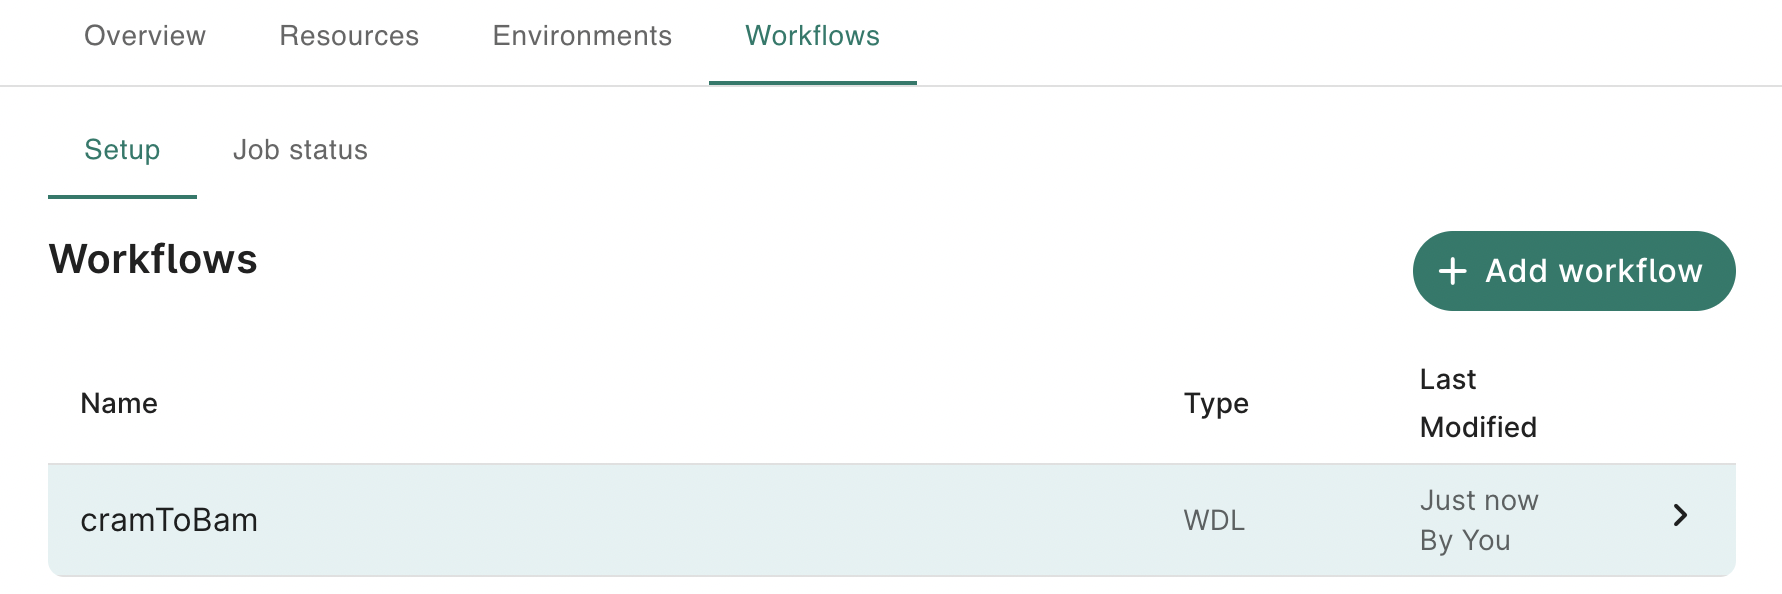
You'll now see the workflow listed in the Setup sub-tab.
Run workflow jobs
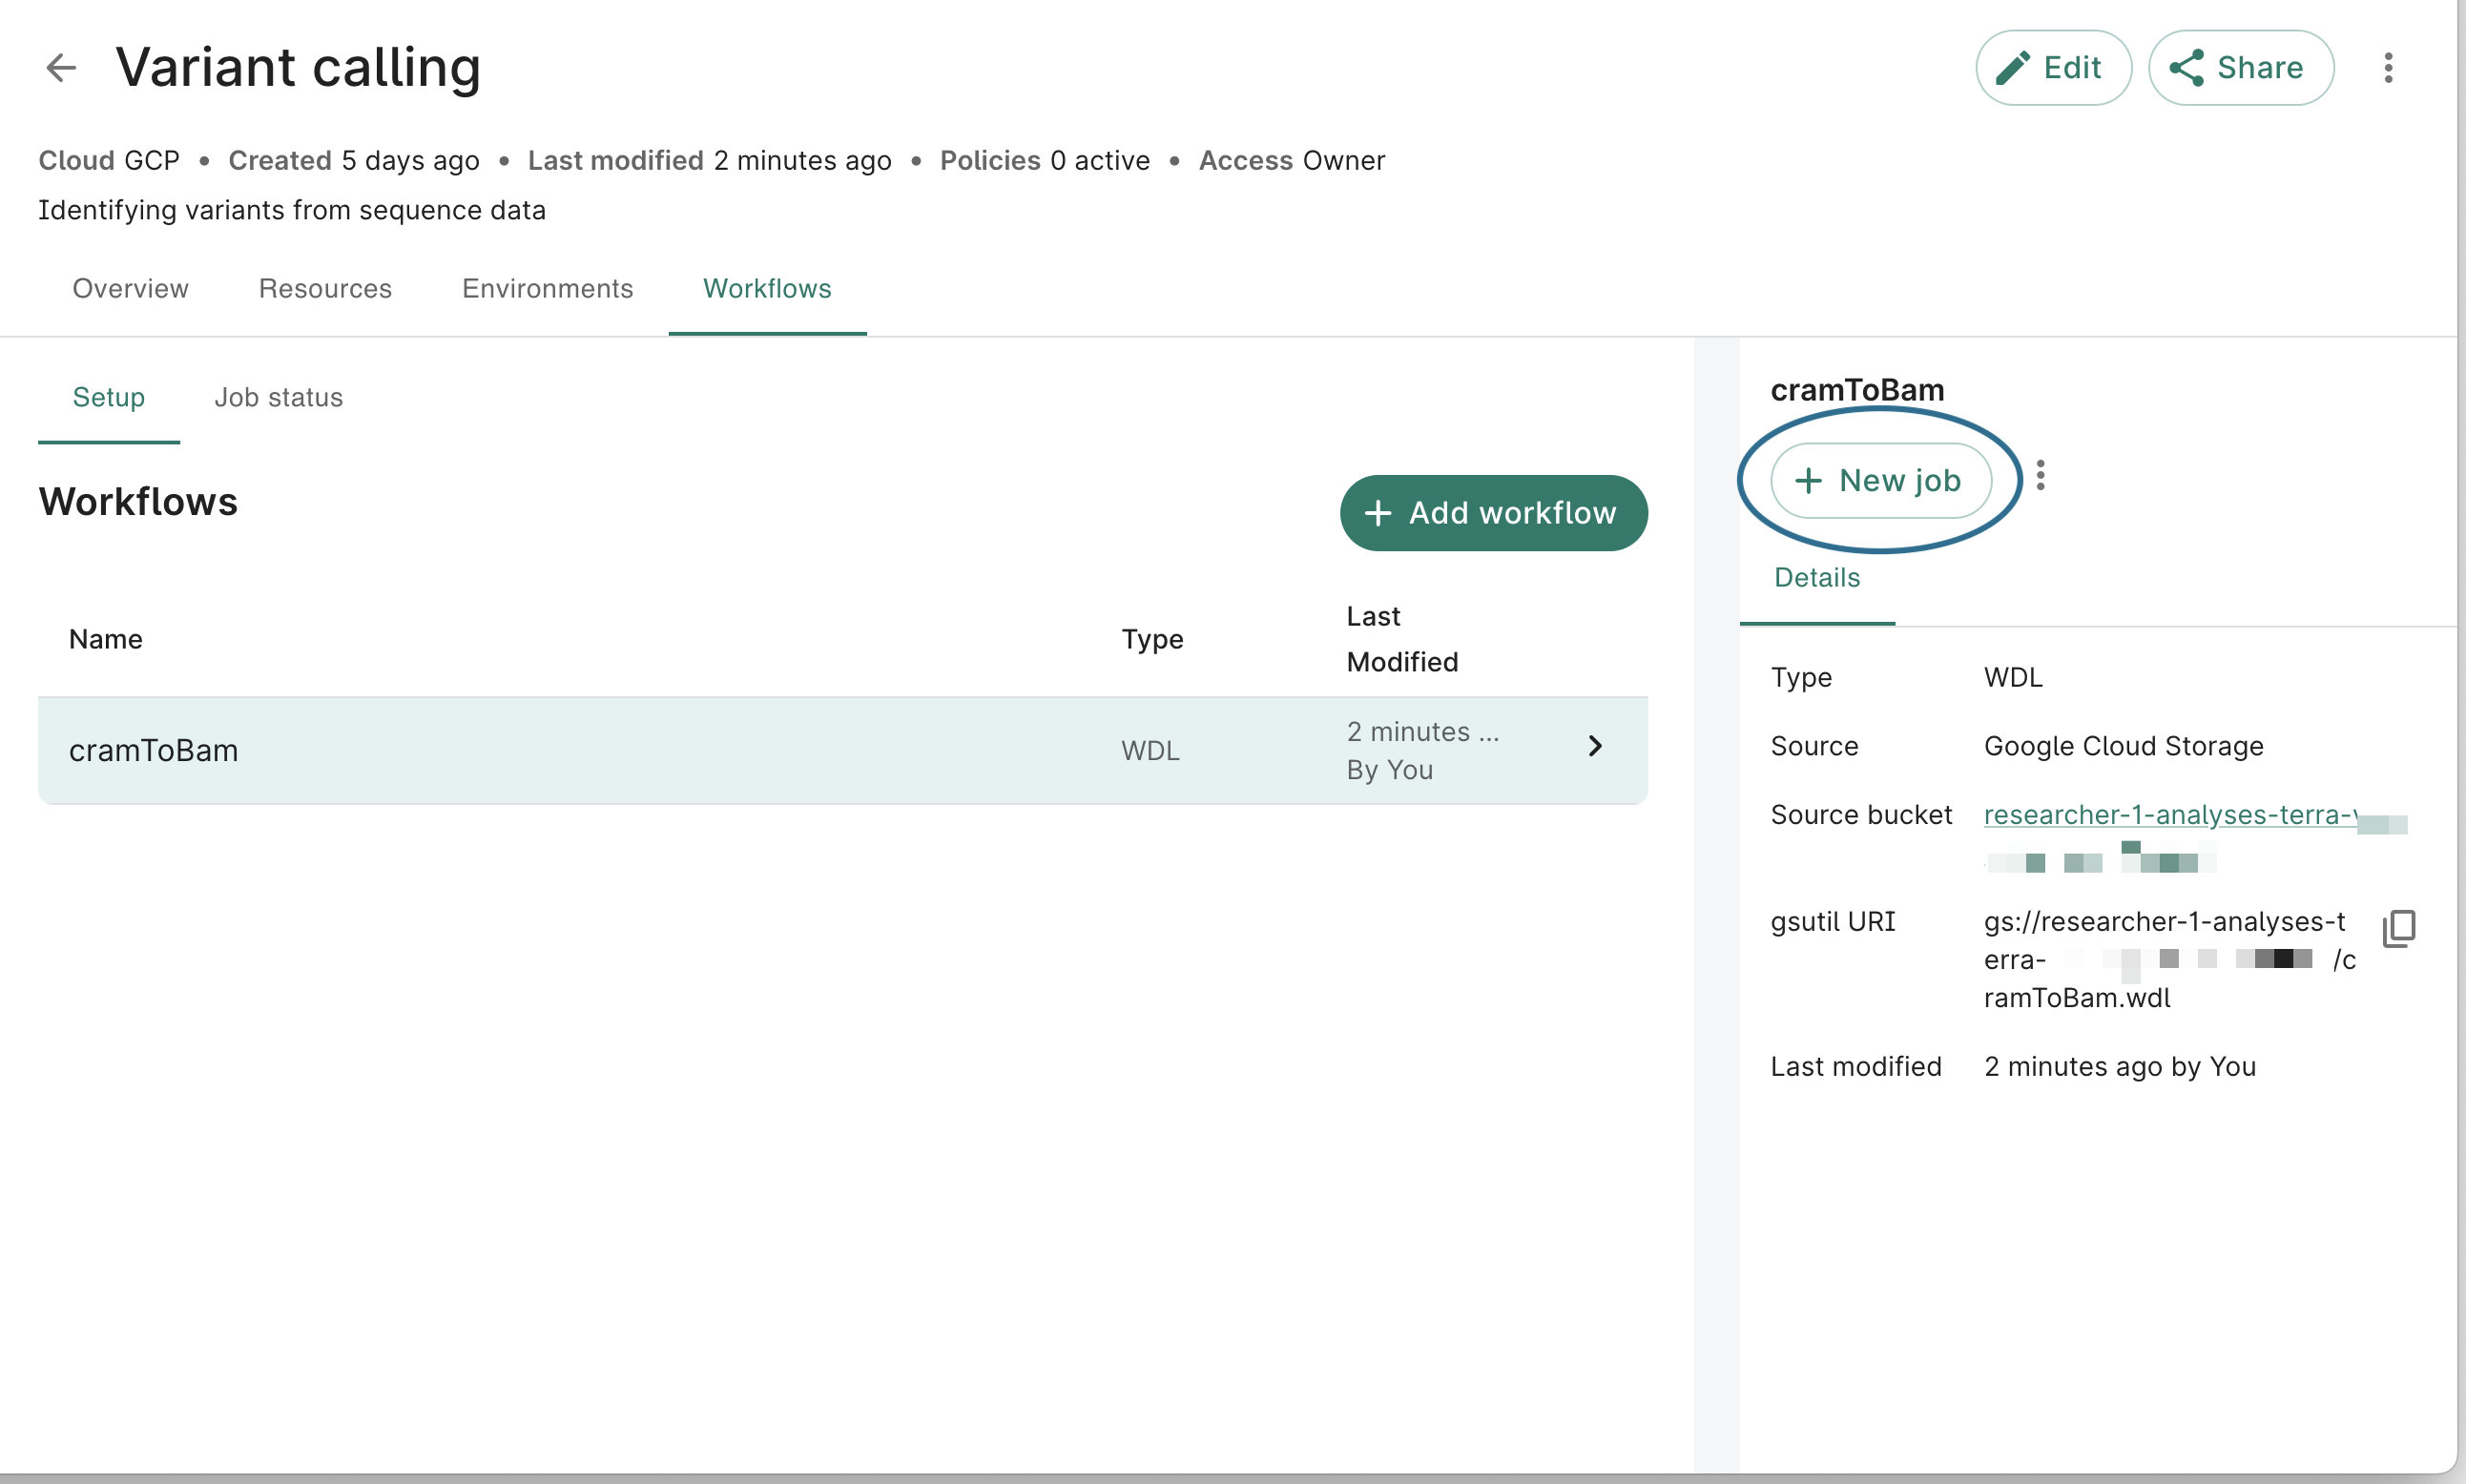
To run a workflow via the Workbench web UI, first navigate to the Workflows tab, and select an existing workflow in the Setup sub-tab. If one does not exist, please follow the instructions in the above section.
Click the New job button in the workflow details tab. A Creating new job dialog will open.
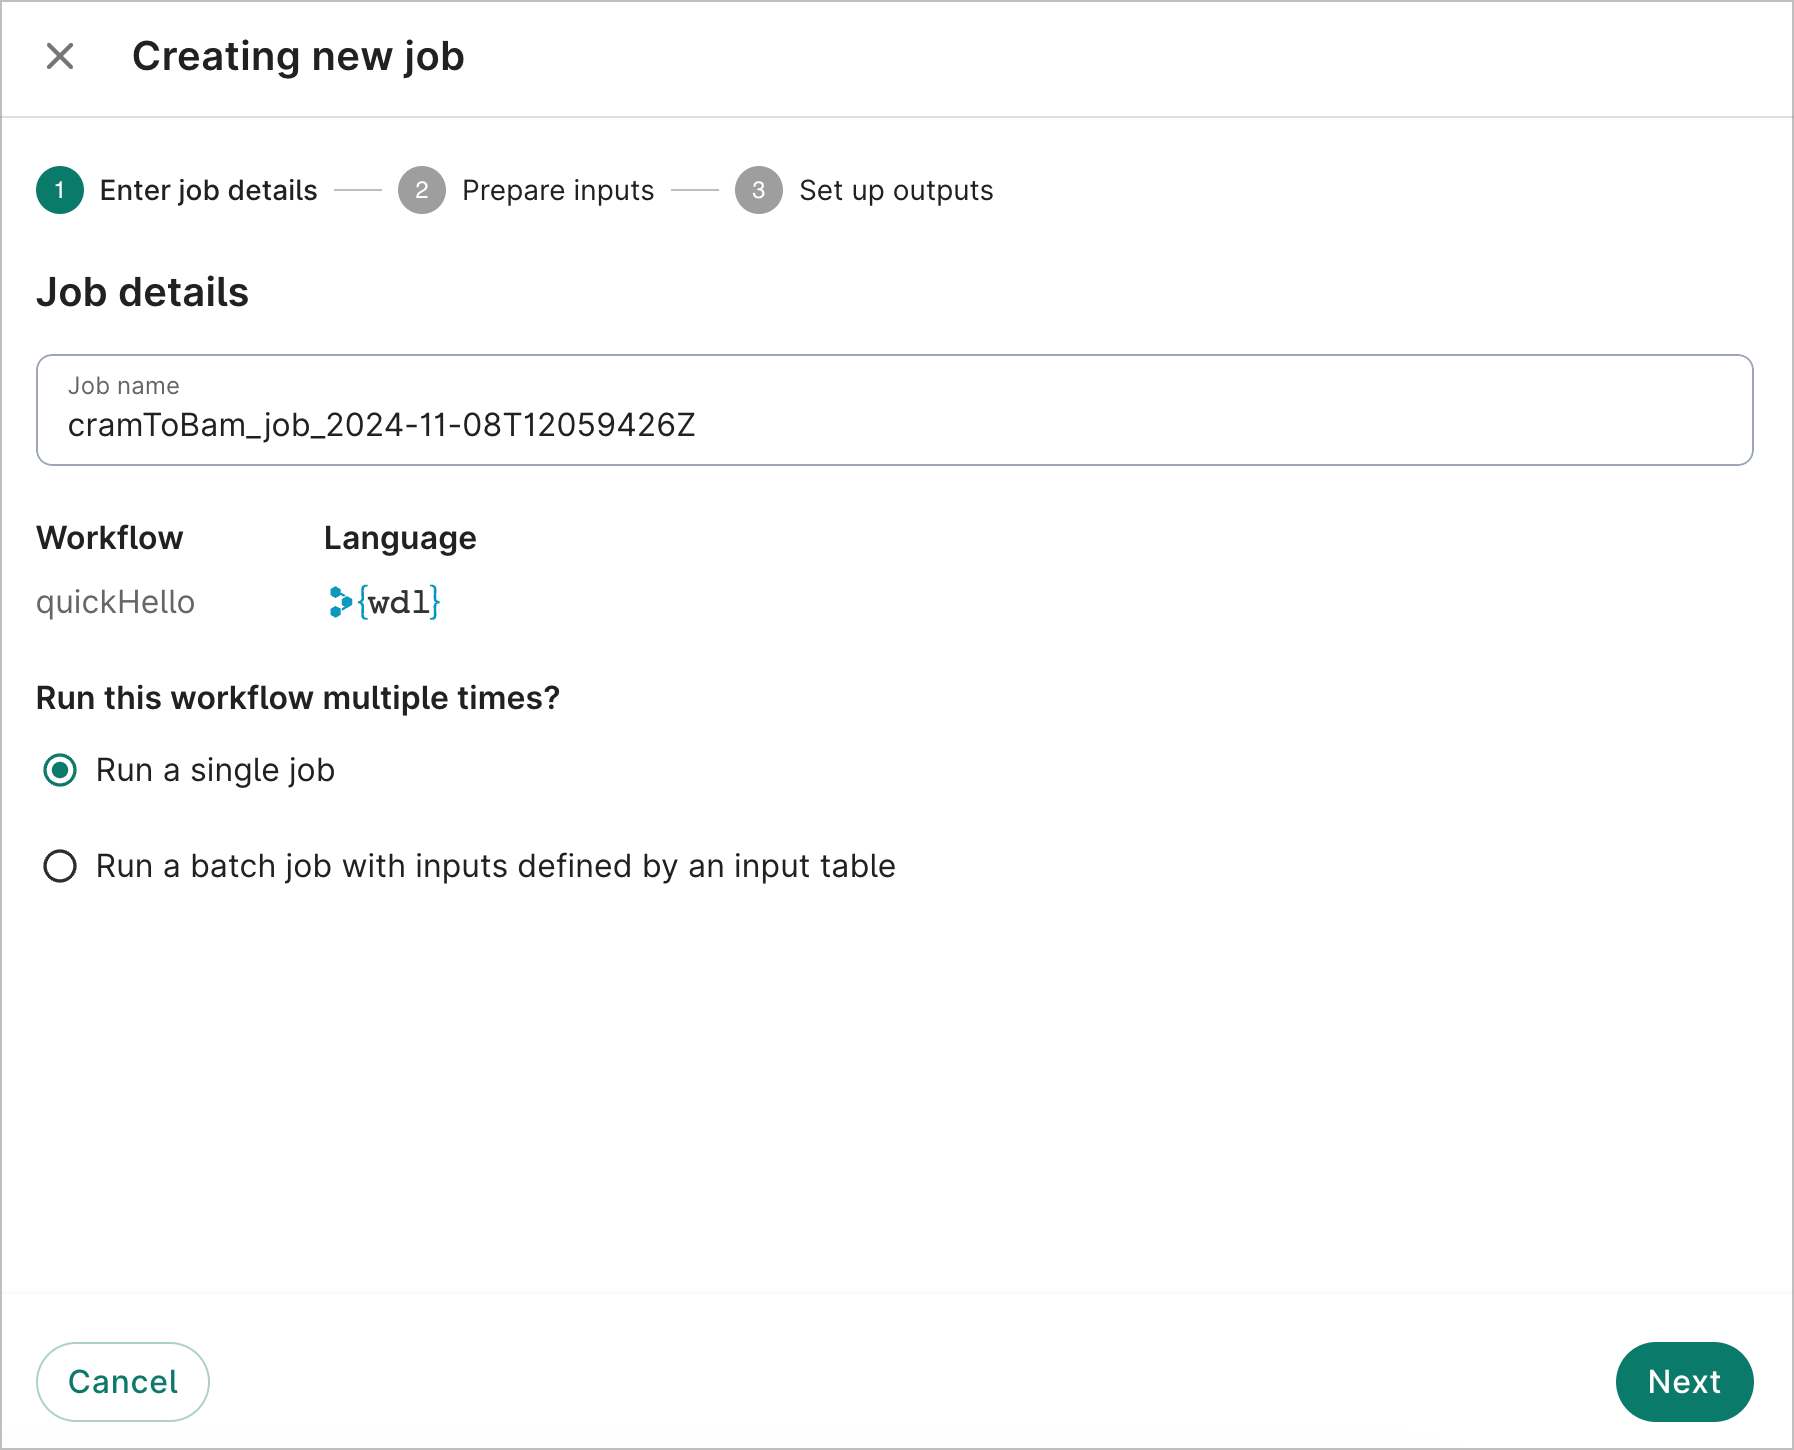
On the Enter job details step, the UI will provide a default display name for the job, which you may optionally adjust. Select Run a single job and click Next.
On the Prepare inputs step, the UI will show two sections: Run options and Input form.
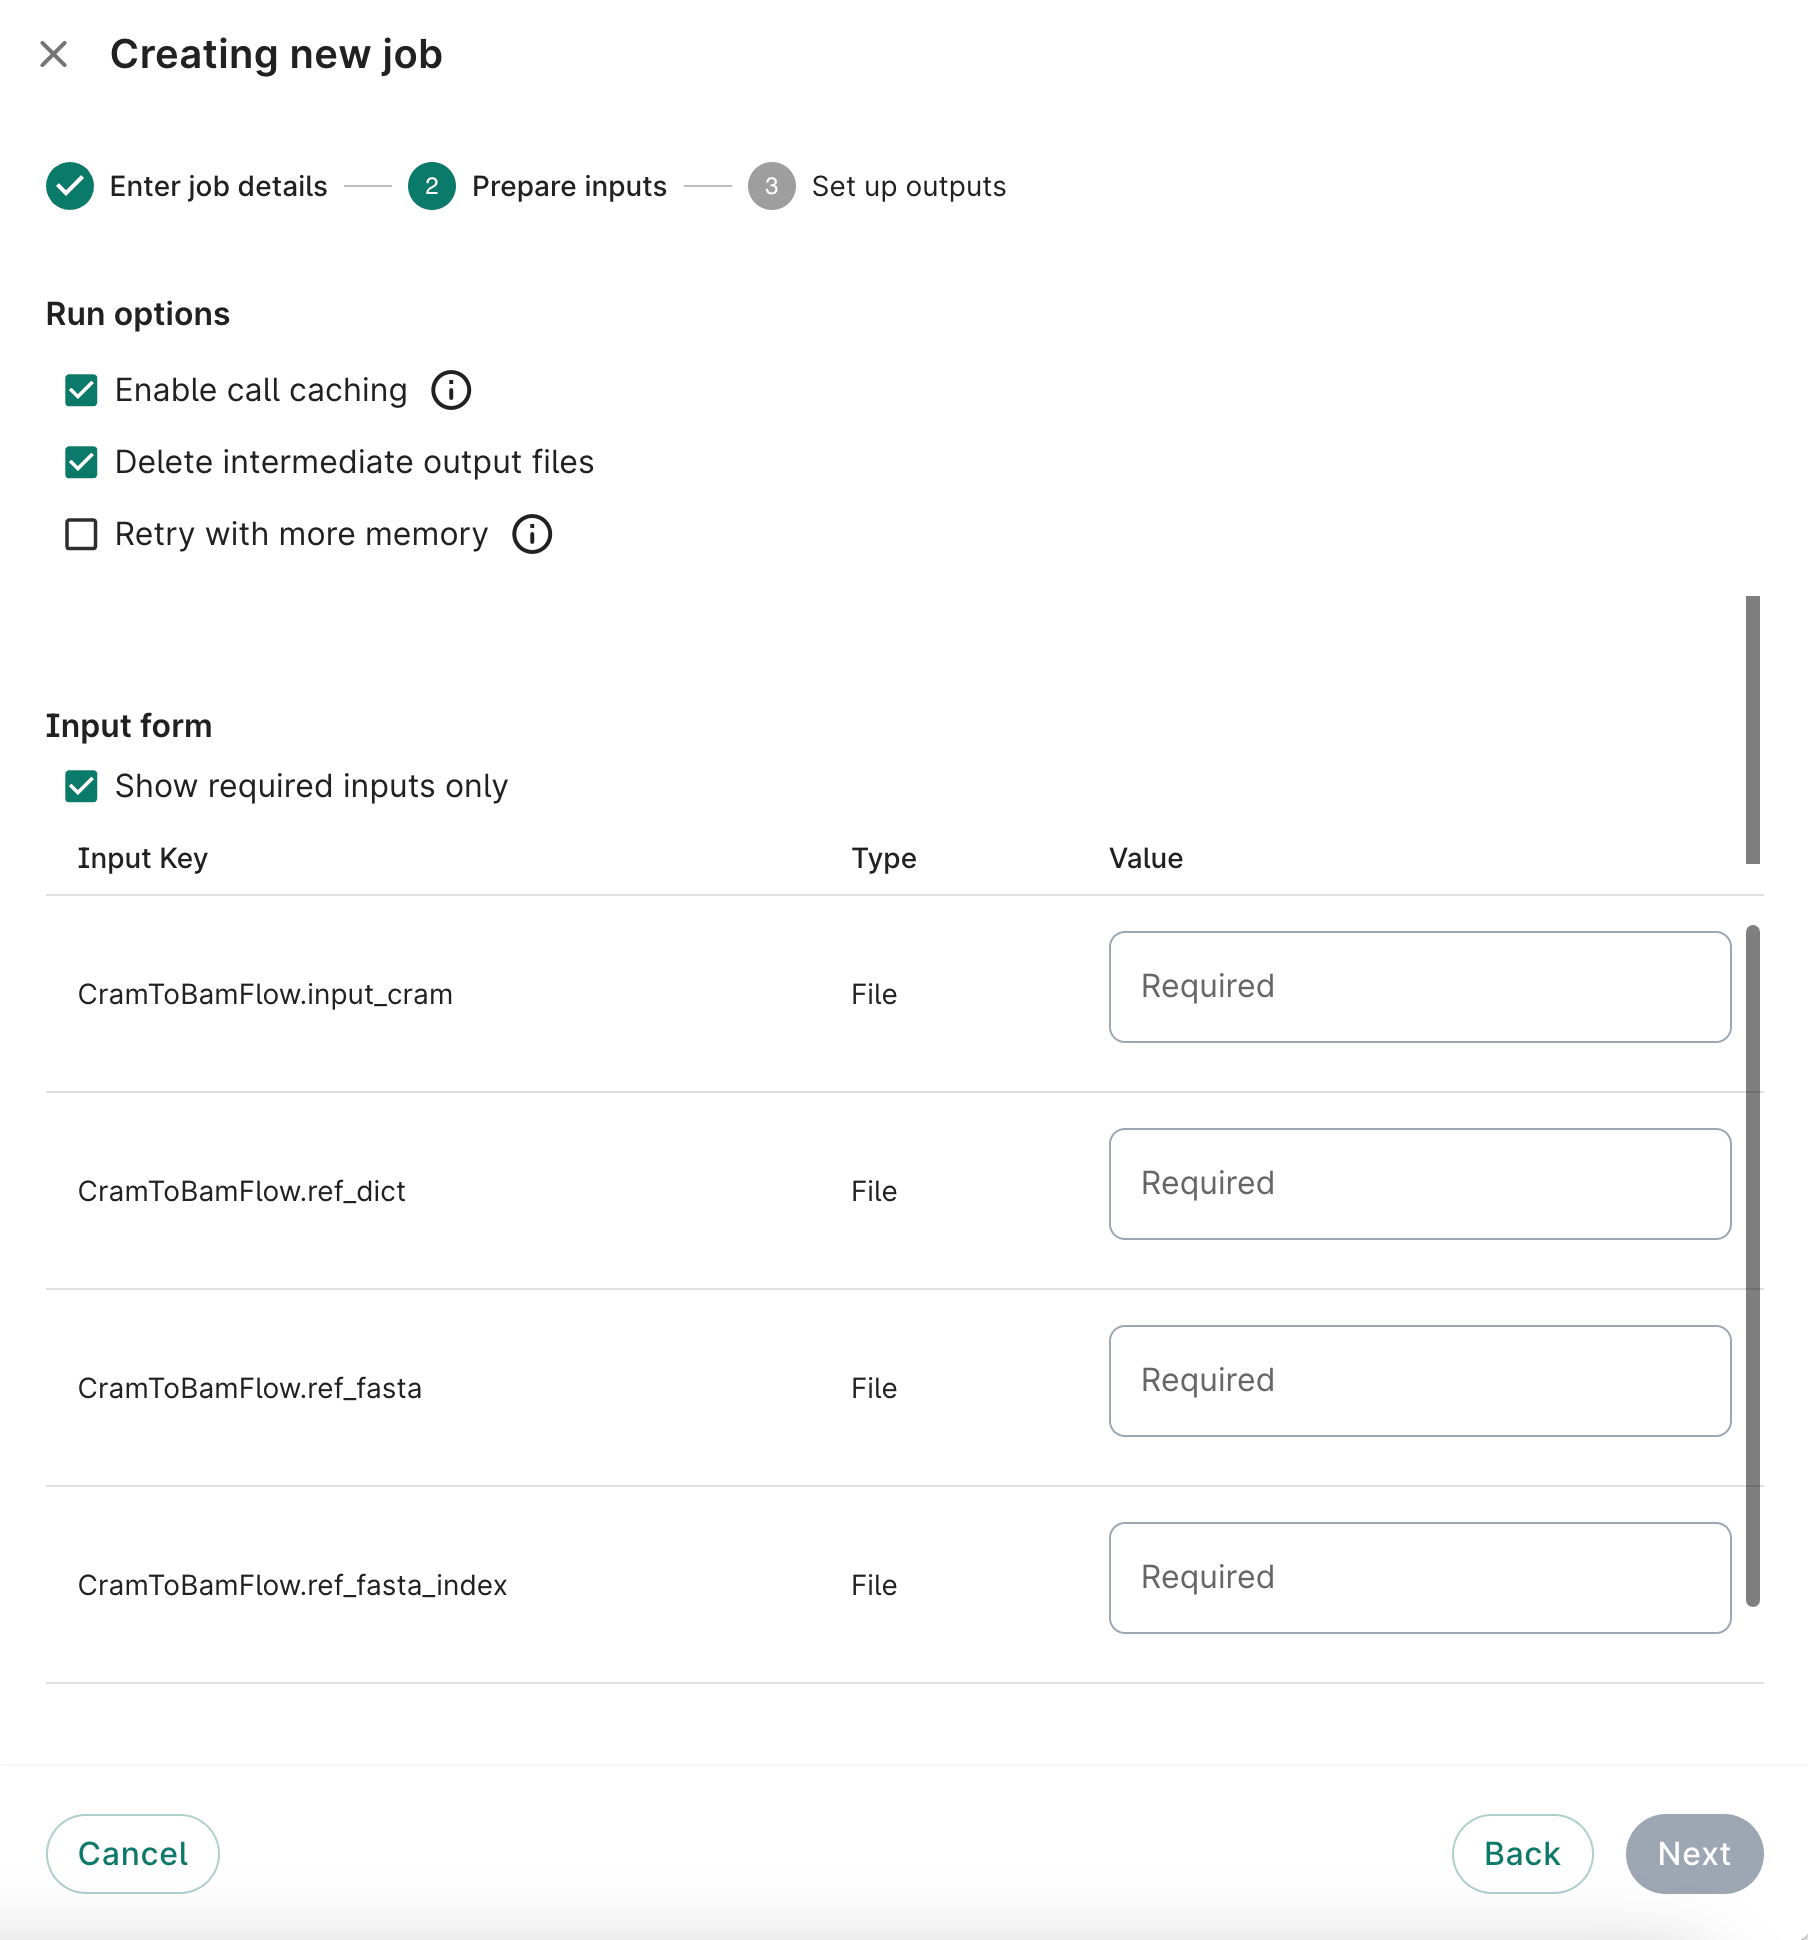
The Run options section allows the user to configure a few options specific to running workflows in Cromwell:
- Enable call caching - Allows the user to cache job results to speed up future executions of the same job run with the same inputs. On by default.
- Delete intermediate output files - Removes intermediate files created by Cromwell during workflow execution. On by default.
- Retry with more memory - If selected, allows the user to specify a factor which the VM's memory will be multiplied by if the workflow fails and Cromwell retries execution. For example, if a factor of 1.2 is provided, and the initial VM memory is 2GB, then when retried the VM will be upgraded to 2.4GB memory.
The Input form section is where a user will enter inputs for the workflow. Whenever you open
this dialog to run a job, Workbench parses the WDL(s) to determine what inputs can be
provided. It then dynamically displays these inputs to the user as an input form, complete with
validation specific to the WDL type for each field. Optional fields are hidden by default and can be
adjusted by selecting the Required only option in the Show dropdown. For file type inputs,
the value must be a valid cloud bucket URI, e.g., gs://your-workflows-folder/wb-test....
After adjusting options and inputs, click the Next button to continue.
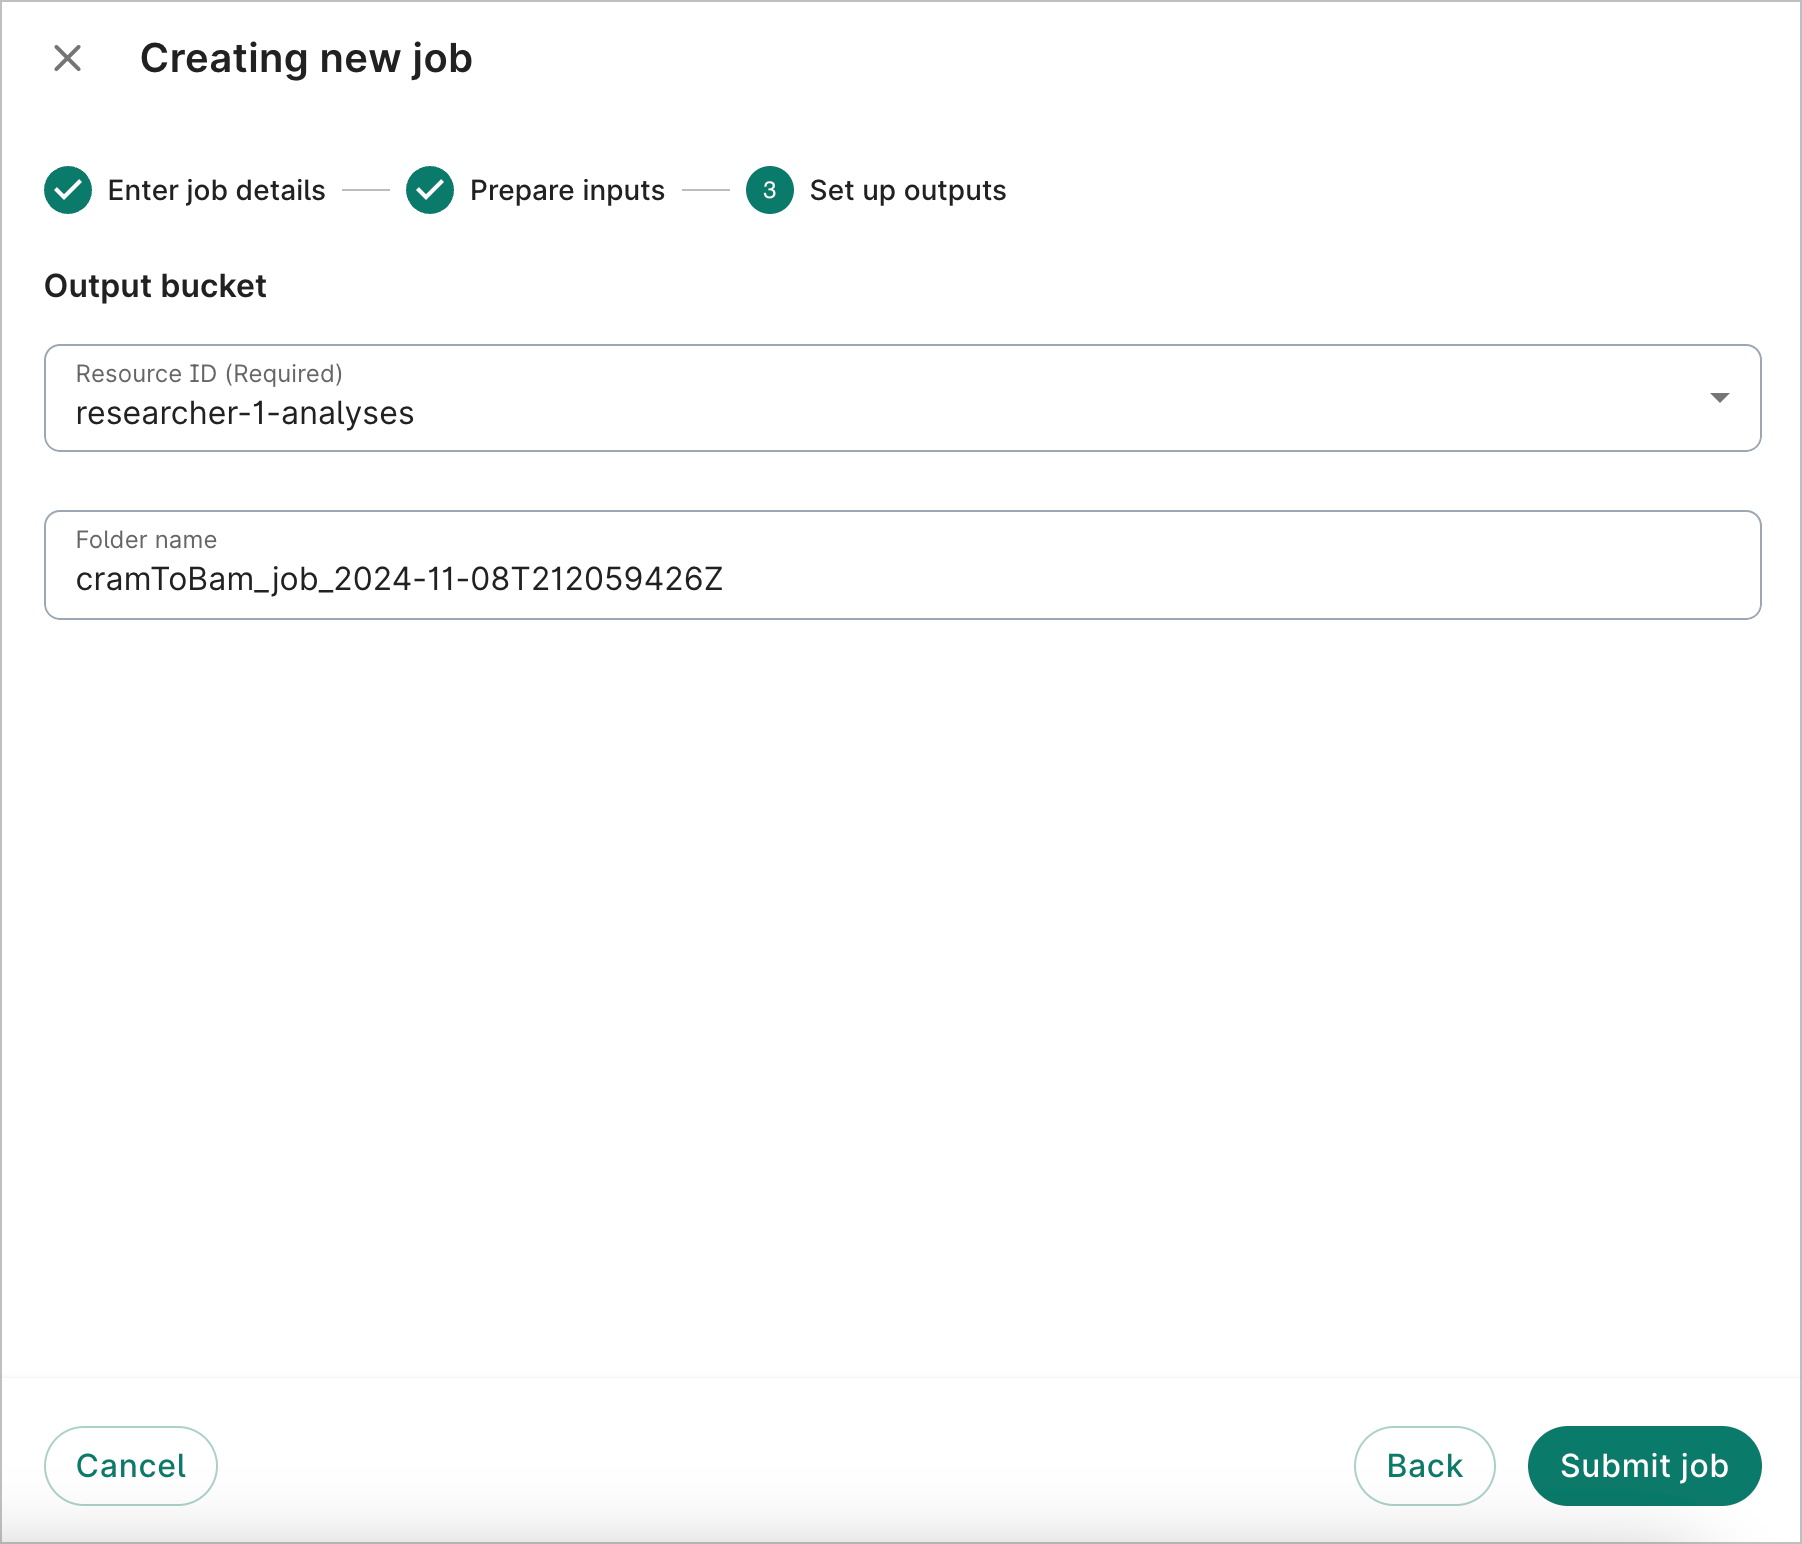
Finally, the Set up outputs step will allow the user to choose a destination bucket to write the workflow outputs and intermediate files to. This will default to the bucket the WDL is located in, but the user can choose any bucket in the workspace. The top-level folder name in the bucket will default to the display job name; this can also be adjusted. Click the Run button when ready and your workflow will begin execution.
Cromwell submission limits
When you submit a Cromwell job, Workbench checks the requested number of jobs against your available allowance and the allowance shared by all users. These allowances apply to Cromwell jobs submitted through Workbench in GCP workspaces.
| Allowance | Per user, across workspaces |
|---|---|
| Outstanding jobs | 1,000 |
| Jobs accepted in the past 24 hours | 5,000 |
Outstanding jobs include jobs that are waiting to start, starting, queued, running, or stopping. Each individual job in a batch counts separately; the batch itself does not count as an additional job. Tasks within a job do not count as separate jobs.
The 24-hour allowance uses a rolling window and does not reset at midnight. Jobs that finish, fail, or are canceled still count toward this allowance while they remain in your job history and within the window. Available capacity also depends on other users' jobs, so a submission can be rejected even if you have allowance remaining.
If your submission exceeds an allowance
Workbench rejects the entire submission. If you exceed a per-user allowance, the error shows the allowance, your current usage, and the number of jobs remaining. If Cromwell is temporarily at capacity, the error asks you to try again later. No jobs from that submission are started. In the Workbench web UI, the form stays open with your inputs preserved.
For a batch, reduce the number of selected jobs to fit the available allowance, or wait before submitting again. For example, if you have 900 outstanding jobs, a batch of 200 exceeds your 1,000-job allowance. A batch of 100 fits that allowance, provided the 24-hour allowance also has enough capacity.
If the outstanding-job allowance is full, wait for jobs to finish. If the 24-hour allowance is full, wait for older submissions to fall outside the rolling window. Job status updates can take time to appear, so capacity might not become available immediately after a job finishes.
Monitor workflow jobs
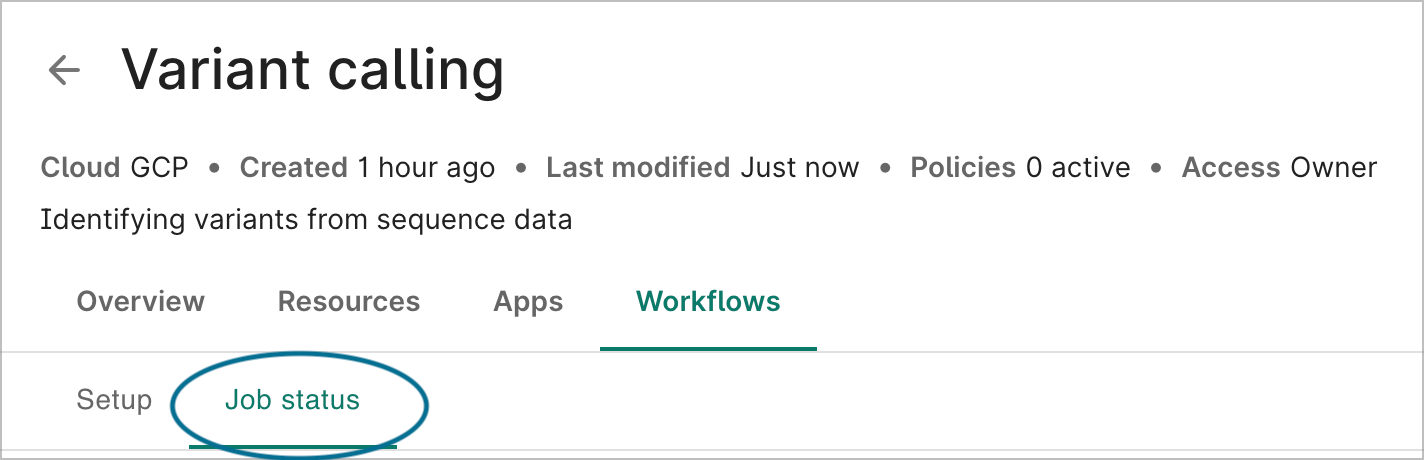
To monitor a workflow that's previously been executed within a workspace, click the Job status sub-tab under the Workflows tab.
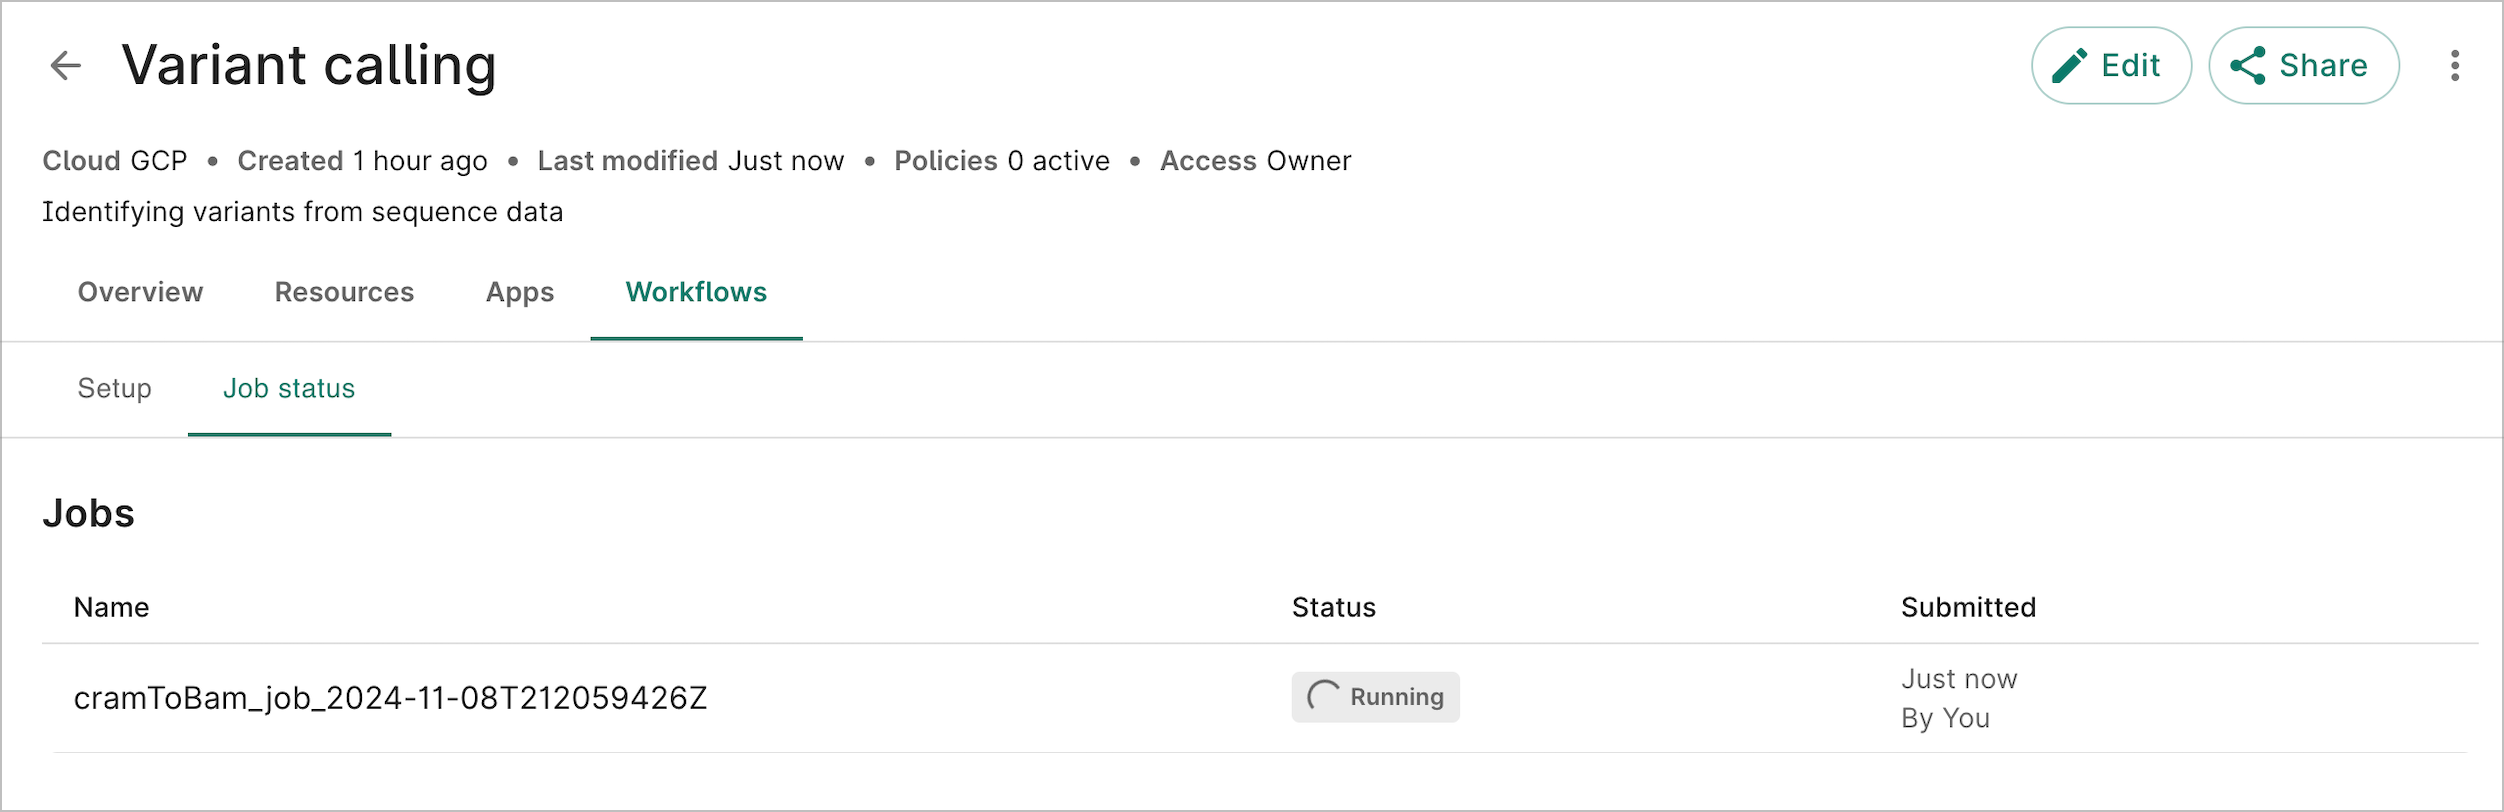
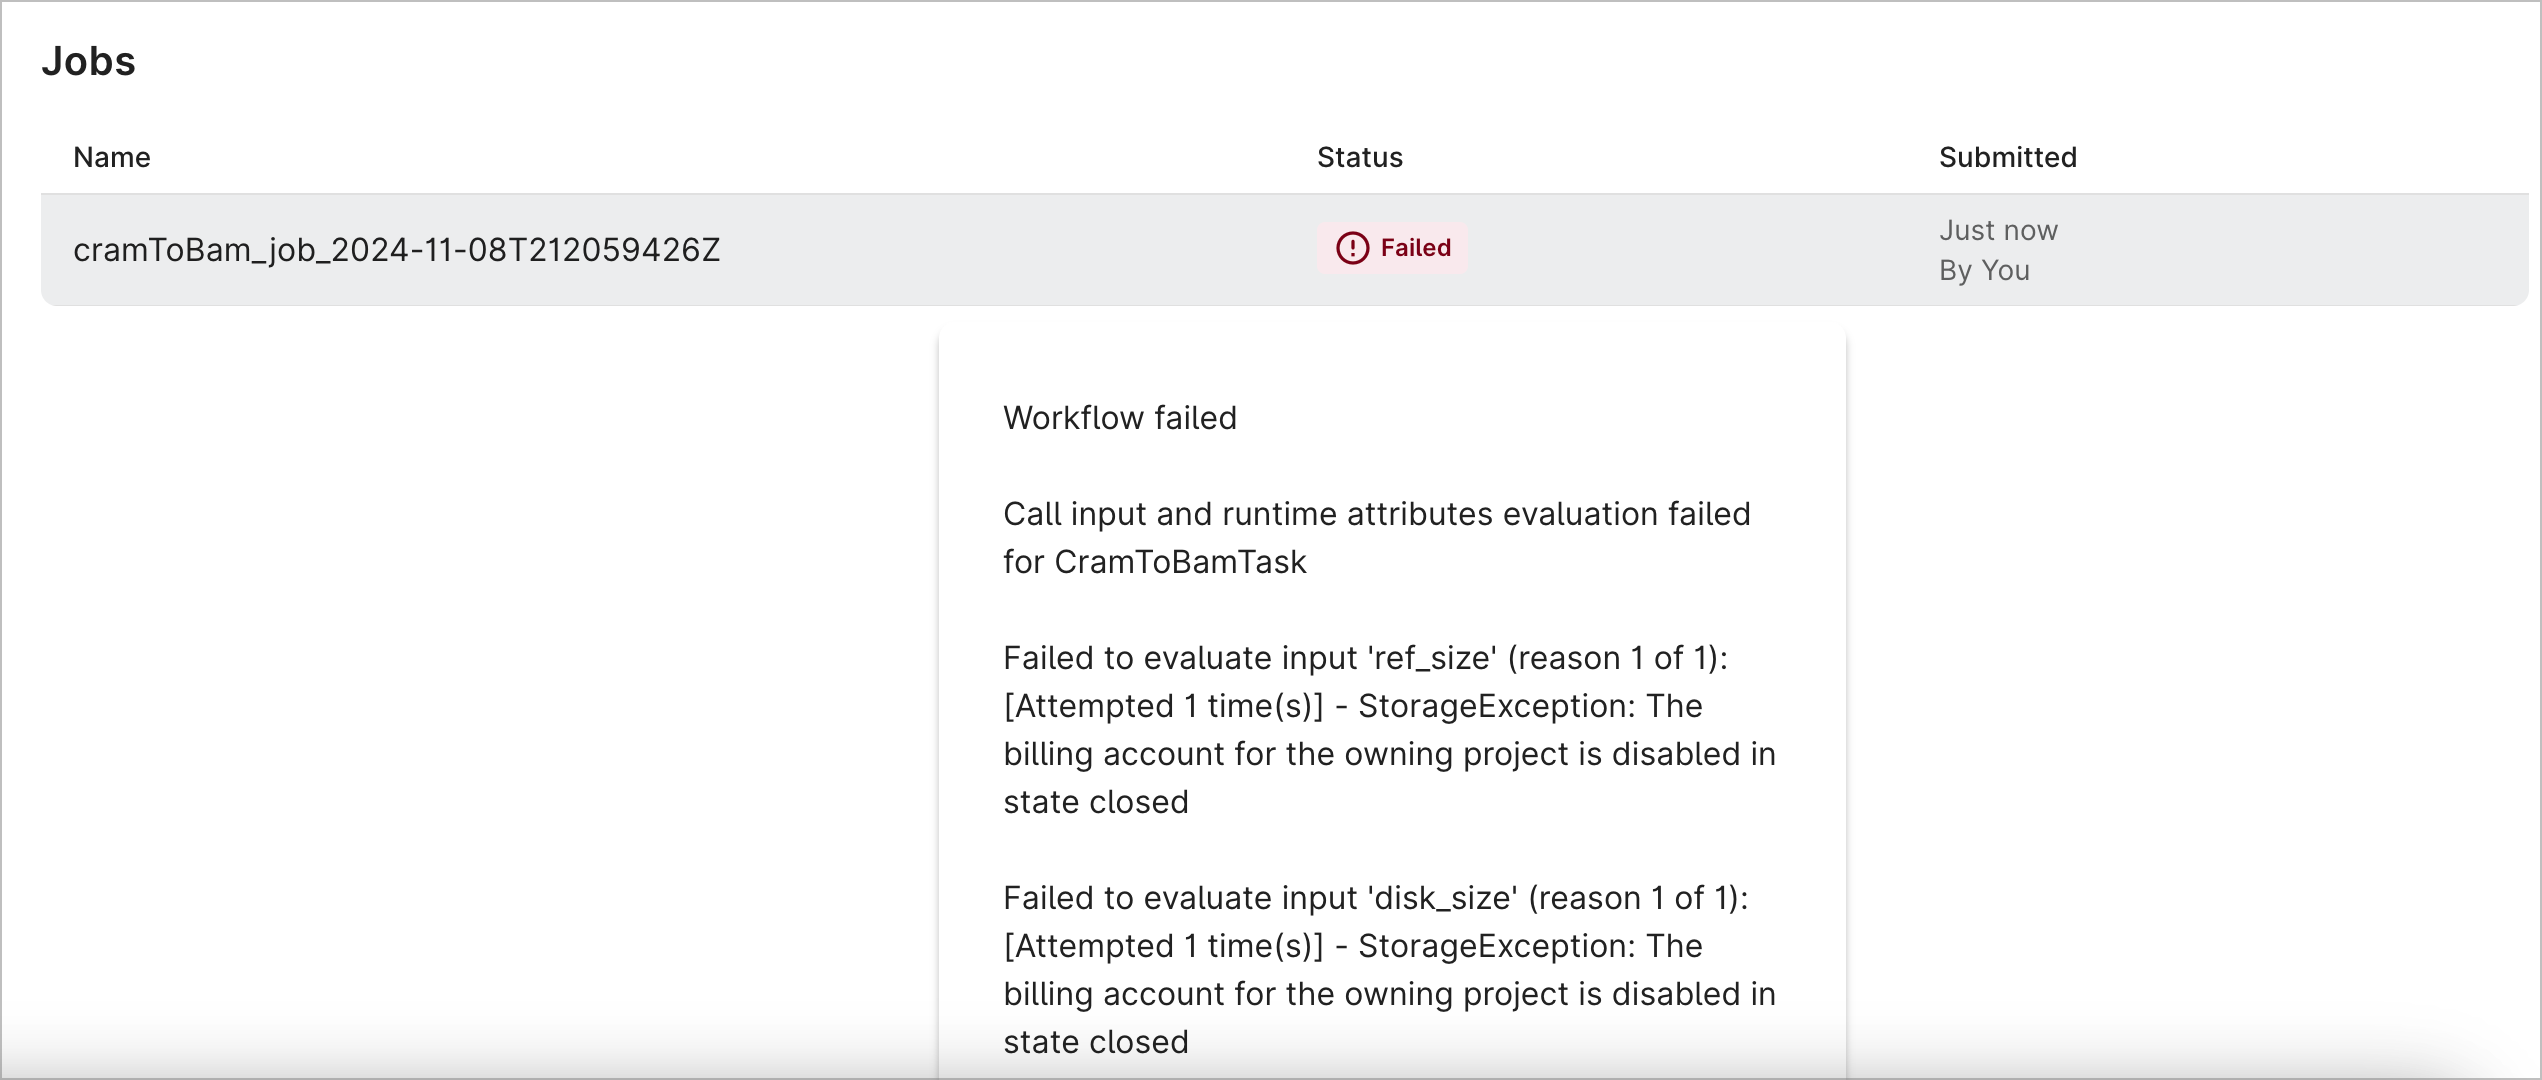
The Jobs table shows the name, status, and submission date of every executed workflow job in the workspace. To see more details for a workflow, select its row.
The workflow details pane will show source information, as well as a table displaying status of each individual task executed by the workflow. When a task is done, you can click View in GCP to get a direct link to the workflow's execution folder in Google Cloud Storage.
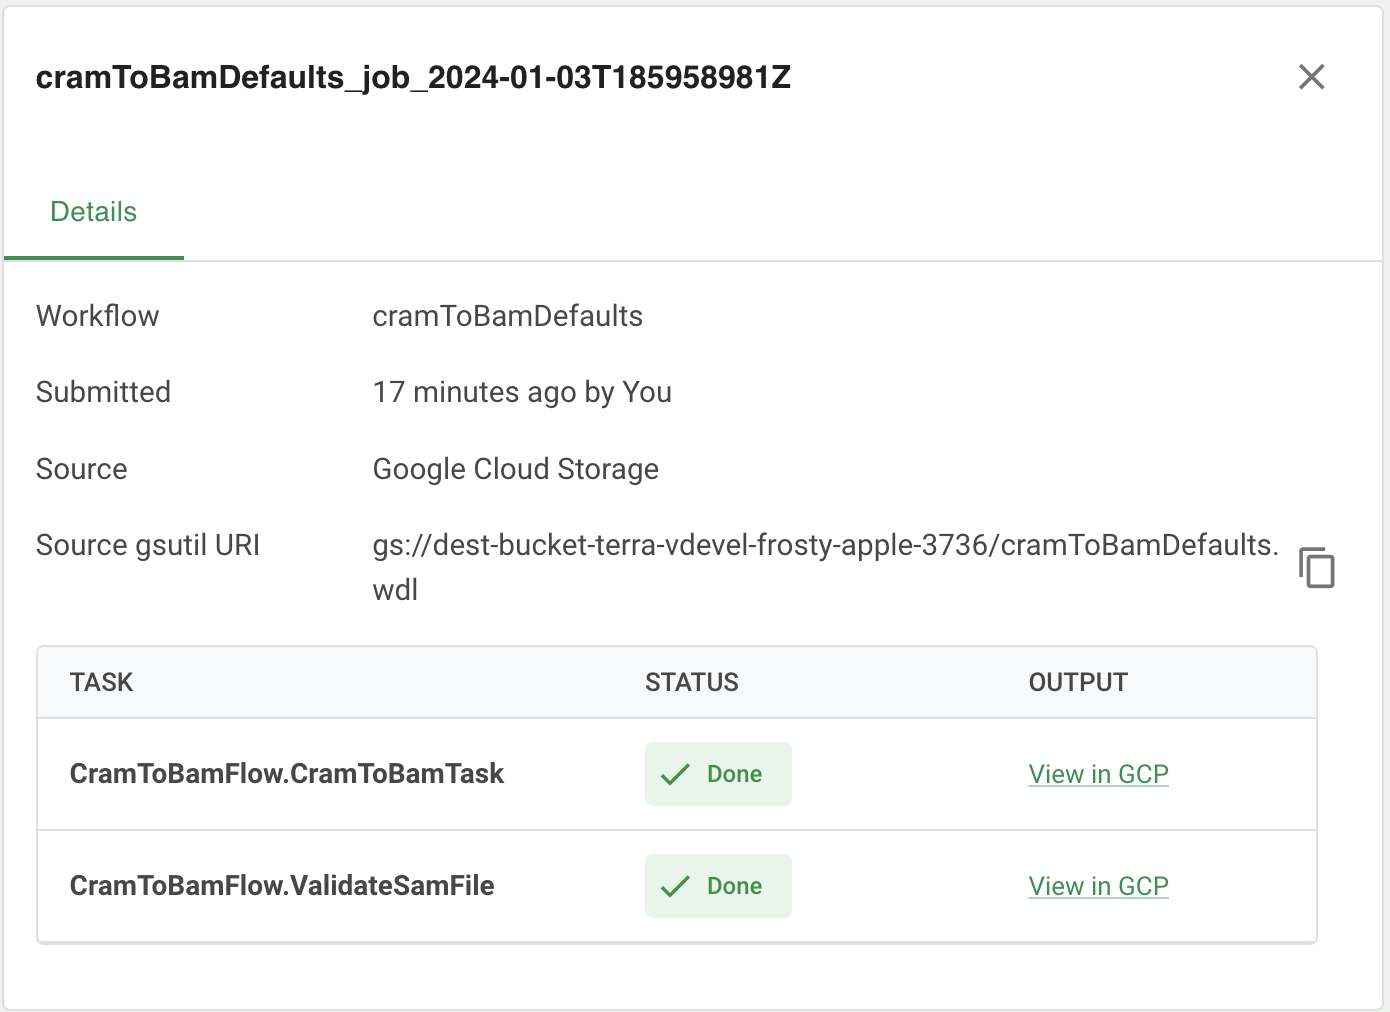
If a task or workflow fails, you can hover over the status to view the error text.
Last Modified: 17 September 2026