Basic cloud app operations
Categories:
Prior reading: Cloud apps overview
Purpose: This document provides detailed instructions for performing basic operations on cloud apps through the Workbench UI.
Notes: These instructions assume that you have already opened a workspace in the Workbench UI and navigated to the Apps tab. This document does not cover doing work within a cloud app, nor installing additional libraries/software.
List your cloud apps and check their status
Your apps are listed in the Apps tab of the workspace.
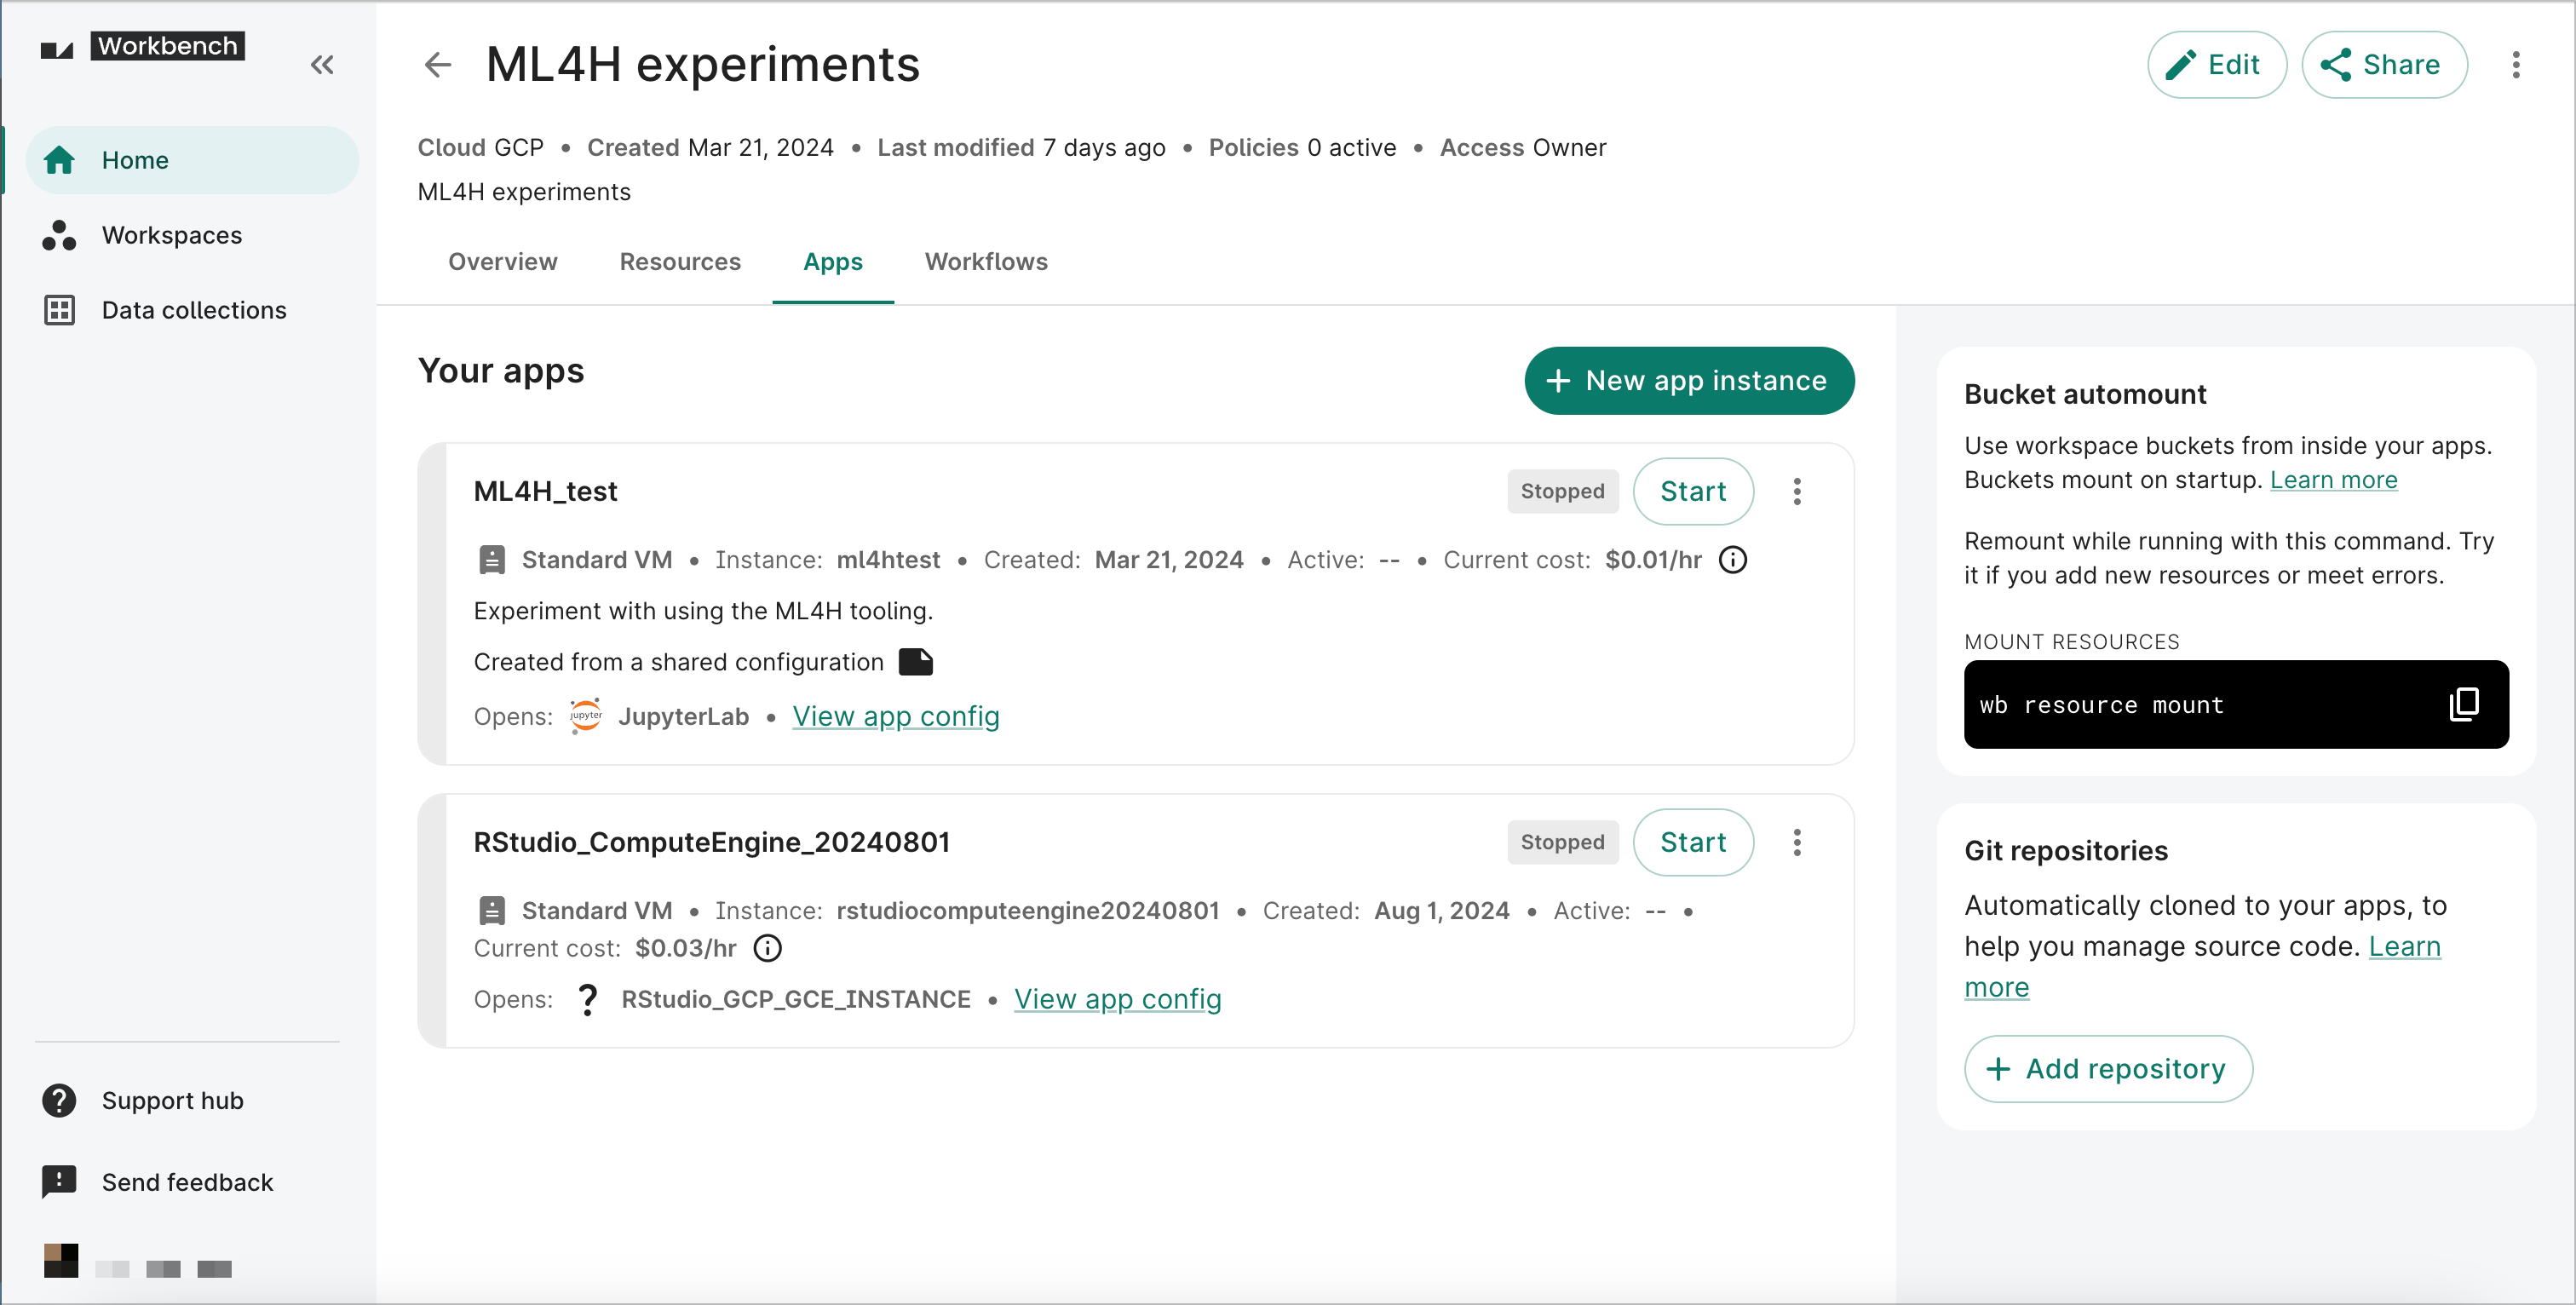
A badge in the top right corner of each app's card denotes its status, which can be one of the following:
- Creating
- Provisioning
- Startup script
- Starting
- Running
- Stopping
- Stopped
For more information about the operations you can perform on apps that are either Stopped or Running, see Operations on existing apps. Apps that are in the process of Starting or Stopping cannot be operated on.
If you have an app that seems stuck on either Starting or Stopping, please contact the support team for help.
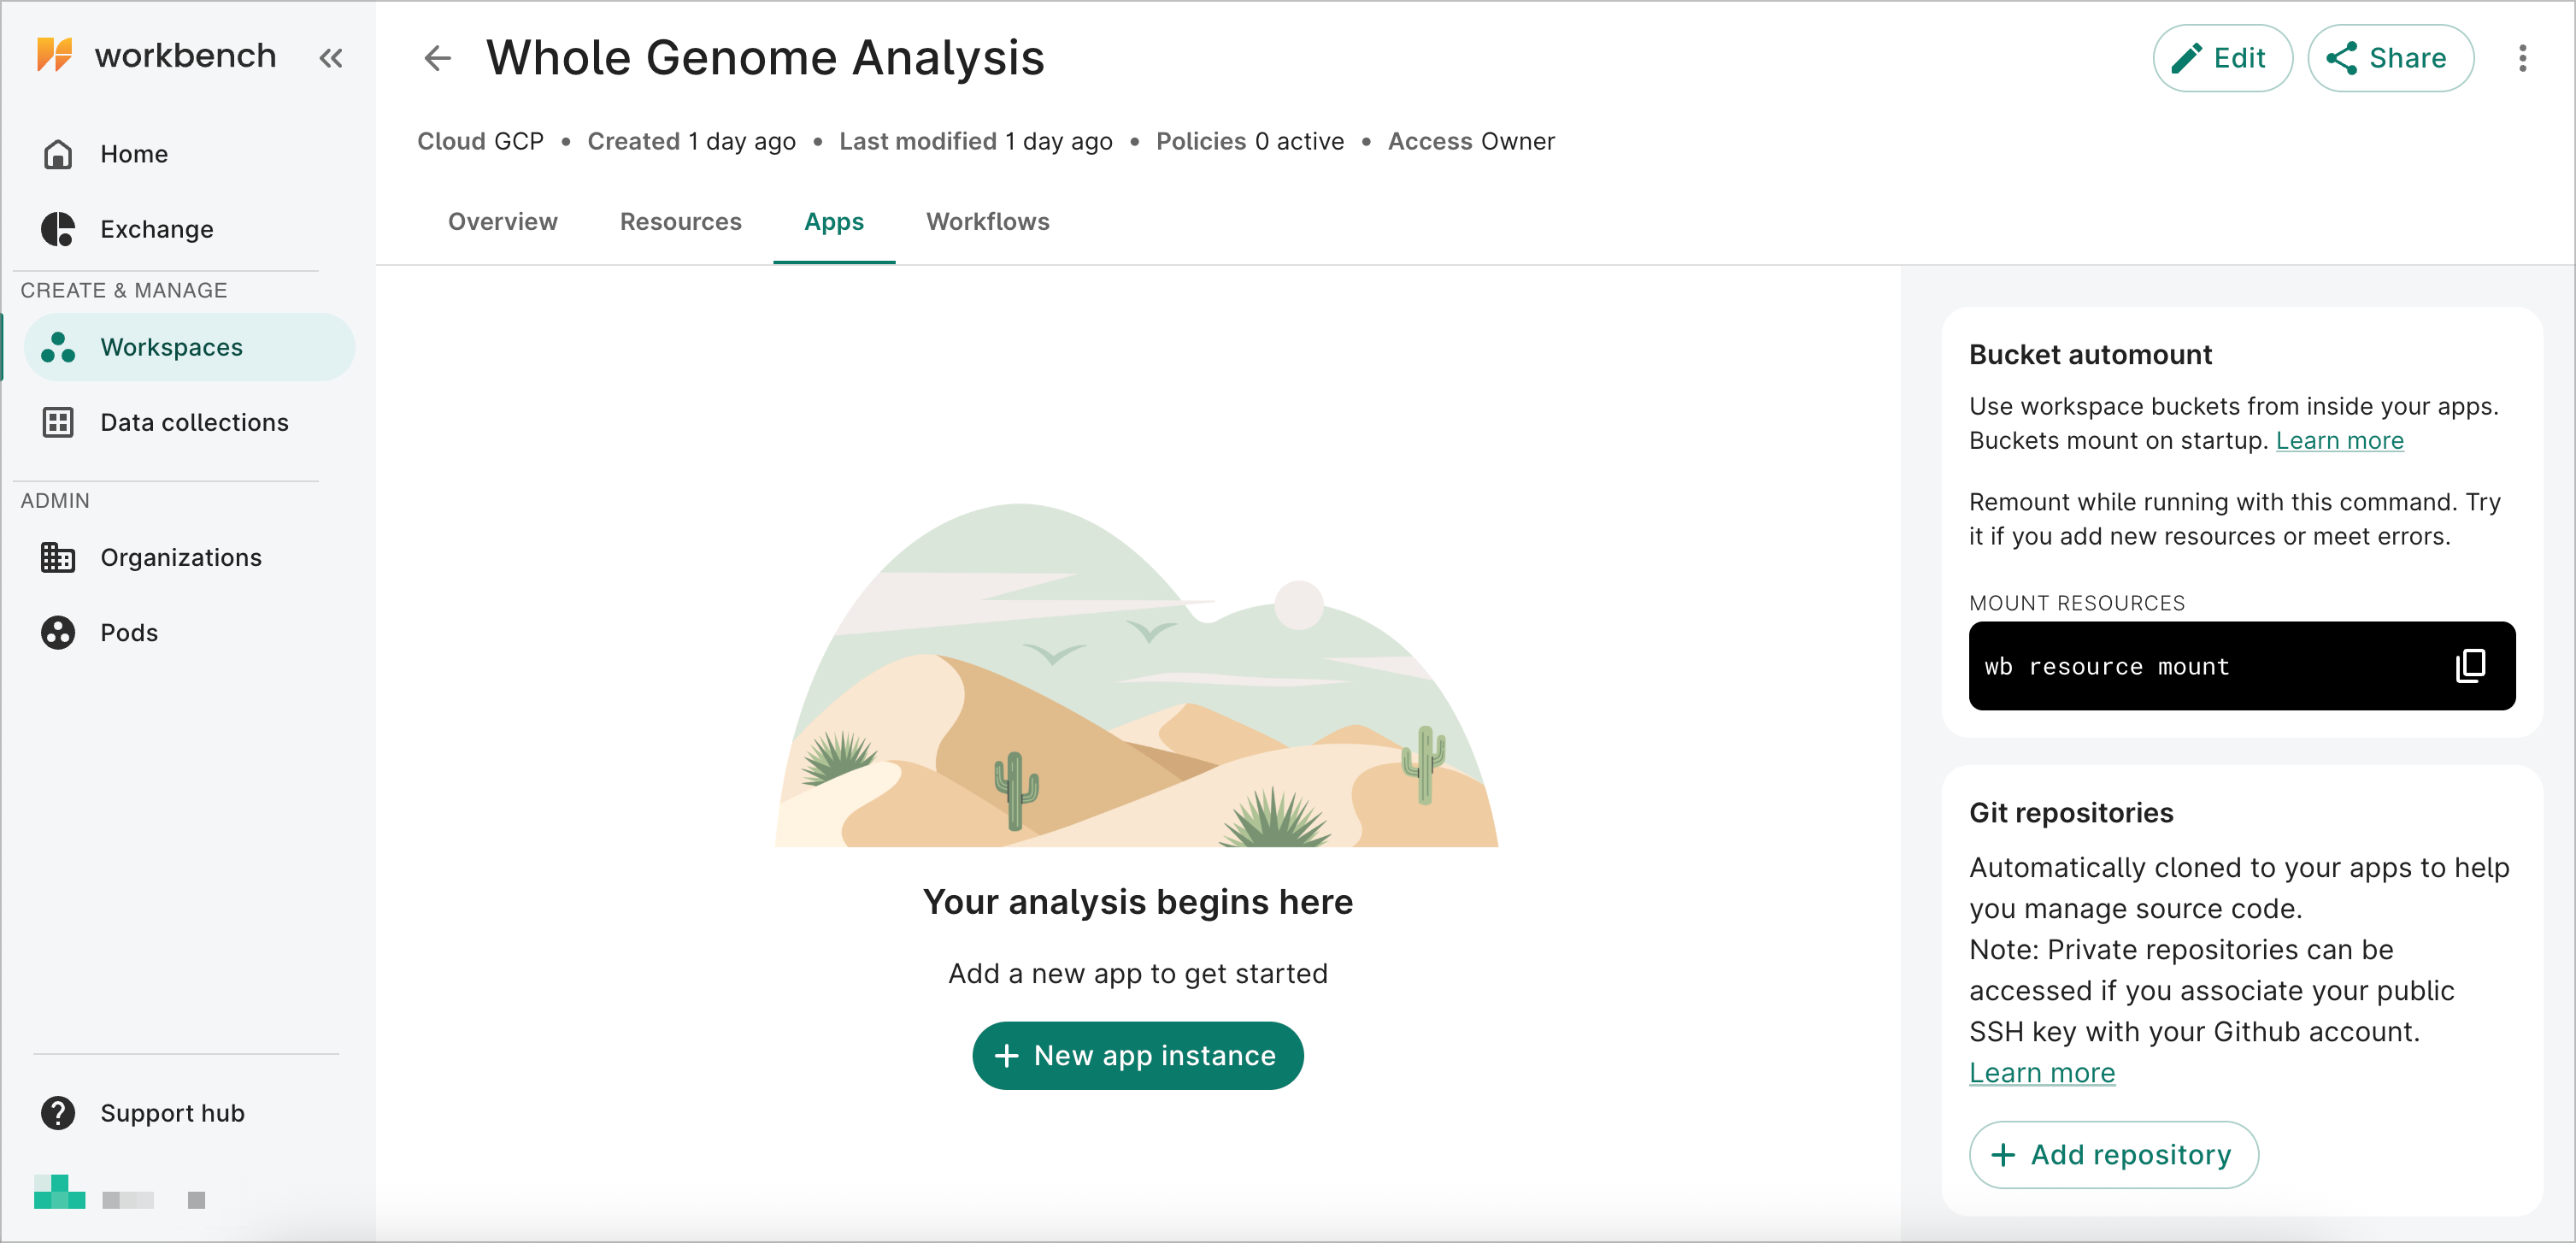
Create a new cloud app
The steps below will walk you through creating a new JupyterLab Compute Engine app.
In the Apps tab of your workspace:
-
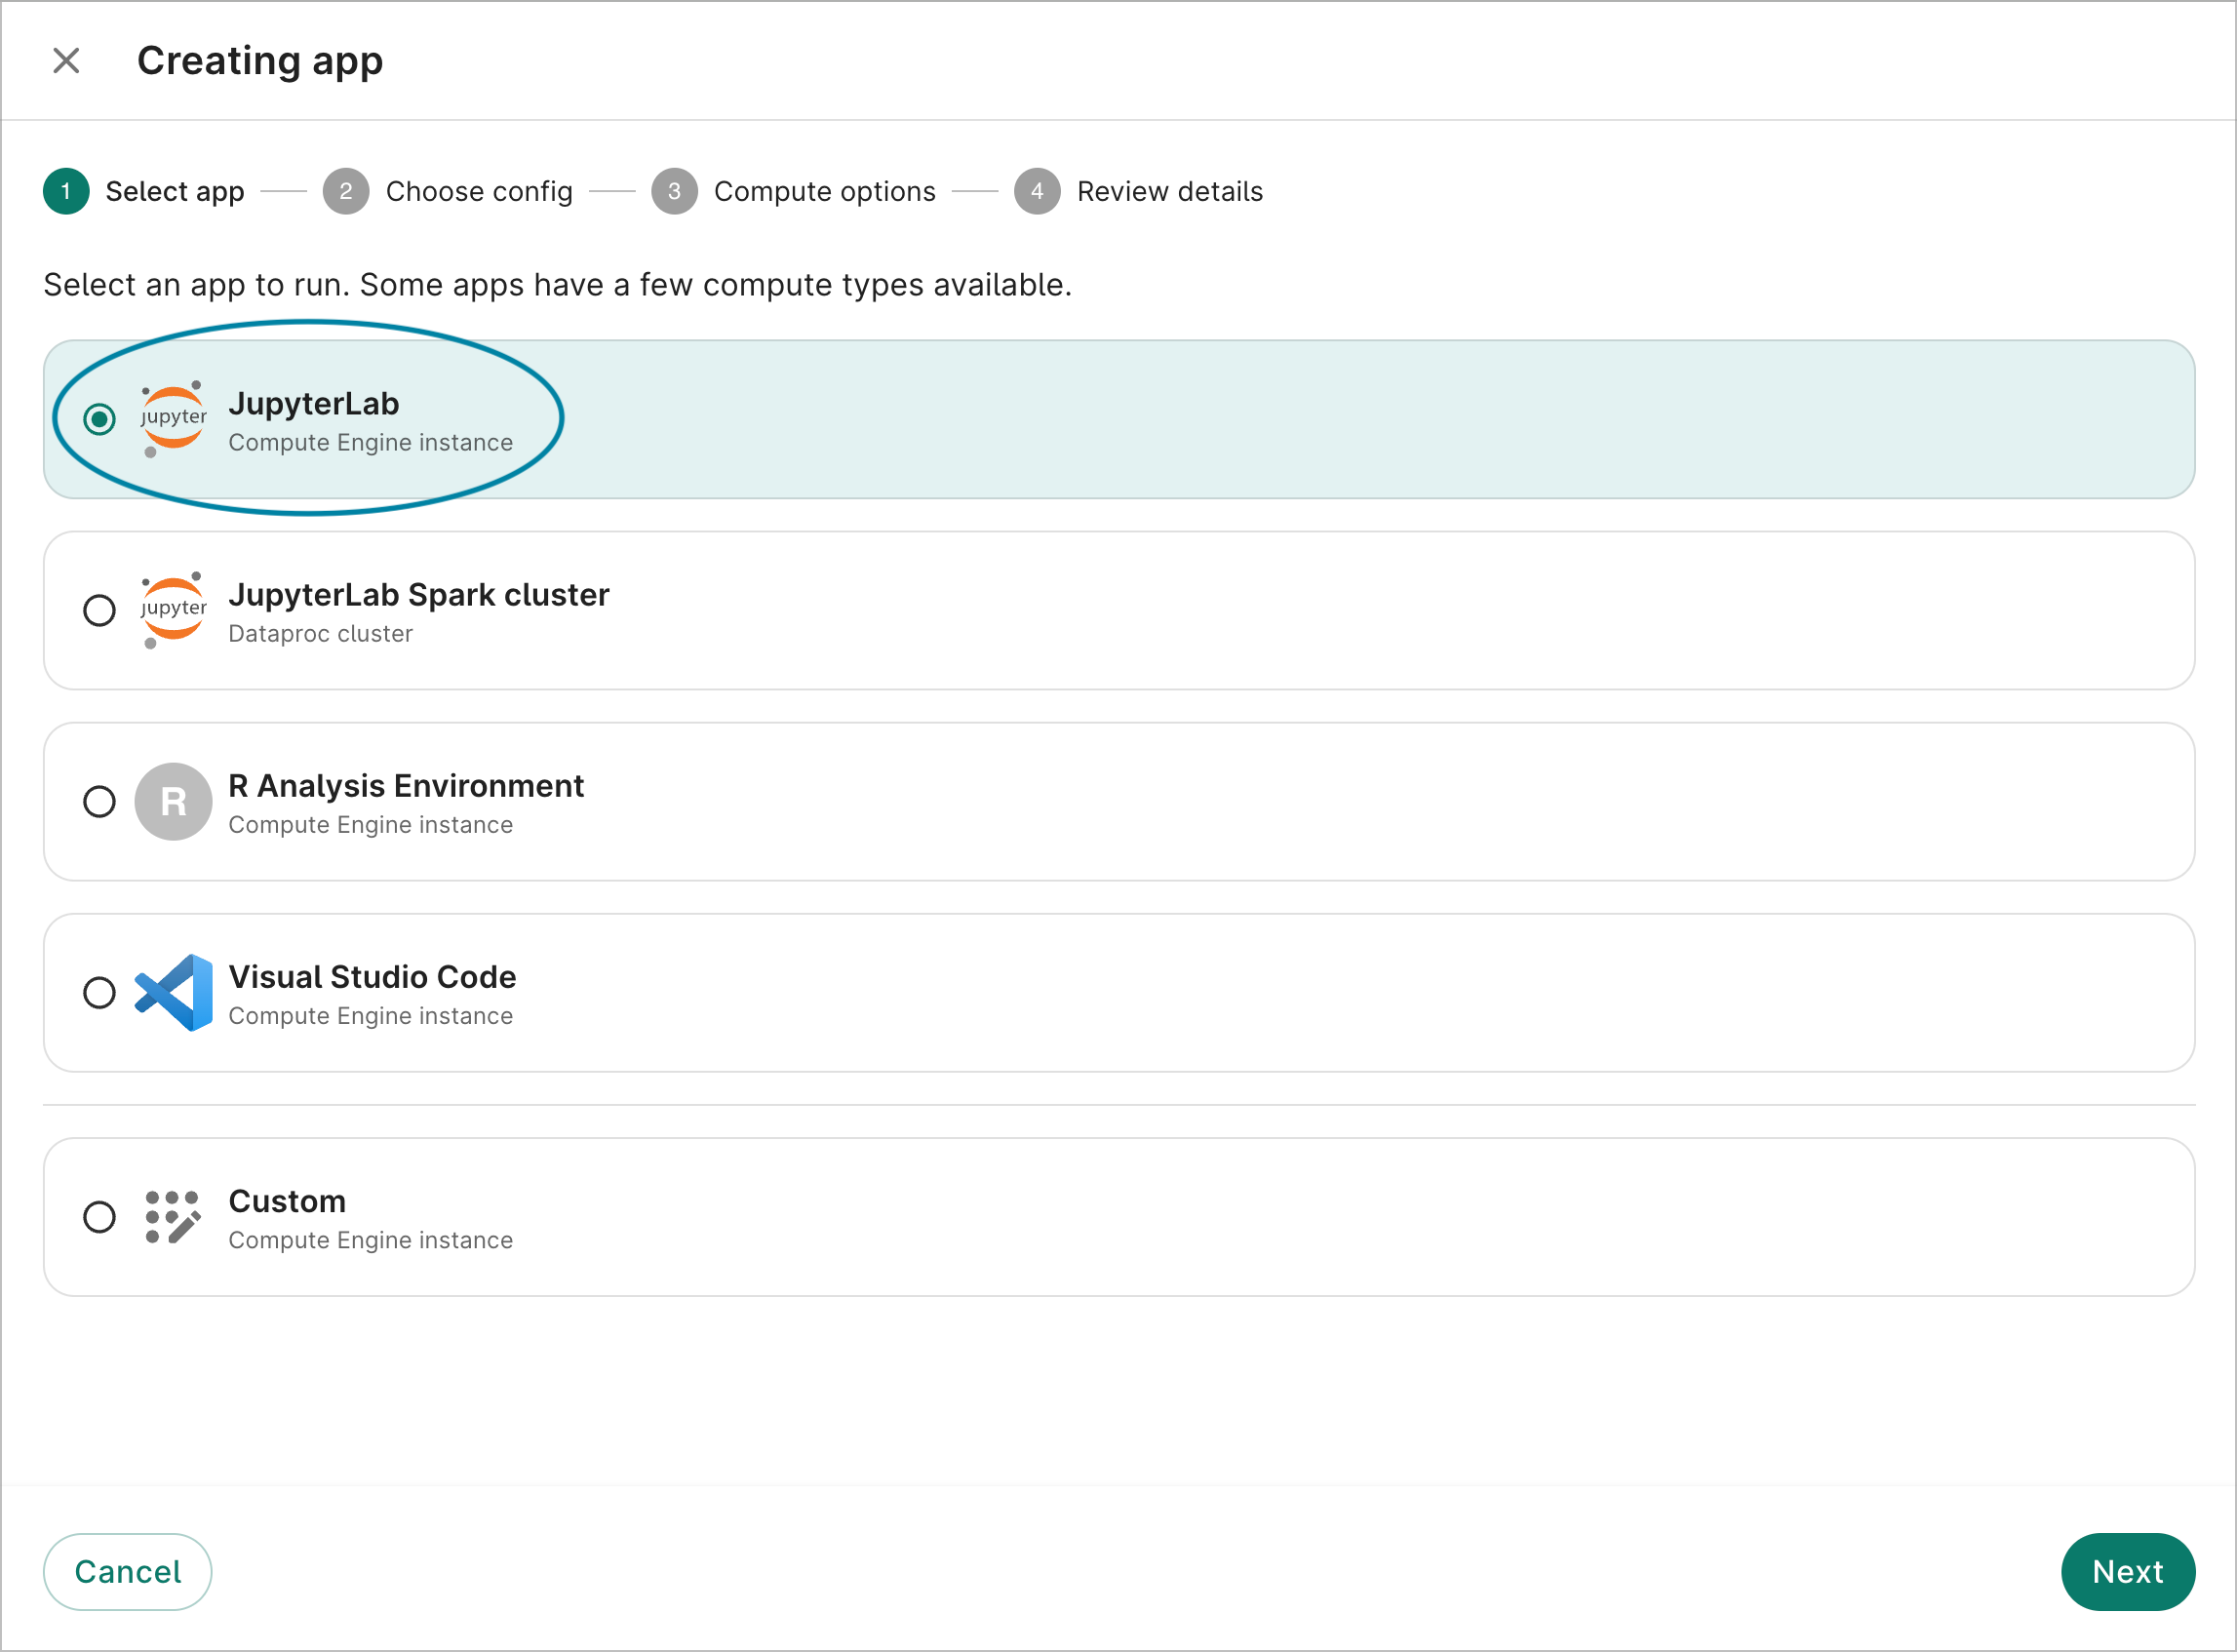
Select + New app instance to open the Creating app dialog.
-
Either select an app from the list, or select the custom Compute Engine instance option. In the image below, the JupyterLab Compute Engine instance is selected. Select the Next button.
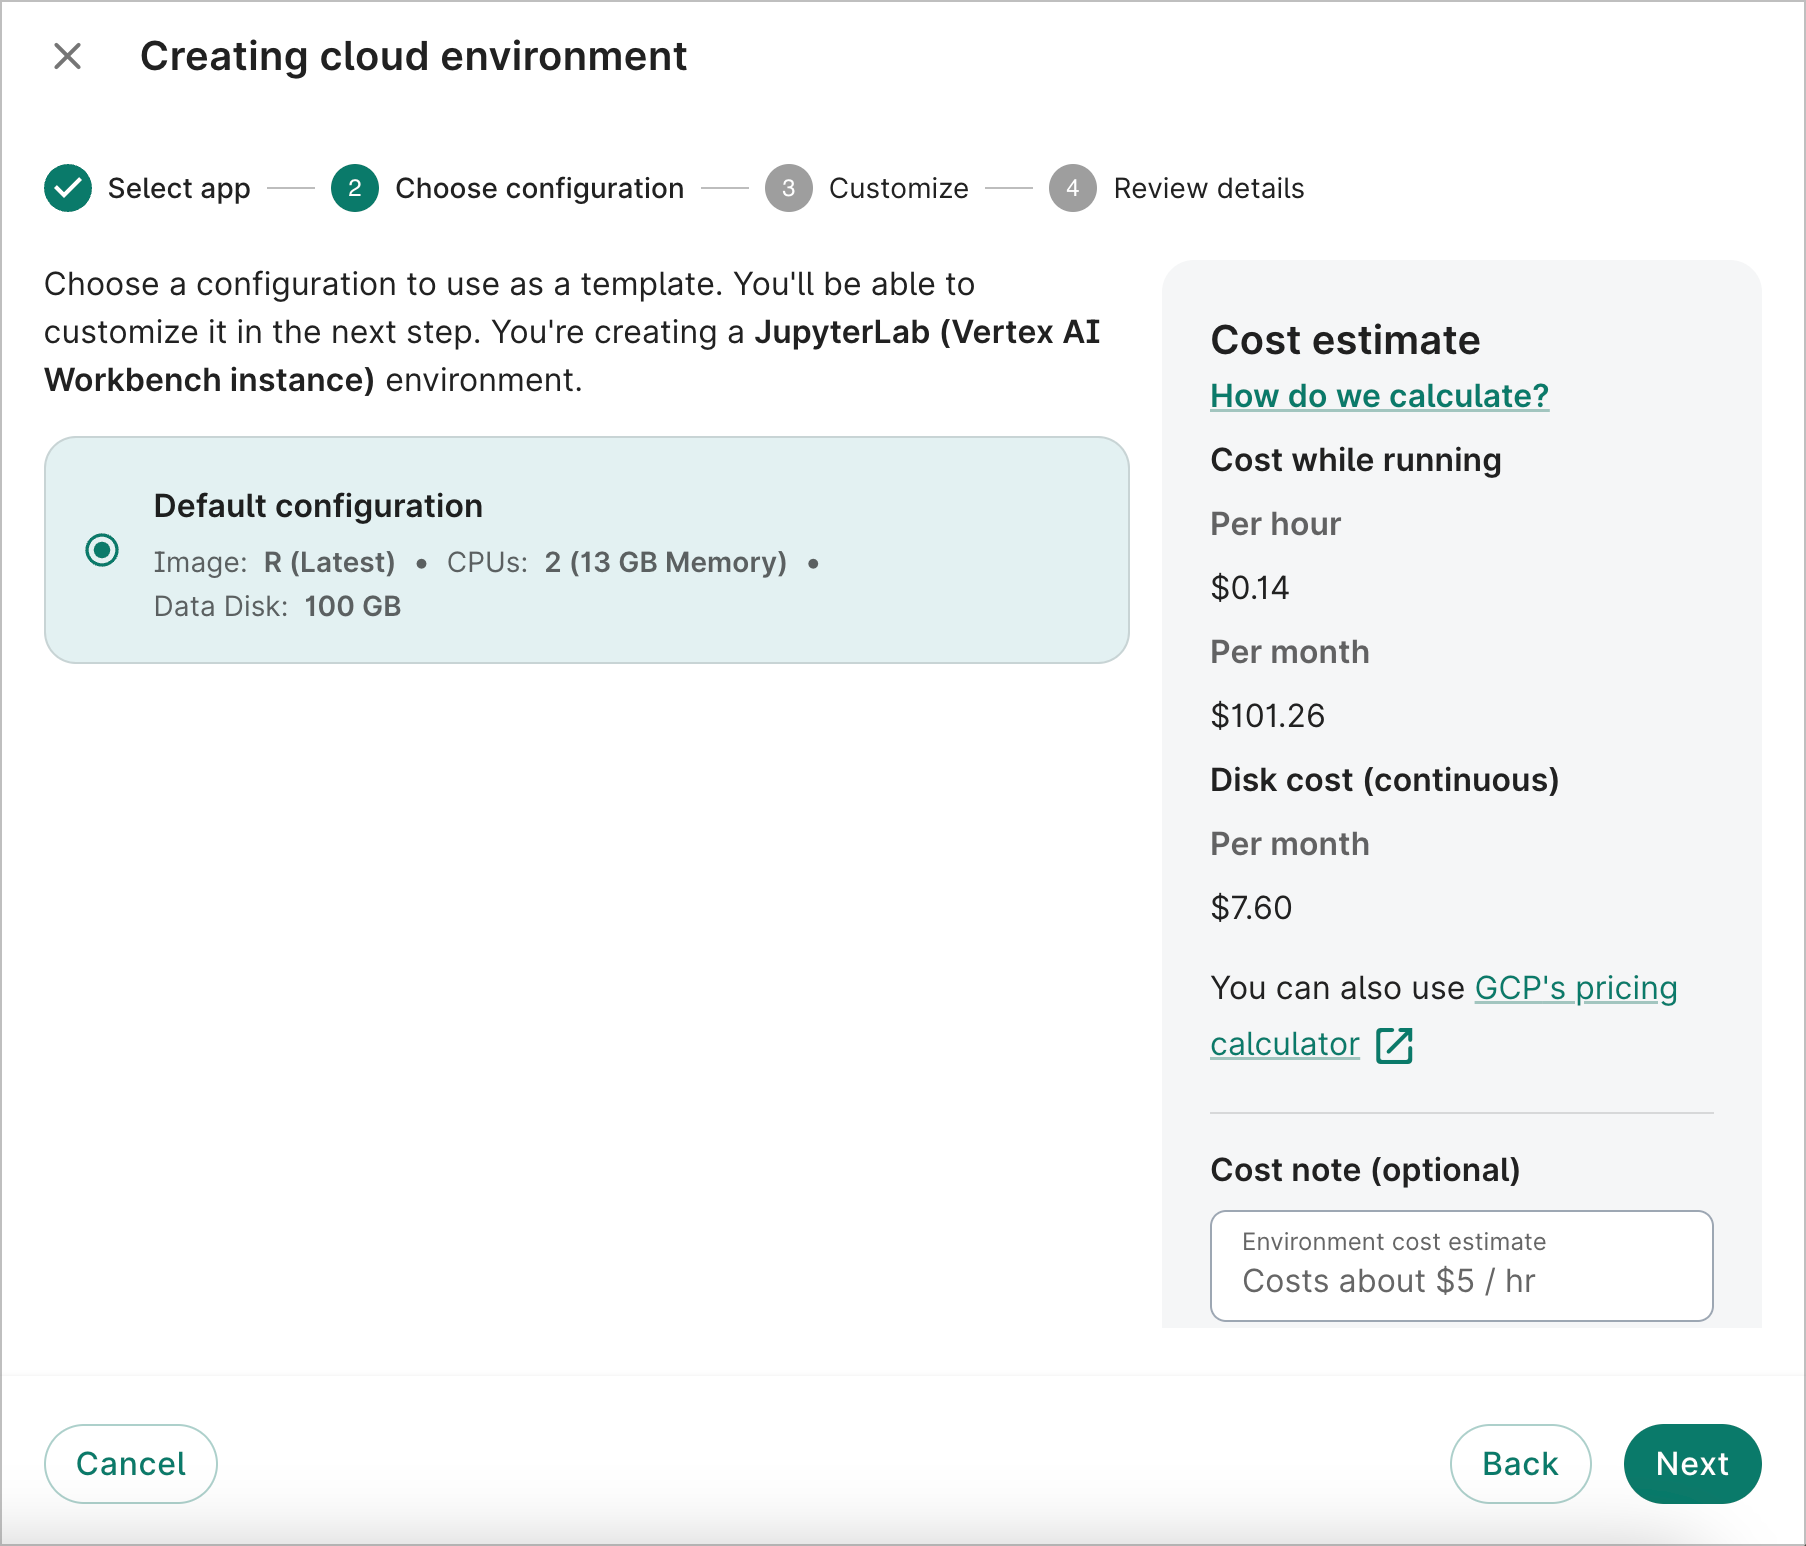
-
A default configuration will already be selected for you. Select the Next button.
-
Select the Workbench app image or enter a custom container. In the image below, the Workbench - R, PyTorch, TensorFlow (latest) image is selected.
You can also change the machine type, which determines the number of CPUs and total memory available. You can also attach GPUs to the VM.
In addition, you can change the data disk size for your app. The default recommended size is 500 GB for Compute Engine instances. However, it can range from 50 GB to 65,536 GB (64 TB). Please note that the data disk size can't currently be customized via the UI for Dataproc clusters.
Tip
It's possible to create apps via the Workbench CLI. You can run a command like the following (substituting your app name, and specifying machine type, accelerators, etc. as desired):
  wb app create gcp \
  --id=<your-app-name> \
  --app-config=jupyter-lab \
  --machine-type=<MACHINE_TYPE> \
  --idle-timeout-seconds=14400 # 4 hours
Finally, you can choose to have a running app automatically stop after a specified idle time. The autostop idle time is set to 4 hours by default, but it can range from 1 hour to 14 days. You can also choose to opt out of the autostop feature.
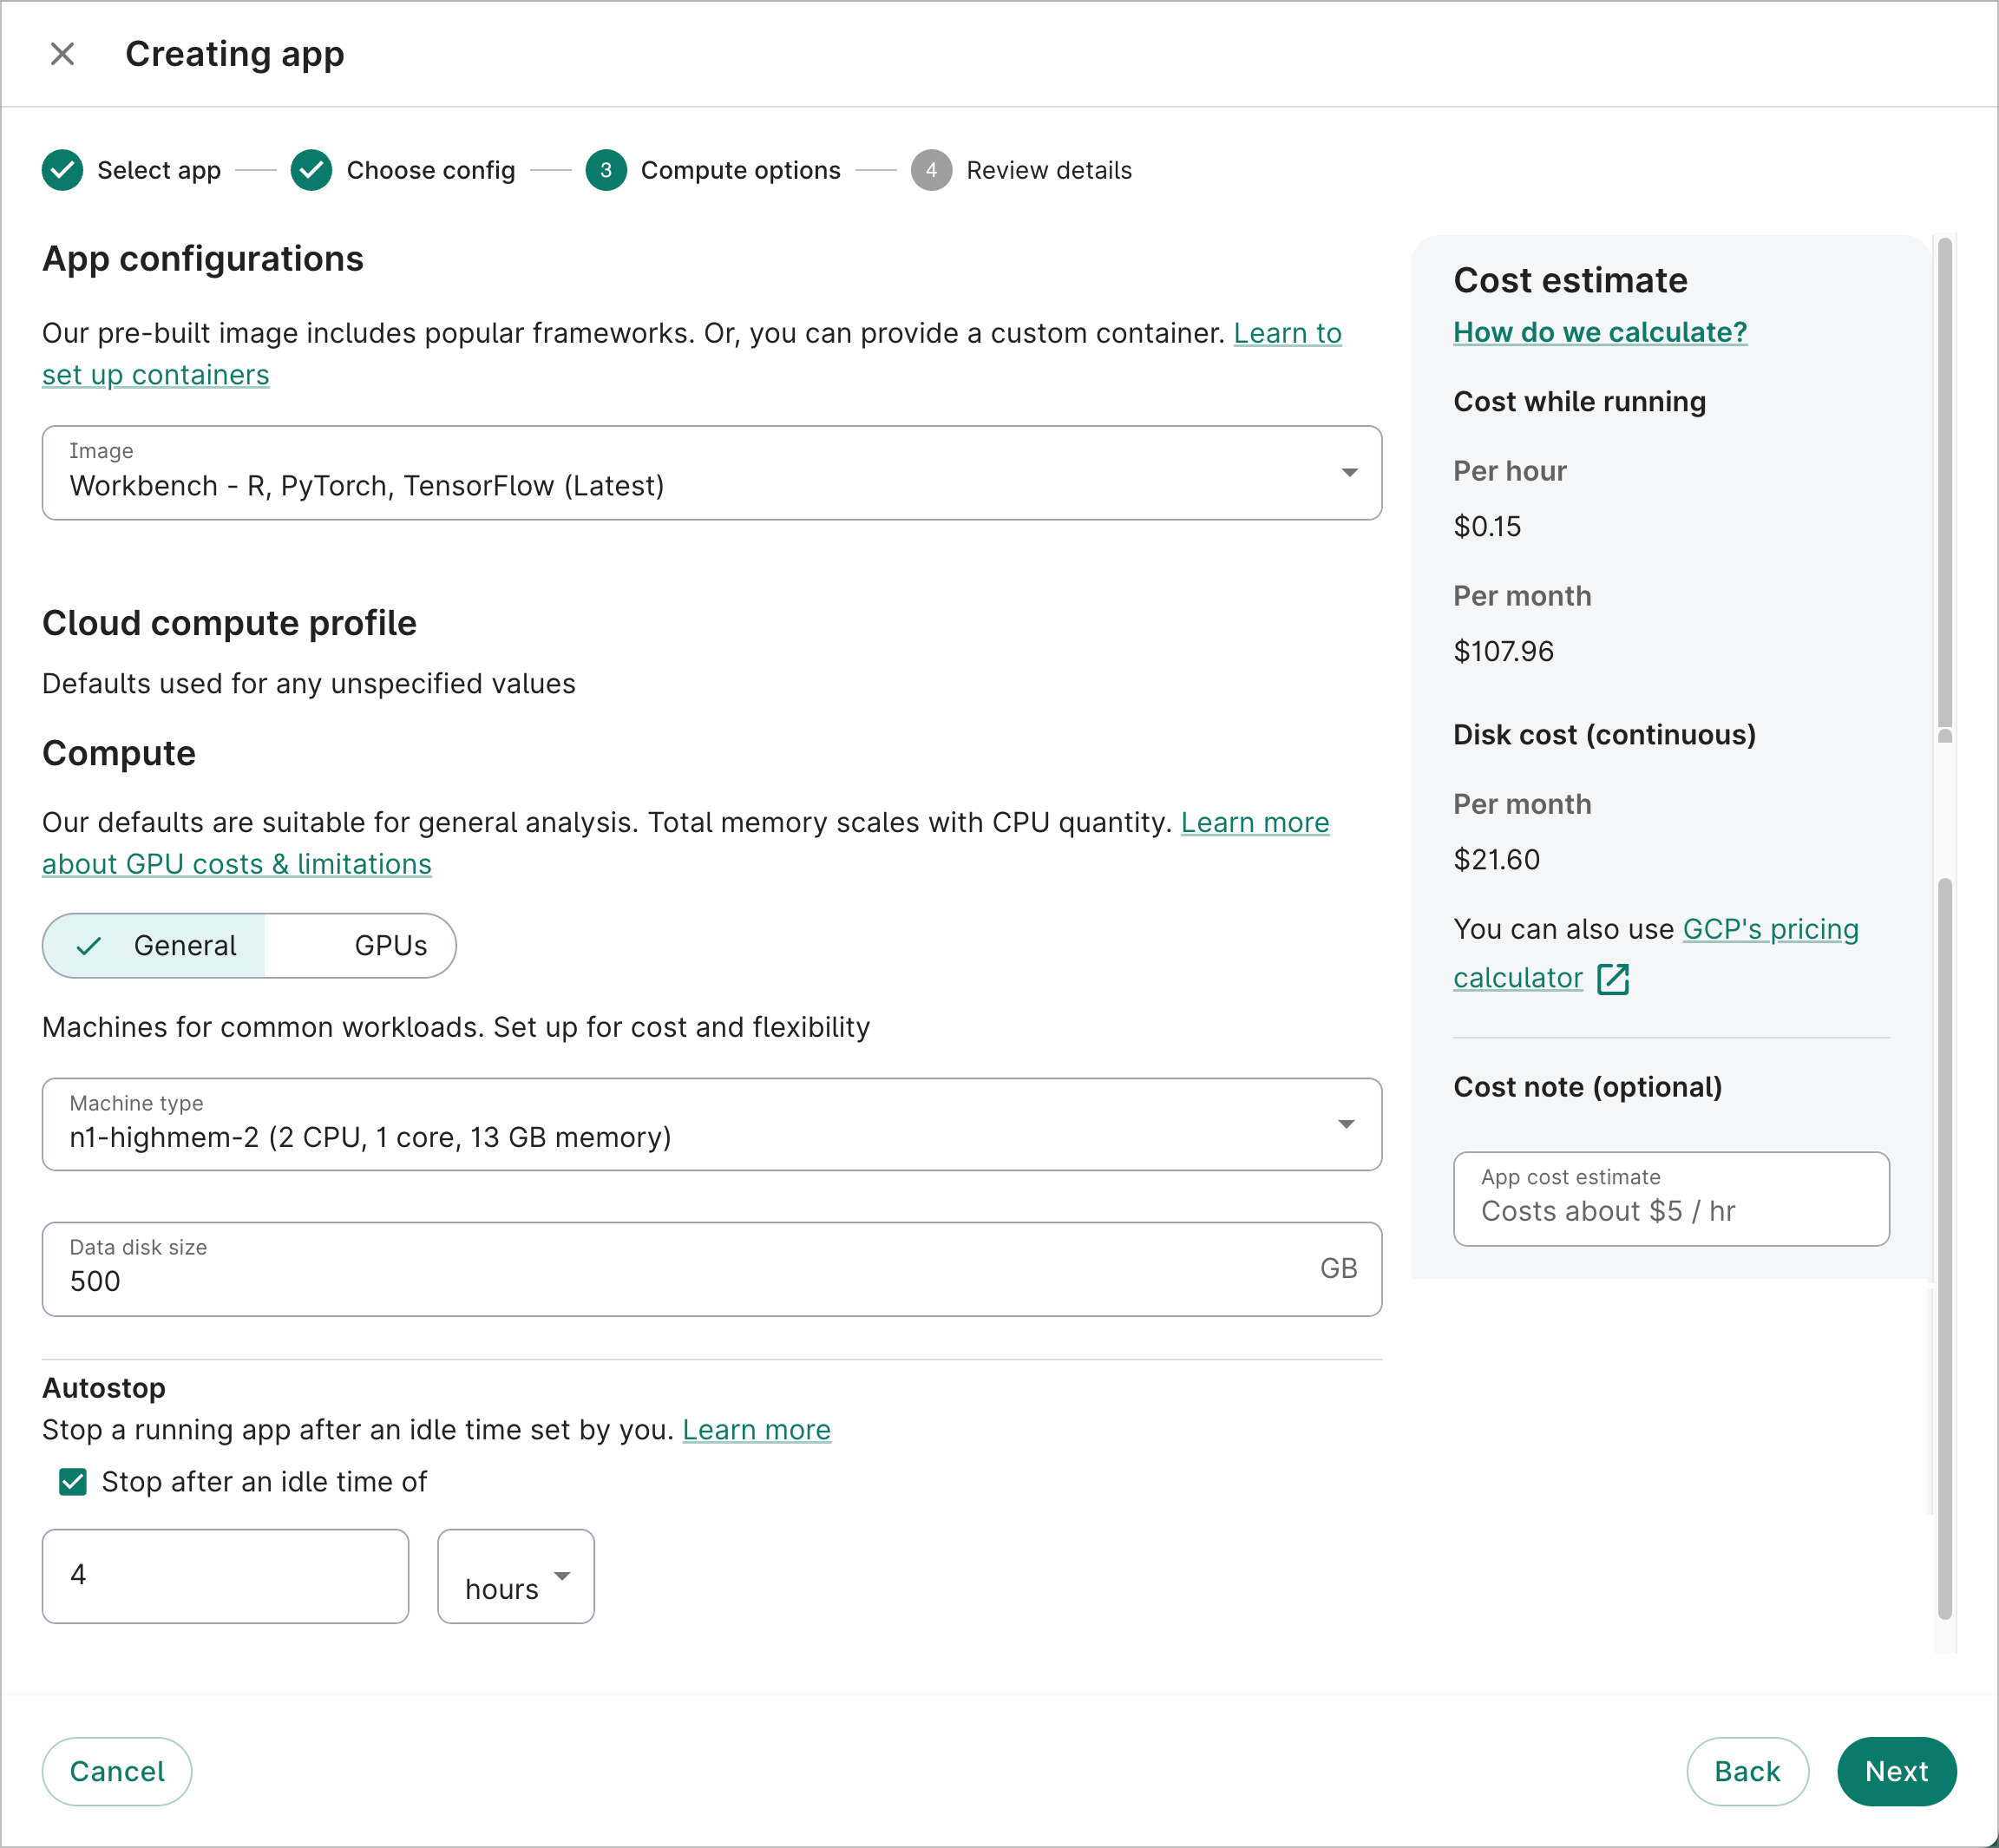
To learn more about configuring the compute profile of your app, see Compute profile configuration options for GCP and AWS apps.
Once you've finished customizing configurations, select the Next button.
Be aware
Use of GPUs is subject to certain constraints and has important implications for cost. Please familiarize yourself with them by reading the documentation on Compute profile configuration options before using GPUs in your work.
In addition, you can't attach or detach GPUs from an existing instance. Create a new instance based on your GPU needs.
-
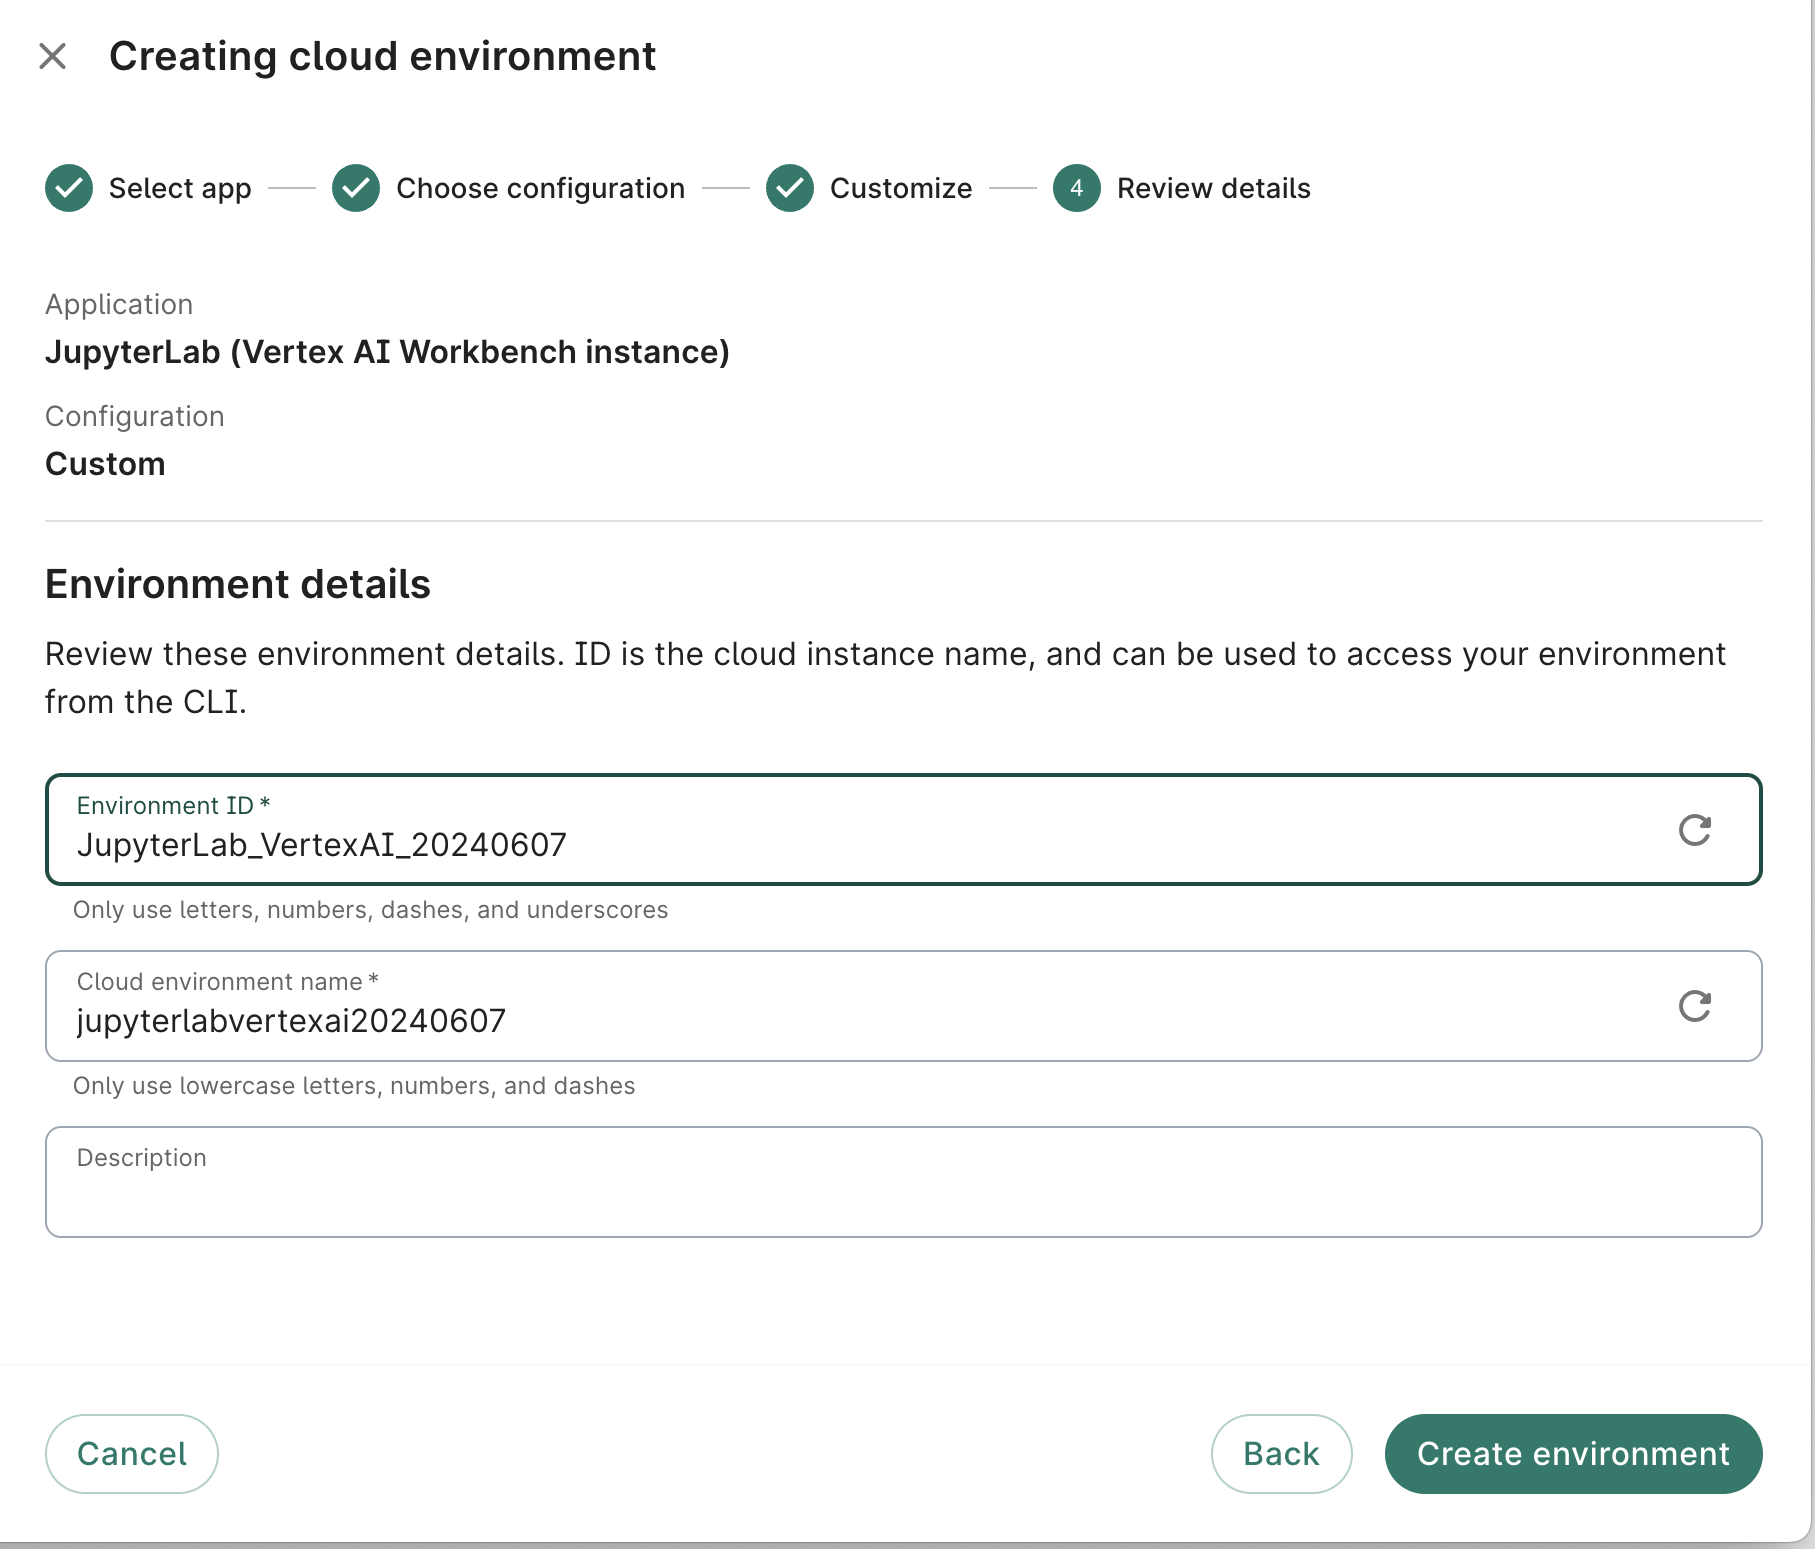
Enter a Workbench ID, instance name, and description (optional). Select the Create app button.
Other app options
Other app options besides JupyterLab GCE instance include:
- JupyterLab Spark cluster (Dataproc cluster)
- R Analysis Environment
- Visual Studio Code
- JupyterLab (NVIDIA NeMo)
- JupyterLab (NVIDIA Parabricks and CUDA-X Data Science)
- Custom
See Cloud app options for more details.
Operations on existing apps
Stop an app
When you create an app, it will automatically provision and start it. Its status will update to Running once it's ready to use.
To stop an app that's currently running, select the Stop button. This will immediately send the instruction to stop the app; there is no confirmation step. However, there may be a lag of a few seconds before the status is updated in the Workbench UI.

Stopping the app should take less than a minute. During that time, you cannot restart the app; you can only edit its name and description, or delete it.
If your app has autostop enabled, you'll see the autostop idle time listed in the app's card. You can still manually stop the app any time before it’s set to automatically stop.
Start an app
To start an app that is currently stopped, select the Start button. This will immediately send the instruction to start the app; there is no confirmation step. However, there may be a lag of a few seconds before the status is updated in the Workbench UI.
Starting the app should take less than a minute. During that time, you cannot stop the app; you can only edit its name and description, or delete it.
Edit an app
You can edit the ID, description, and autostop idle time of your app at any time. Your app's compute profile can be updated only when the app is stopped.
Select Edit in the three-dot action menu of the app card. This will bring up the Editing dialog. Edit the fields as desired. For compute profile changes, you can see cost estimates update in real-time. Select Update to save your changes.

Note
You can also add autostop via the Editing dialog to an app that doesn’t already have autostop enabled.Be aware
You cannot edit the image type or instance name of your app. If these need to be changed, you'll need to create a new app. You can create as many apps as you want within the same workspace.Delete an app
You can delete an app by selecting Delete in the three-dot action menu of the app card.

This will bring up a deletion dialog. To proceed, check the box confirming your intent to delete the app and its associated resources, then choose the Delete app button.
Be aware
Any data stored on the app that aren't in mounted resource buckets will be lost upon deletion.
Other ways to modify your app's compute profile
You can also modify an existing app's compute profile through the
Google Cloud console or via the Workbench CLI
(command-line interface), using the
wb resource update gcp-notebook
command. For both options, the app needs to be Stopped first, as described in
Stop an app.
For details on updating your app via the Cloud console, see Manage your apps in Google Cloud console.
To learn more about the available cloud compute options, see Compute profile configuration options for GCP and AWS.
Next steps
See Overview of cloud app types for more details about the types of cloud apps available on Workbench and how to use them.
Last Modified: 21 October 2025