Compute profile configuration options
Categories:
Prior reading: Cloud apps overview
Purpose: This document provides detailed instructions for customizing the compute resources allocated to an AWS-backed cloud app through the Workbench UI.
Introduction
When creating an AWS-backed cloud app, you have the ability to choose from a number of different instance types. The instance type you select will affect the cost of running your app.
Understand compute options
Virtual machines
A virtual machine (VM) is an emulation of a physical computer and can perform the same functions, such as running applications and other software. VM instances are created from pools of resources in cloud data centers. You can specify your VM's geographic region, compute, and storage resources to meet your job's requirements.
You can create and destroy virtual machines at will to run applications of interest to you, such as interactive analysis environments or data processing algorithms. Virtual machines underlie Verily Workbench’s cloud apps.
By default, Workbench uses m5.xlarge EC2 instances for JupyterLab apps and t3.medium EC2 instances for R Analysis Environment and Visual Studio Code apps in AWS-backed workspaces. To learn more, see AWS EC2 M5 Instances and AWS EC2 T3 Instances.
Note
JupyterLab apps require a m5.xlarge machine or larger.Be aware
The type of instance you select will determine the number of CPUs and memory used, and whether or not it has GPUs attached. Therefore, it can have a major effect on your app costs.CPUs (central processing units)
The central processing unit (CPU), or simply processor, can be considered the “brain” of a computer. Every computational machine will have at least one CPU, which is connected to every part of the computer system. It’s the operational center that receives, executes, and delegates the instructions received from programs. CPUs also handle computational calculations and logic. Increasing the number of CPUs accelerates the processing of these tasks. Other types of processors (GPUs or TPUs) may be better suited for processing specialized tasks, such as parallel computing and machine learning.
If you think you'll need more than the default number of CPUs, you can choose a different machine type at the time of creation.
GPUs (graphical processing units)
A graphical processing unit (GPU) is a specialized processor that excels at parallel computing, which means processing many tasks at once. While a central processing unit (CPU) must process tasks one by one, a GPU can split complex tasks into many pieces and work through them simultaneously. GPUs were traditionally used to accelerate video rendering, but their parallel computing ability also makes them ideal for tasks such as sequence alignment, AI, and machine learning.
Certain instance types include GPUs. You can set your GPU configuration at the time of app creation.
Memory
Memory, also known as random access memory (RAM), is where programs and data that are currently in use are temporarily stored. The central processing unit (CPU) receives instructions and data from programs, which are kept in the computer’s memory while being used. Once the instructions are completed, or the program is no longer in use, the memory is freed up. If the computer system doesn’t have enough memory for all of the CPU’s instructions, the system’s performance will diminish and slow down. While the CPU is commonly thought of as a computer’s brain, you can think of memory as the attention span.
The memory amount is set based on the AWS instance type selected.
Autostop
Autostop is a configurable app option that automatically stops running apps after a specified idle time.
Zone
When creating an AWS-backed app, you'll be asked to specify an Availability Zone. This is to help mitigate temporary resource unavailability for GPUs.
Set compute options for a new app
Virtual machines, CPUs, and memory
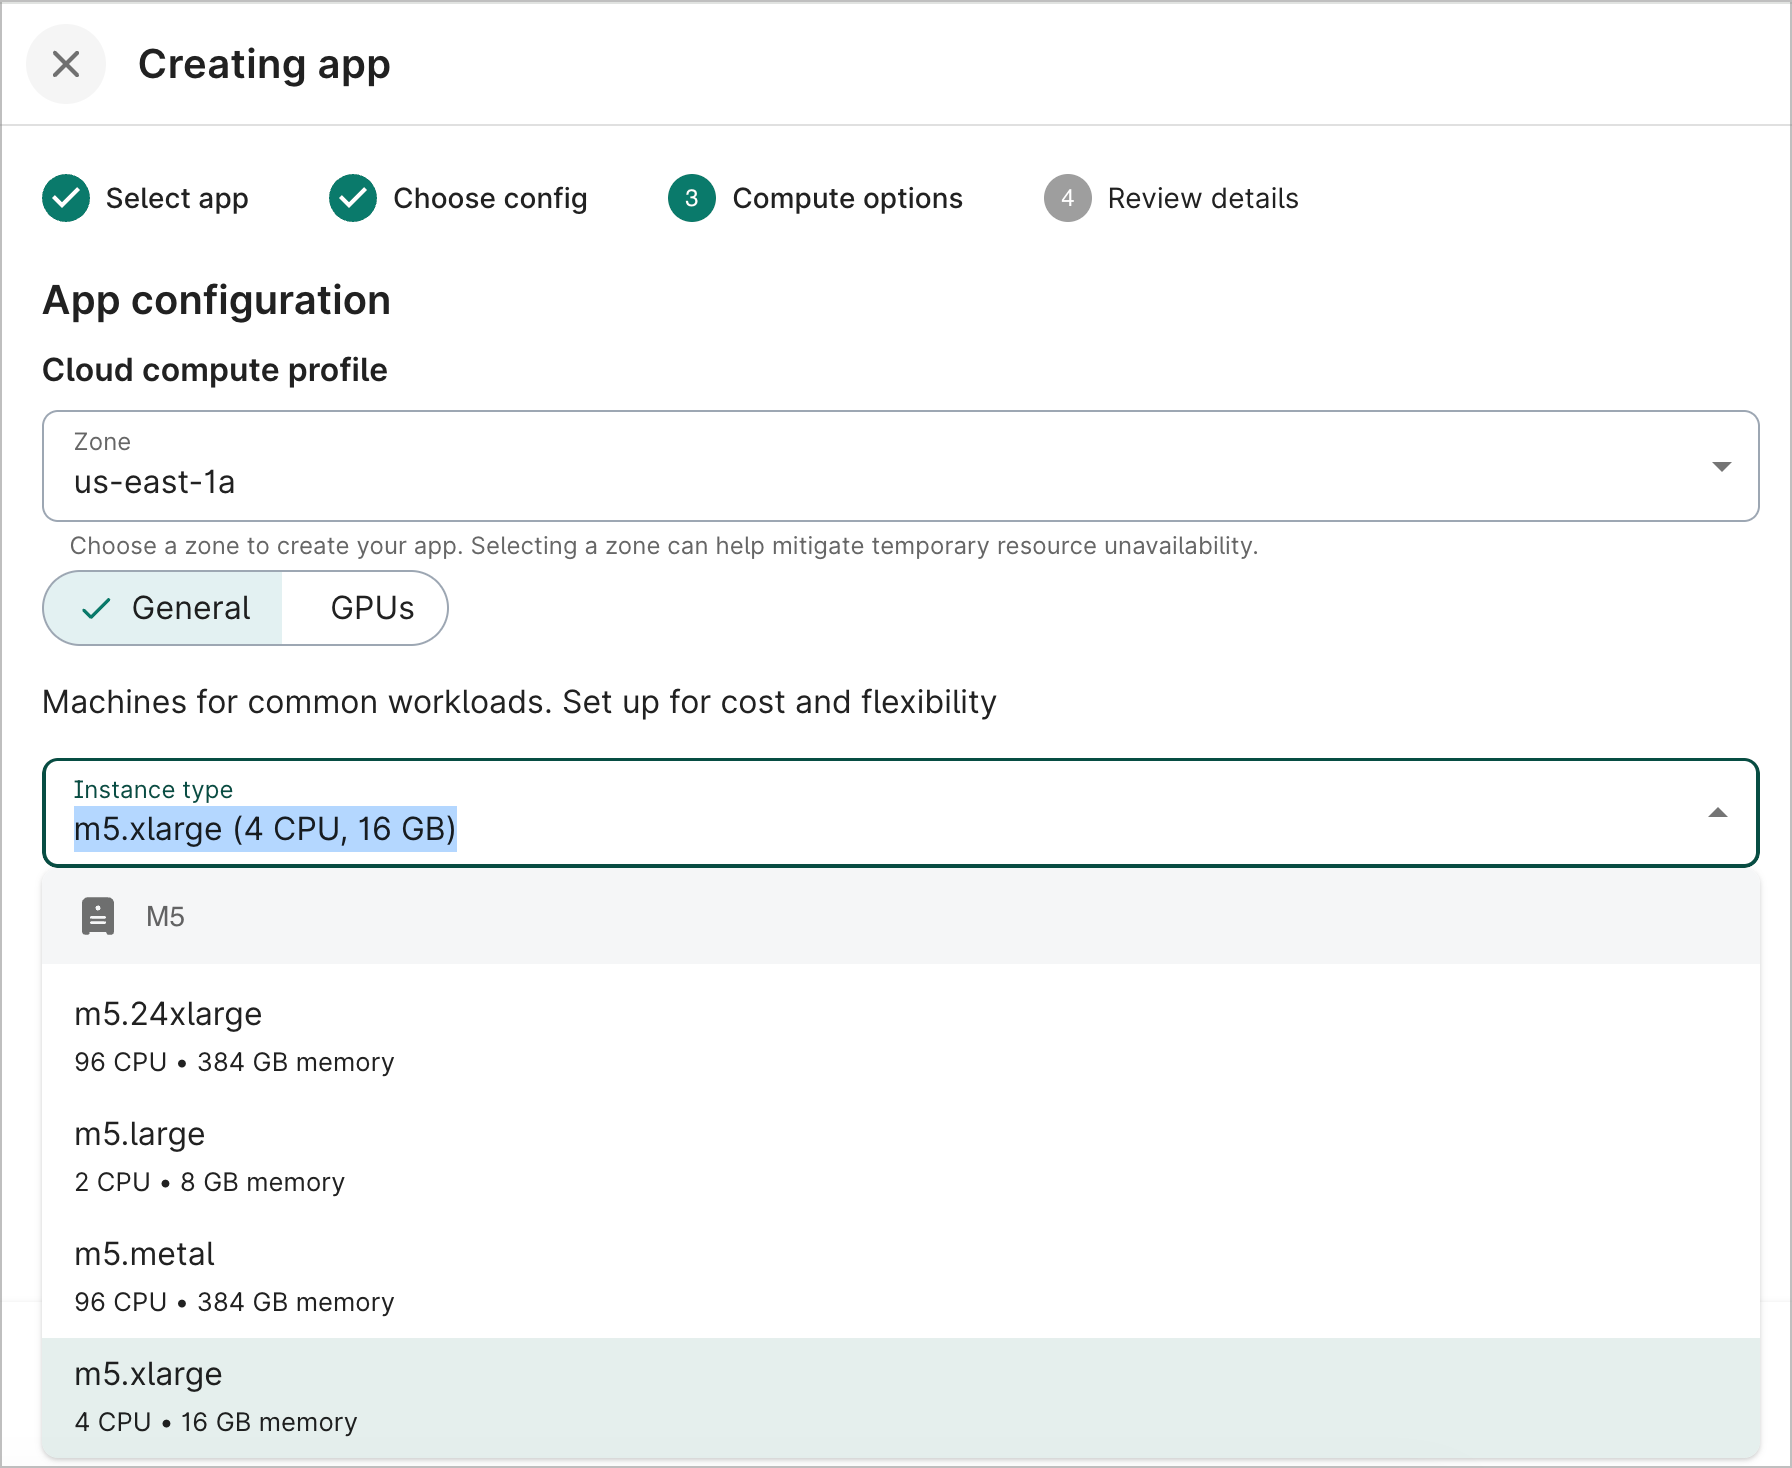
New apps based off of JupyterLab will include a M5 instance, 4 CPUs, and 16 GB of total memory by default. New R Analysis Environment and Visual Studio Code apps will include a T3 instance, 2 CPUs, and 4 GB of total memory by default.
You can select a different instance type if you need more computing power. On the Compute options step during app creation, click the General button. The Instance type dropdown lists the various options available. You can see the number of CPUs, memory, and GPU type (if applicable) for each instance type.
GPUs
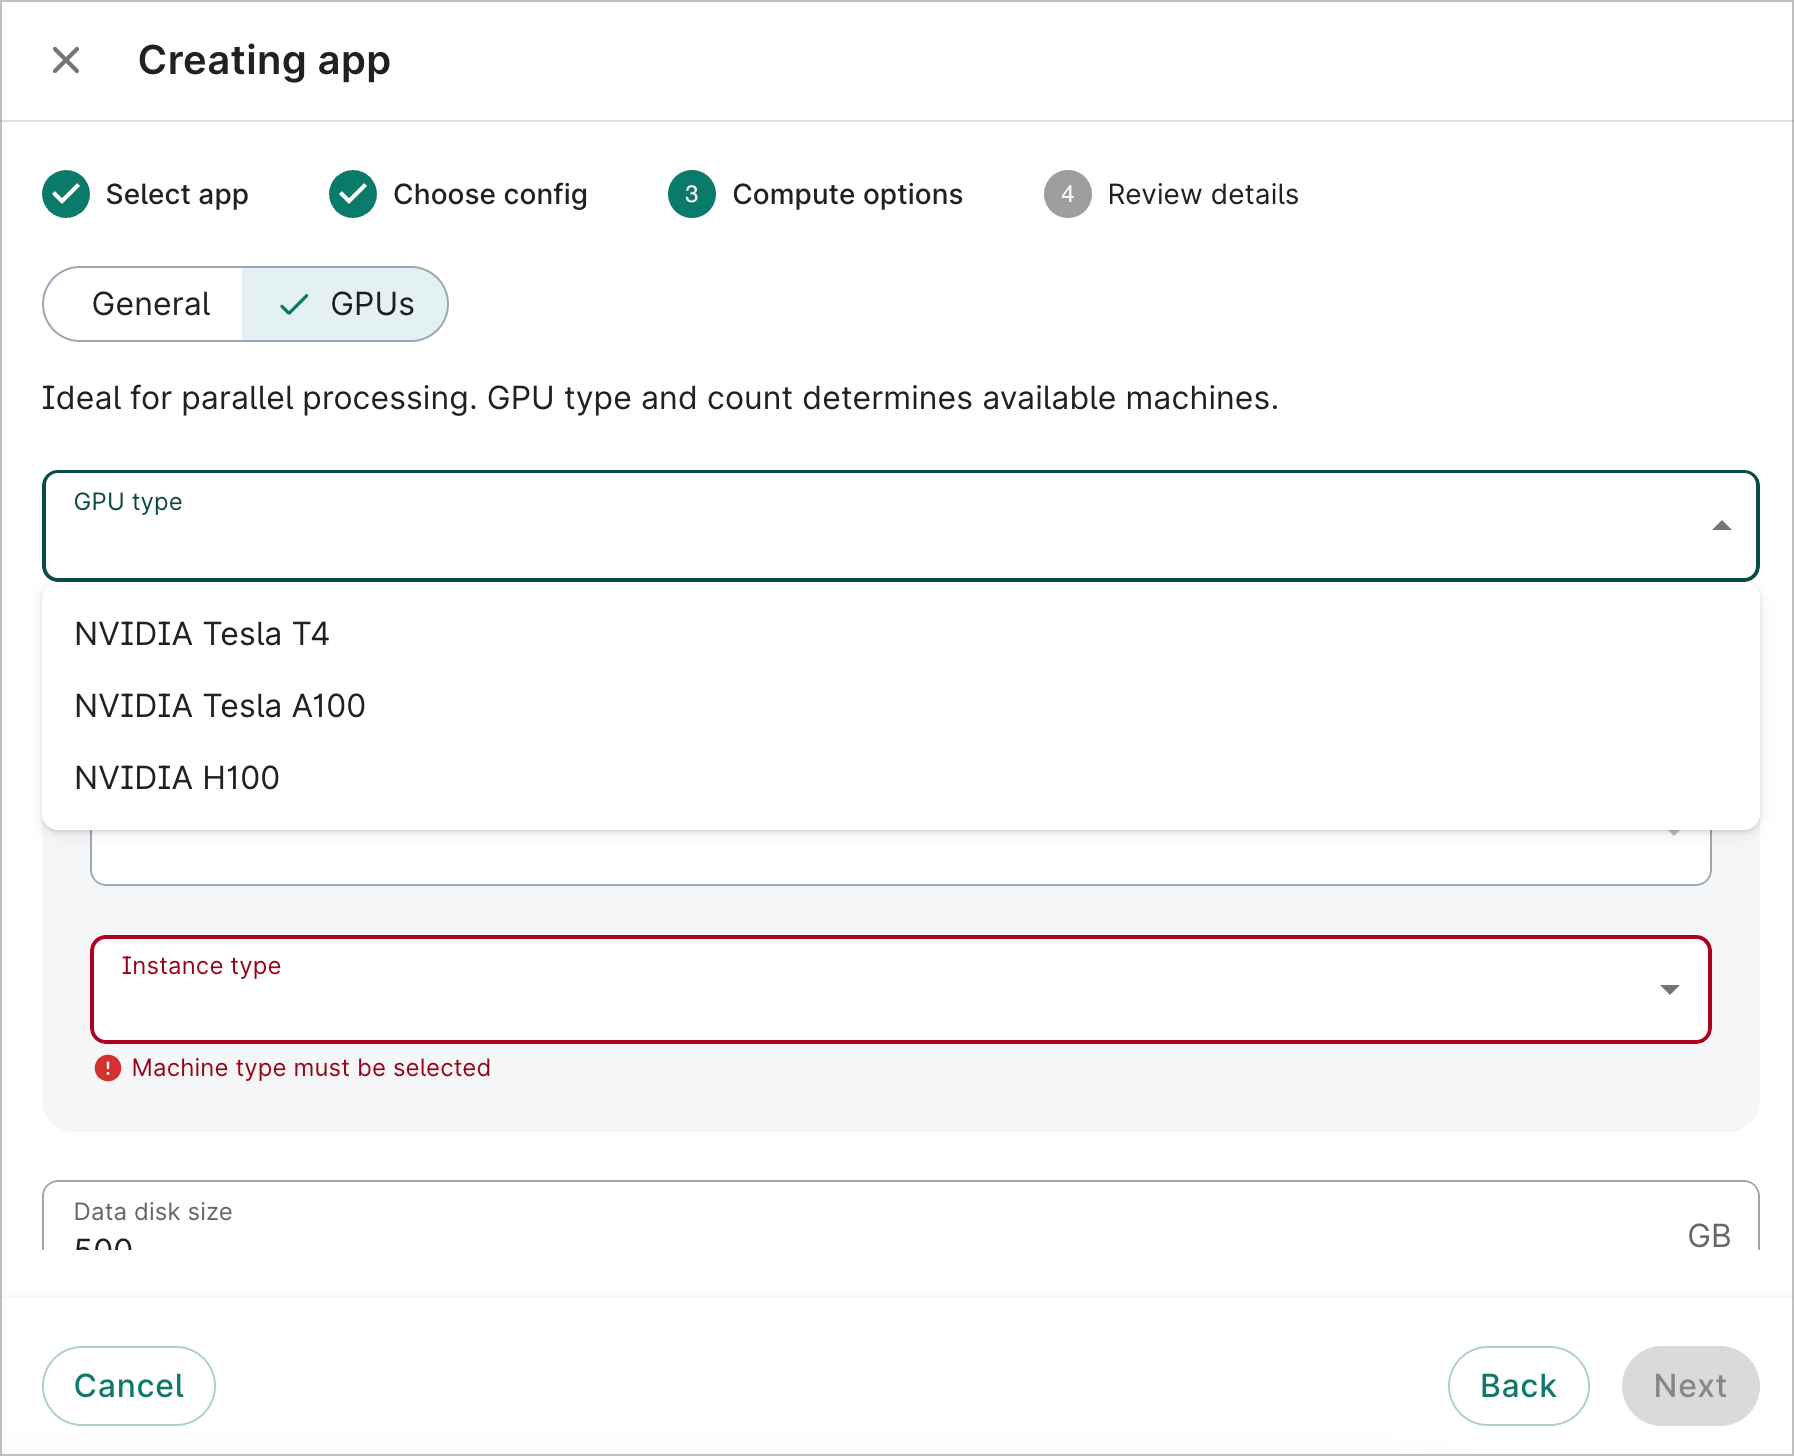
Certain instance types, such as G4s, include GPUs. You can configure the GPUs in the Compute options step during app creation.
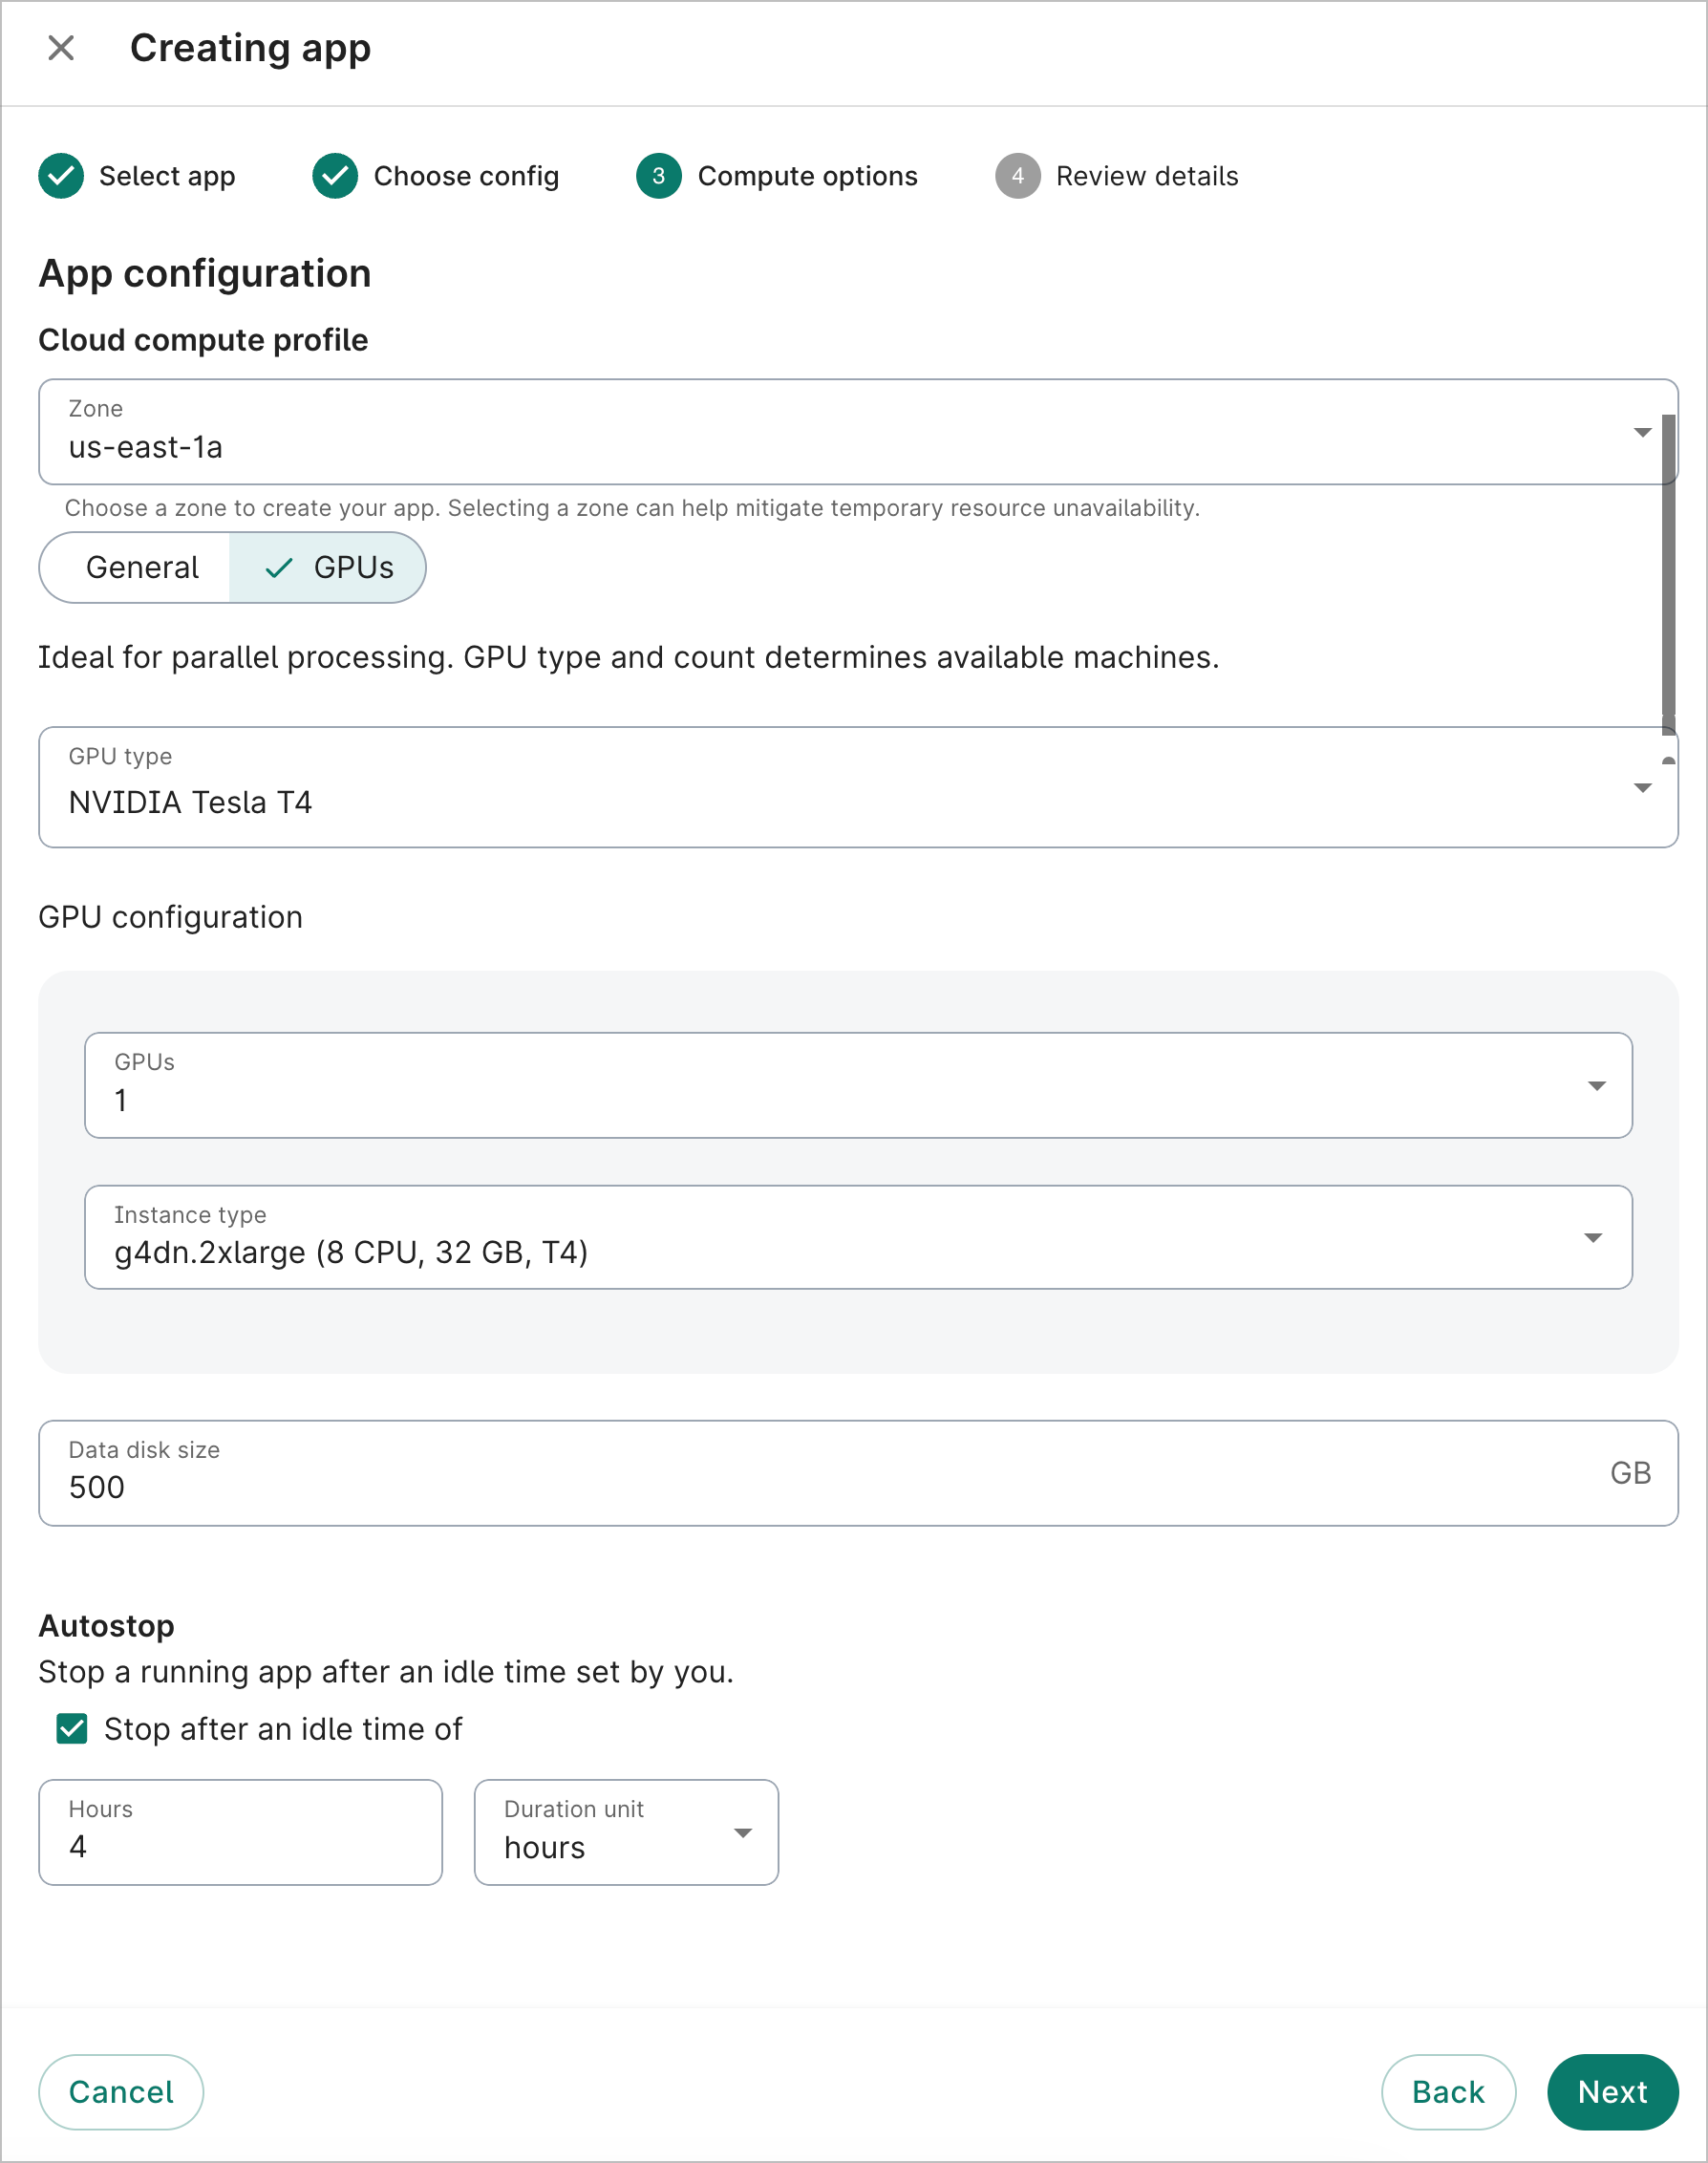
Click the GPUs button. Select a GPU type from the dropdown. In the GPU configuration section, select the number of GPUs and the instance type. You can see the number of CPUs and memory for each GPU instance type.
Disk storage
New EC2 apps come with 500 GB of disk storage space by default. For most apps, we recommend a minimum of 100 GB. However, disk storage can be as small as 50 GB or as large as 65,536 GB (64 TB).
Be aware
Disk storage is configurable only during app creation. The size cannot be updated afterward.Autostop
The autostop idle time is set to four hours by default. This can be changed to any length from 1 hour to 14 days. You can also disable the autostop feature.
On the Compute options step during app creation, enter the desired autostop idle time. Deselect the checkbox if you'd like to disable autostop.
Zone
You can select any Zone for your cloud app; it does not need to be within the Region of your workspace. However, depending on resource availability, you may see an error during app creation if there is insufficient capacity for your selected GPU type. The error message will suggest Zones that may have sufficient capacity.
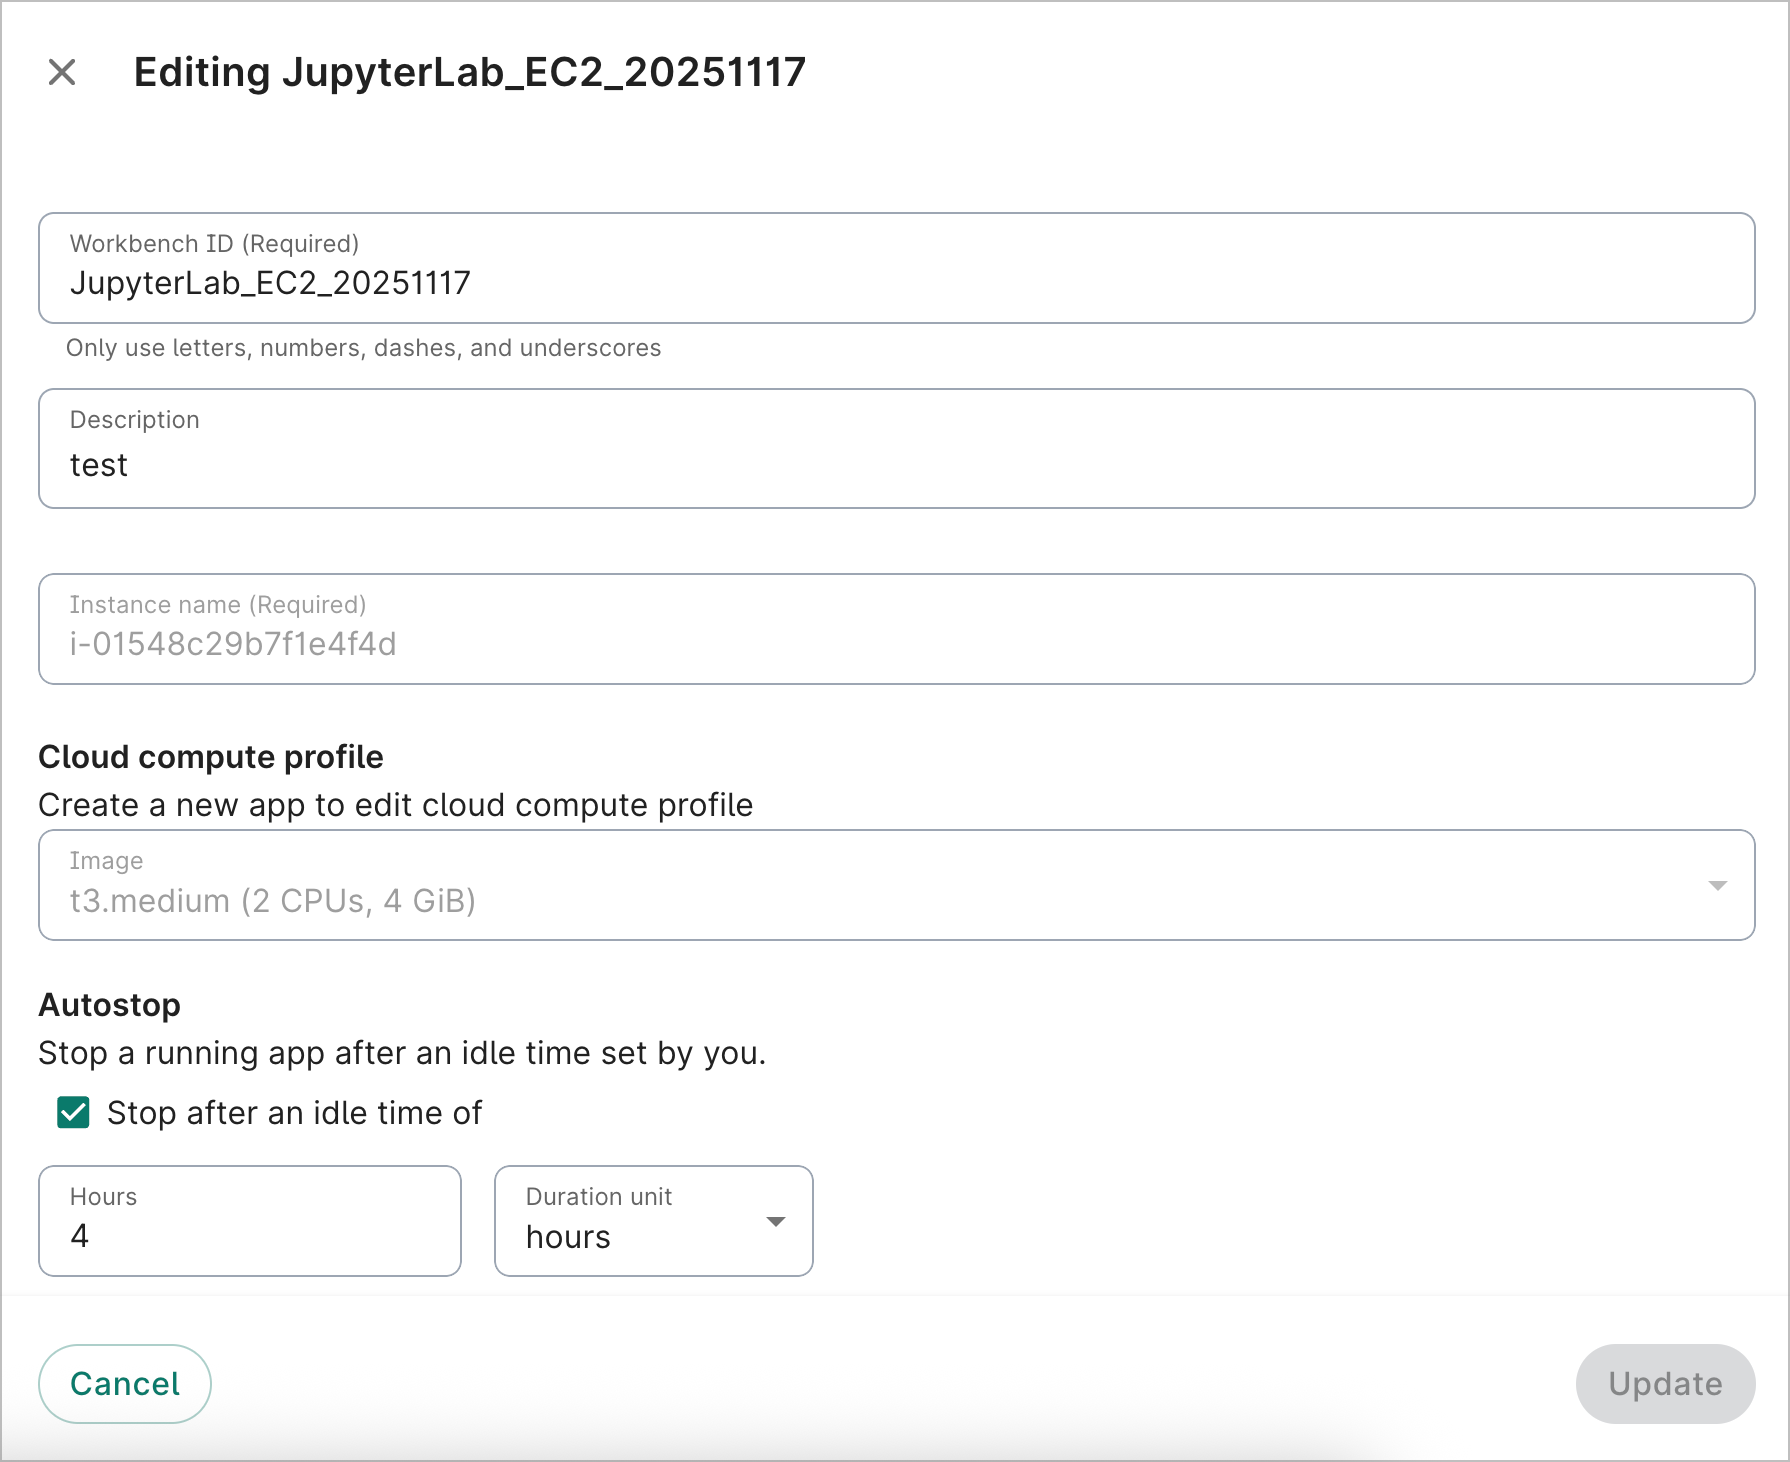
Update compute options for an existing app
You can't update the EC2 compute options once an app has been created. Please create a new app with the desired configuration settings.
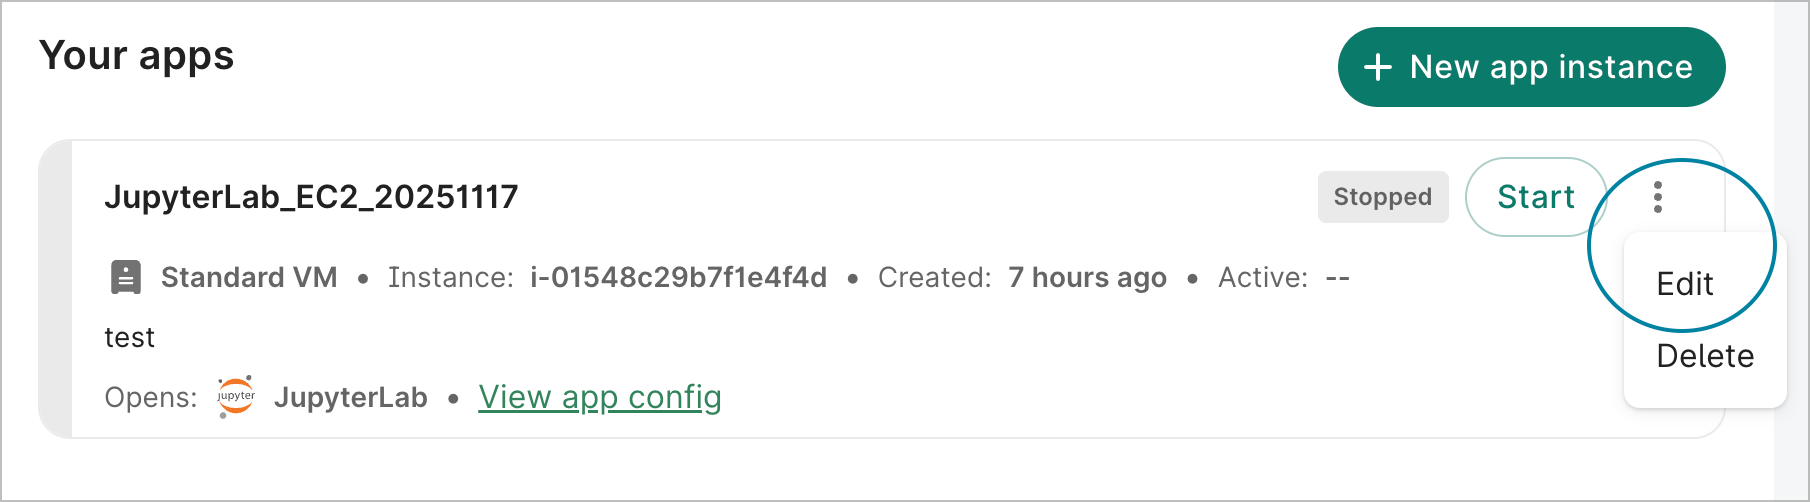
At this time, you can only edit the Workbench ID, description, and the autostop idle time. These can be updated via the Workbench UI. Select Edit in the action menu of the app card to open the Editing dialog.
Last Modified: 10 February 2026